Facilities - Admin Guide
Section 1: Facilities - Overview
Who Should Use This Guide
This guide is for - Learning Management System (LMS) Client Super Administrators and Administrators to enable them to utilize and train others in the use of the Facilities Feature and Functionality.
Facilities - Overview
This feature is used to create facilities or company locations in the LMS system. It also allows for the creation of classroom or training room facilities within each location. These classrooms are associated with classroom-based course instances and used as part of course planning and scheduling process.
Facility information, including directions (if entered), are made available to students when enrolling in and reviewing course scheduling information.
Often, facilities are entered as part of the initial implementation or implementation training process, but Administrators may augment or update as required.
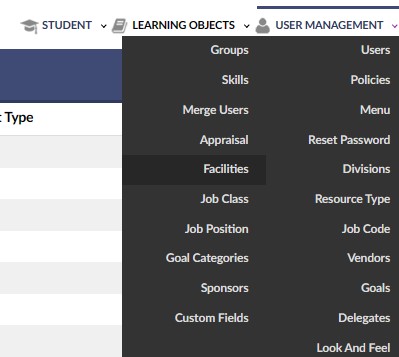
To access the Facilities Feature, navigate to the Advanced View, hover over the User Management dropdown menu and select Facilities.
Objectives
Upon completion, you will be able to:
- Access the Facilities Feature
- Create a New Facility
- Add Rooms to a Facility
- Associate a Facility to a Course Instance
- Edit an Existing Facility or Room
- Delete an Existing Facility or Room
Section 2: Facilities - How to Guide
2.1 Access the Facilities Feature
The Learnsoft LMS system the Facilities feature is used to create a listing of company. It also allows for the creation of classroom or training room facilities within each location. These classrooms are associated with classroom-based course instances and used as part of course planning and scheduling process.
To access the Facilities Feature:
- 1 - Navigate to the Advanced View, hover over the User Management dropdown menu and select Facilities.
- 2 - This will bring up the Facility List which provides a listing of all Facilities in the LMS system.
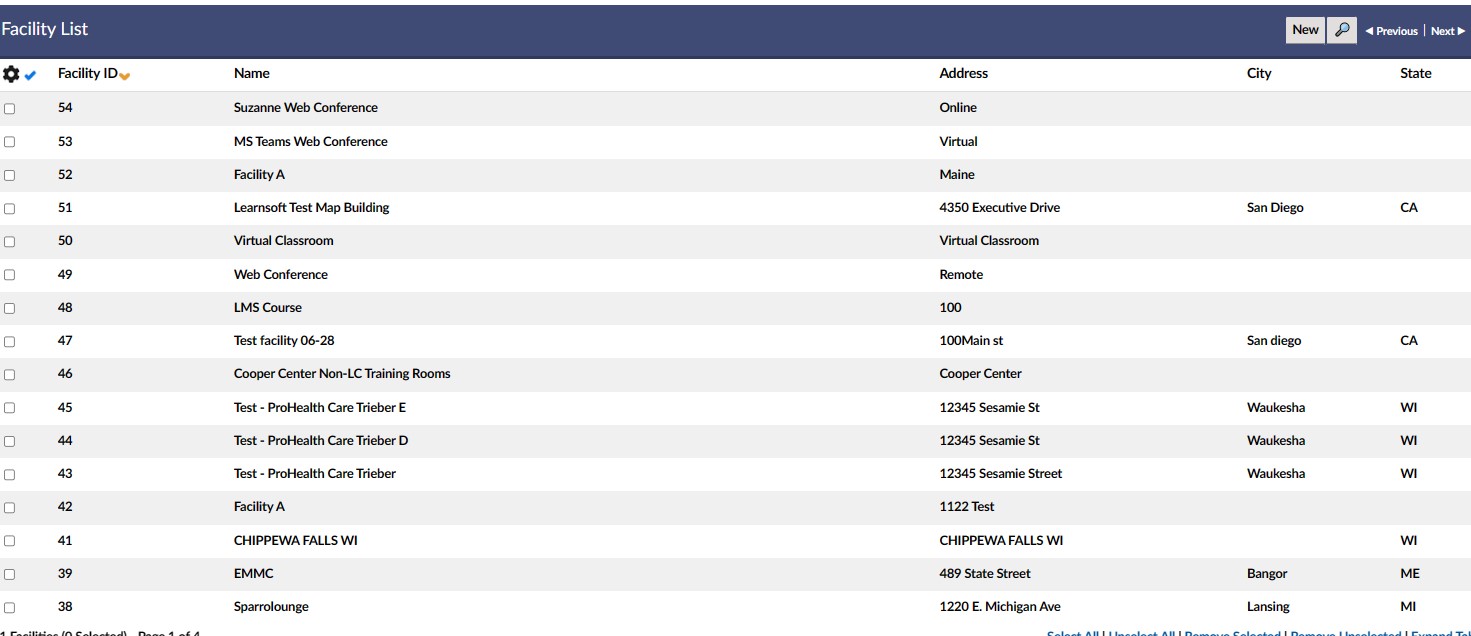
Explanation of Columns: Facility List
- - Column of checkboxes allows selection of single or multiple facilities.

- Facility ID - LMS System generated ID based on order of creation.
- Name - Facility Name based upon organizational naming conventions.
- Address -Street address of the facility.
- City - City in which the facility is located.
- State - State in which the facility is located
- Delete - Red (X) icon. If available and if clicked, it will ask for confirmation to delete a Facility (See section 2.6).
2.2 Add a Facility
To Add a Facility to the LMS system, follow these steps:
- 1 - Navigate to the Advanced View, hover over the User Management dropdown menu and select Facilities to bring up the Facilities List.
- 2 - Click the New Facilities button in the upper right hand corner of the Facilities List.
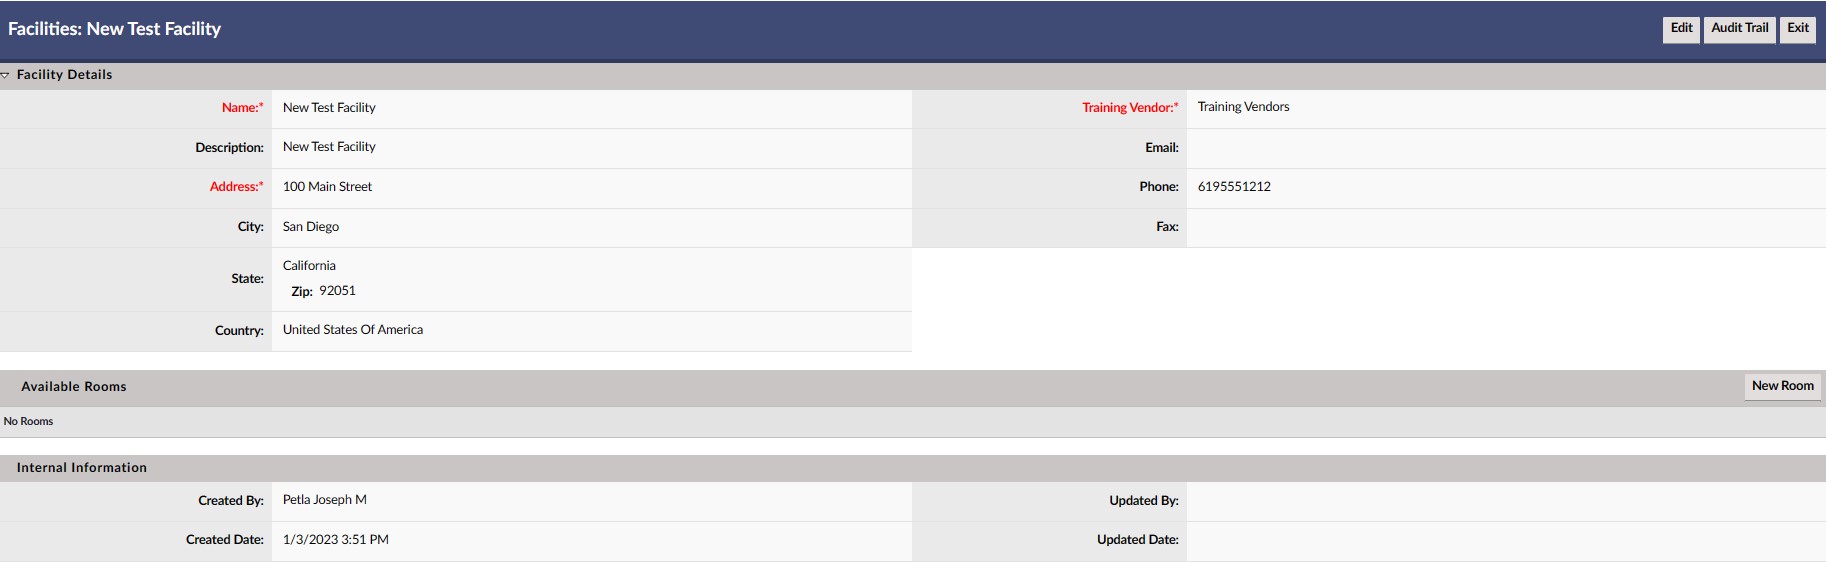
- 3 - This will bring up the Add Facilities / Facilities Details Screen.

Explanation of Fields: Facilities Details
- Name* - Textbox for entry of Facility name
- Description - Textbox for entry of a description of the facility.
- Address* - The street address of the Facility.
- City - The city in which the facility is located.
- State - allows for selection of state in which the facility is located from a dropdown box.
- Zip - The zip code of the facility.
- Country - allows for selection of a country in which the facility is located from a dropdown box.
- Training Vendor* - dropdown selection to choose between a vendor or facility.
- Email - an email address for the facility. (NOTE: If an incorrect entry is made it may impact emails, including instructor notification)
- Phone - a phone number for the facility.
- Fax - a fax number for the facility.
(*) Required
- 4 - Enter a Name and Address of the facility and select Training Facilities or Training Vendors type from the dropdown box.
- 5 - Enter any additional information as desired.
- 6 - Click the Save button.
- 7 - The new Facilities will be saved and the Facilities Details Screen will reload with the updated information.
- - Note: There is now a new section: Available Rooms, just below the facilities details.
- 8 - If wishing to make changes, click the Edit button.
- 9 - To return to the Facilities List where the new Facilities will now have been added, click Exit.
2.3 Add Rooms to a Facility
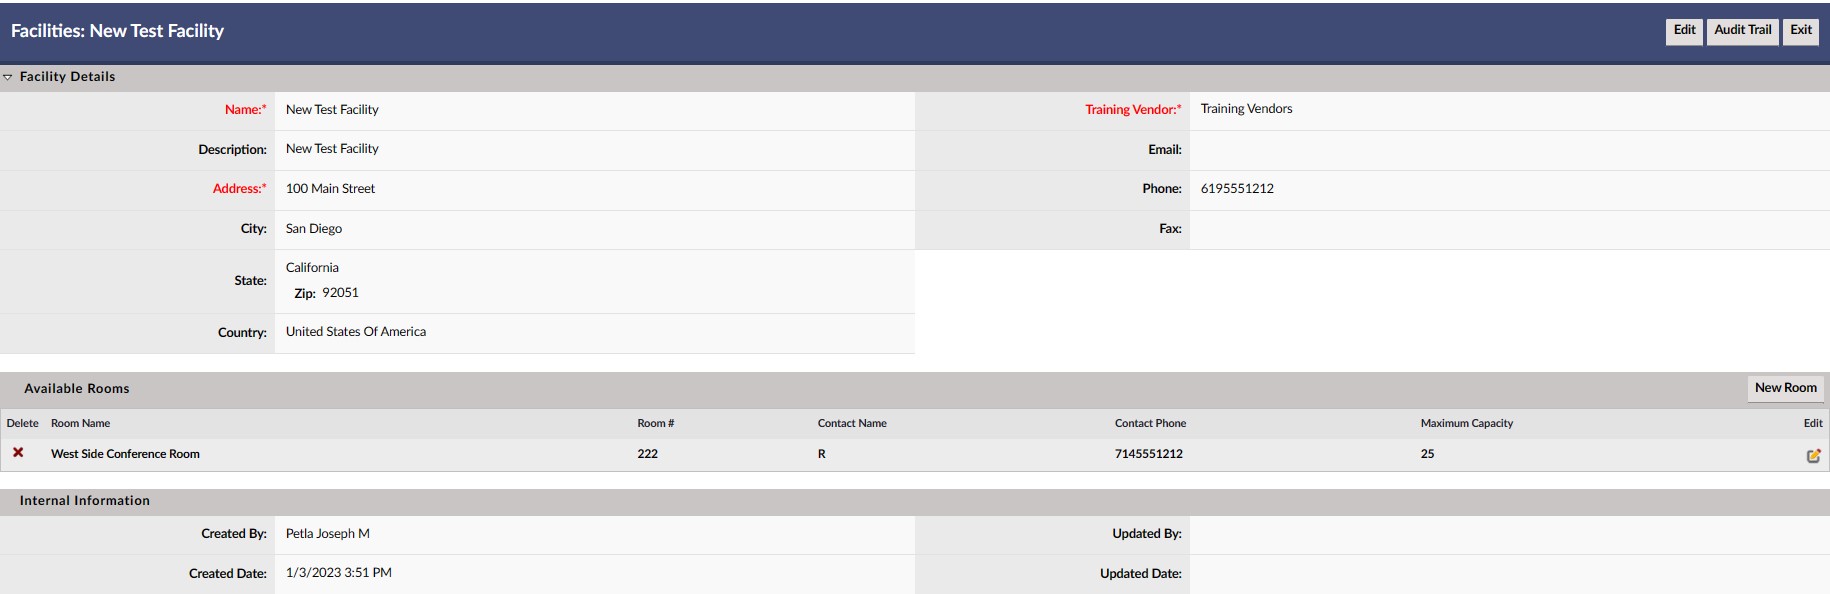
As noted in the prior section, once a facility has been saved, a new section, called Available Rooms, is added to the Facilities Details page (see screenshot 04, above). This is where you can add specific room class and training room information that will then be selected when scheduling a classroom-based course instance.
To add a new room...
- 1 - Click the New Rooms button located on the right side of the Available Rooms section of the Facilities Details page.
- A) If you have just created and saved a facility, as detailed in section 2.2, then you will already be on the Facilities Details page for the newly saved facility.
- B) If you are adding a room to an existing facility, navigate Advanced View > User Management > Facilities to access the Facility List. Use the navigation, sort and search features to find the facility to which you wish to add a room and click within the row of that facility (anywhere between the ID and State columns) to launch the Facilities Details page for the selected facility.
- 2 - This will launch the Add Room / Room Details page in a separate popup window.
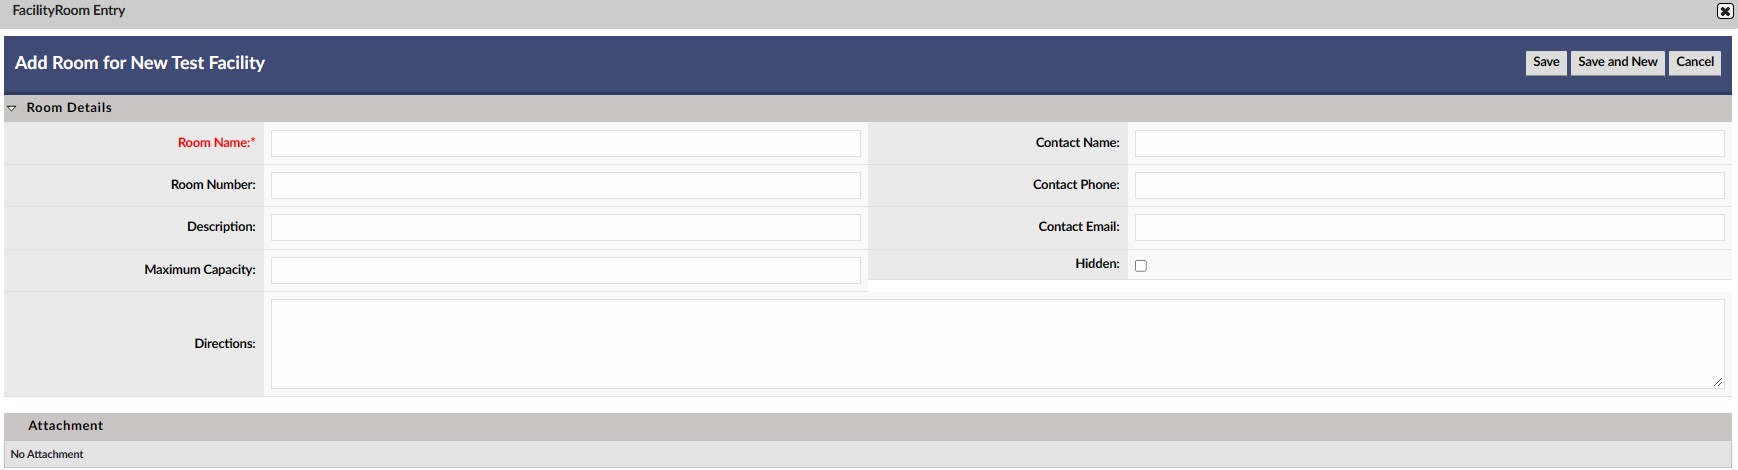
Explanation of Fields: Room Details
- Room Name* - Textbox for entry of a room name.
- Room Number - Room Number.
- Description - Textbox for entry of a description of the Room.
- Maximum Capacity - The maximum capacity of the room (numeric entry required).
- Contact Name - The name of the contact person for the room.
- Contact Phone - The phone number of the contact person for the room.
- Contact Email - The email address of the contact person for the room.
- Hidden - Checkbox if selected will hide the Facility from search criteria, e.g. when associating classroom-based course instances to a room or when using reports (Note: Feature may not be currently enabled).
- Directions - Directions to this facility / room. Will be available to students to help them locate and access the facility and room.
- 3 - Enter the required Room Name.
- 4 - Enter any optional information you deem necessary.
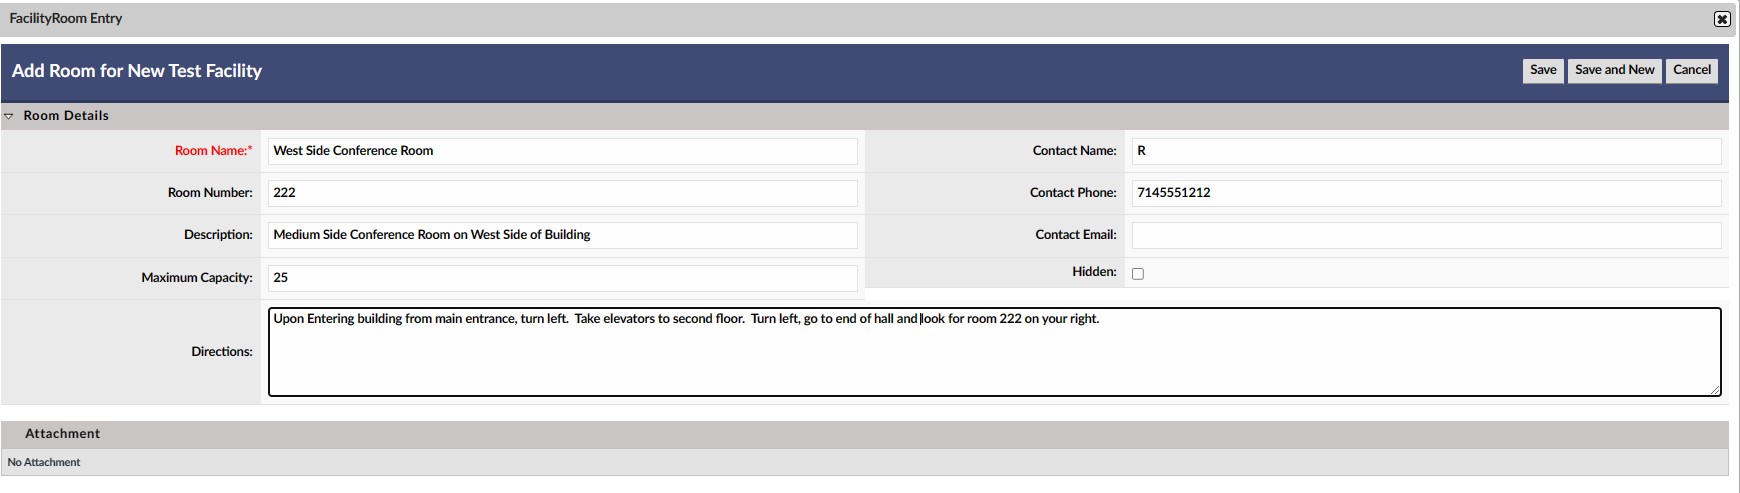
- 5a) If satisfied and there are additional rooms to enter for this facility, click Save And New. This will save the room and launch a new, blank Add Room / Room Details page in the popup window
- 5b) If satisfied and there are no more rooms to enter for this facility, click Save. This will return you to Facility Details page, where details from the newly added room can be seen in the Available Rooms section.
2.4 Associate a Facility to a Course Instance
This document will assume Administrators already know how to navigate, create and edit Learning Object (Courses) and Course Instances. If not, see separate Courses – How to Guide.
- 1 - Create or edit a specific classroom-based course instance to which you wish to associate a specific Room (Navigate to the Learning Object Instance Details page).

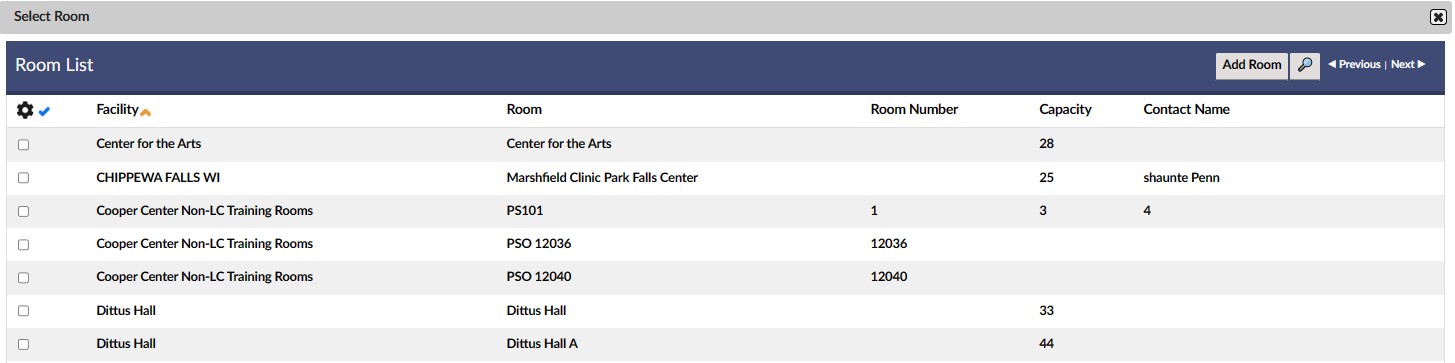
- 2 - Depending on the number of rooms in your system, you may have a dropdown or lookup button to select room.
a (not shown) Use the dropdown box next to the Room:* field to display a listing of available Rooms /select room. b (shown below) Click the Select Room button to bring up the Room List, use the filters and navigation to find room, check the checkbox to the left of the line in which the room appears then click the Add Room button.
- 4 - When complete with all entries or edits, make sure to save the instance entries / updates by clicking the Save (or Save and Exit) button.
2.5 Edit an Existing Facility or Room
Facilities can be edited, both to make changes to the Facility and to the associated rooms. Also, (if enabled), the admin can make specific rooms hidden from search functions.
To edit a Facility and / or Available Rooms,
- 1 - Navigate to the Advanced View, hover over the User Management dropdown menu and select Facilities to bring up the Facilities List.
- 2 - Use the navigation, sort and search features to find the specific Facility you wish to edit.
- 3 - Click anywhere in the row (between the ID and state columns) of the Facilities you wish to edit to bring up the Facility Details page of the selected facility.
- 4 - If wishing to edit or update facility-specific information, click the Edit button to enter Edit mode (Note: In edit mode, the room information is not accessible).
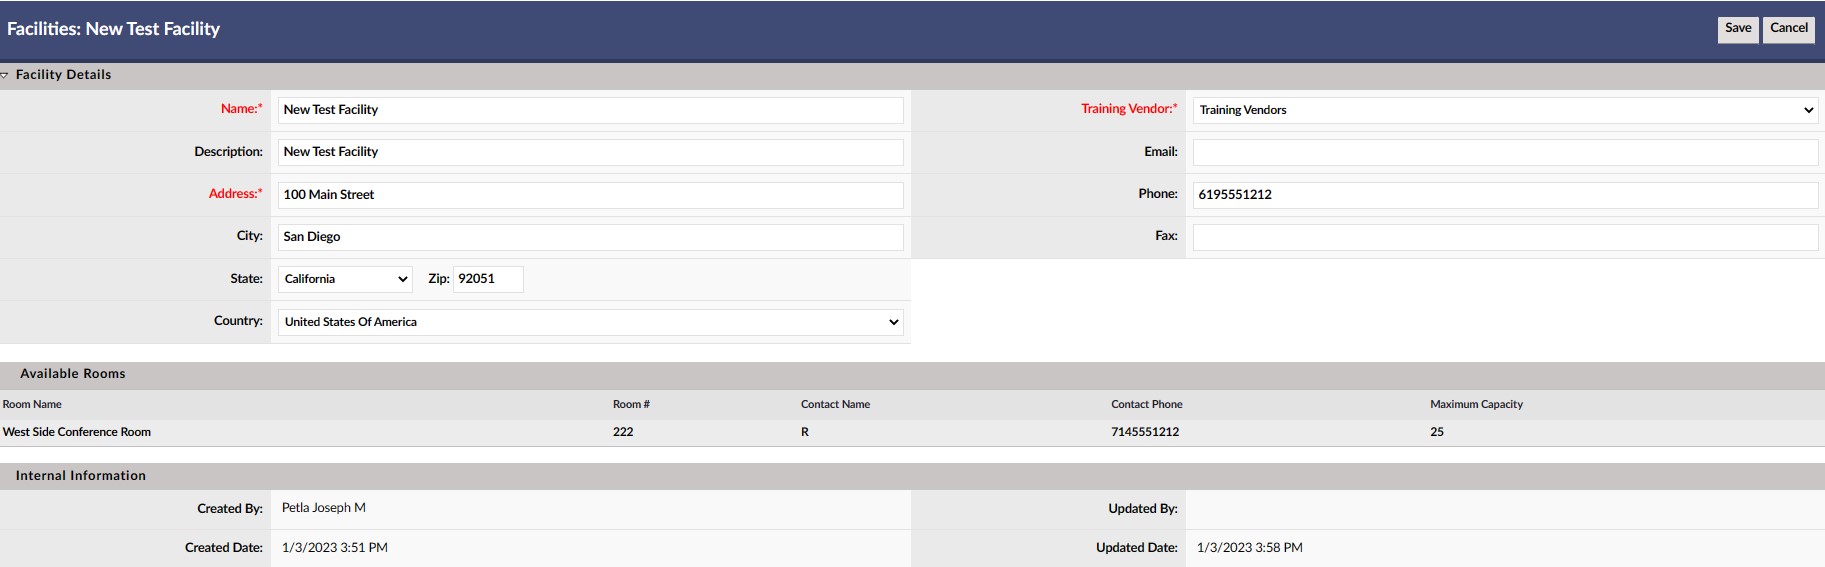
- - Edit as needed.
- - Click the Save button to save the edits.
- 5 - If wishing to edit room-specific information, click on the pencil icon to the right of the row of the specific room you wish to edit to enter edit mode for the Room Details in a popup window. (As noted above, rooms cannot be edited if the facility is in edit mode).

- - Edit as needed.
- - If wanting to add an attachment, such as a pdf map, click Attachment button to bring up add attachment screen..
- - Click the Save button to save the edits.
- 6 - The updated information will be saved and the Facilities Details Screen will reload with the updated information.
- 7 - Click Exit to return to the Facilities List.
2.6 Delete an Existing Facility or Room
Note: Depending on system set-up, not all facilities may be deleted. It is also not recommended to delete facilities unless you are sure this will have no impact to users and reporting.
- Navigate to the Advanced View, hover over the User Management dropdown menu and select Facilities to bring up the Facilities List.
- Use the navigation and search features to find the specific Facilities you wish to edit.
To delete a facility...
- 1 - Click on the red (X) in the Delete Column on the far right of the row of the facility you wish to delete. (You may need to use the small gear icon to show the column and must have permissions to do so)

- 2 - A message will popup asking for confirmation of the deletion.
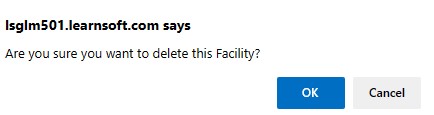
- 3 - Click OK to confirm the deletion
To delete a room...
- 1 - Click anywhere in the row (between the ID and state columns) of the Facilities you wish to edit to bring up the Facility Details page of the selected facility.
- 2 - Click on the red (X) in the Delete Column on the far left of the row of the Facilities you wish to delete.
Screenshot 13a

- 3 - A message will popup asking for confirmation of the deletion.
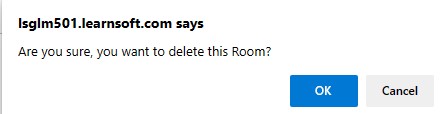
- 4 - Click OK to confirm the deletion