Vendors - Admin Guide
Section 1: Vendors - Overview
Who Should Use This Guide
This guide is for - Learning Management System (LMS) Client Super Administrators and Administrators to enable them to utilize and train others in the use of the Vendors Feature and Functionality .
Vendors- Overview
In the Learnsoft LMS, Vendors are a feature that allows creation, editing, viewing and searching of vendor information.
Vendors provide key products and services to the LMS system, e.g. SCORM courses. Vendors can be external, for example "Epic", or internal, for example 'company design group".
Generally, vendor information is used by other features, e.g. Accreditations, to identify vendors of specific products and services. When creating a COURSE in the system, one of the available fields in the course record is Vendor.
The system is able to generate reports by Vendor, as well as display vendor logos in a course listing, or as a featured course on a web page
Objectives
Upon completion, you will be able to:
- Access the Vendor Feature
- Add a New Vendor
- Edit Vendor Information
- Delete Vendors
Section 2: Vendors- How to Guide
2.1 Access the Vendors Feature
Vendors provide key products and services to the LMS system, e.g. SCORM courses. Vendors can be external, for example "Epic", or internal, for example 'company design group".
To access the Vendors Feature:
- 1 - Hover over the User Management Dropdown Menu
- 2 - Click Vendors.
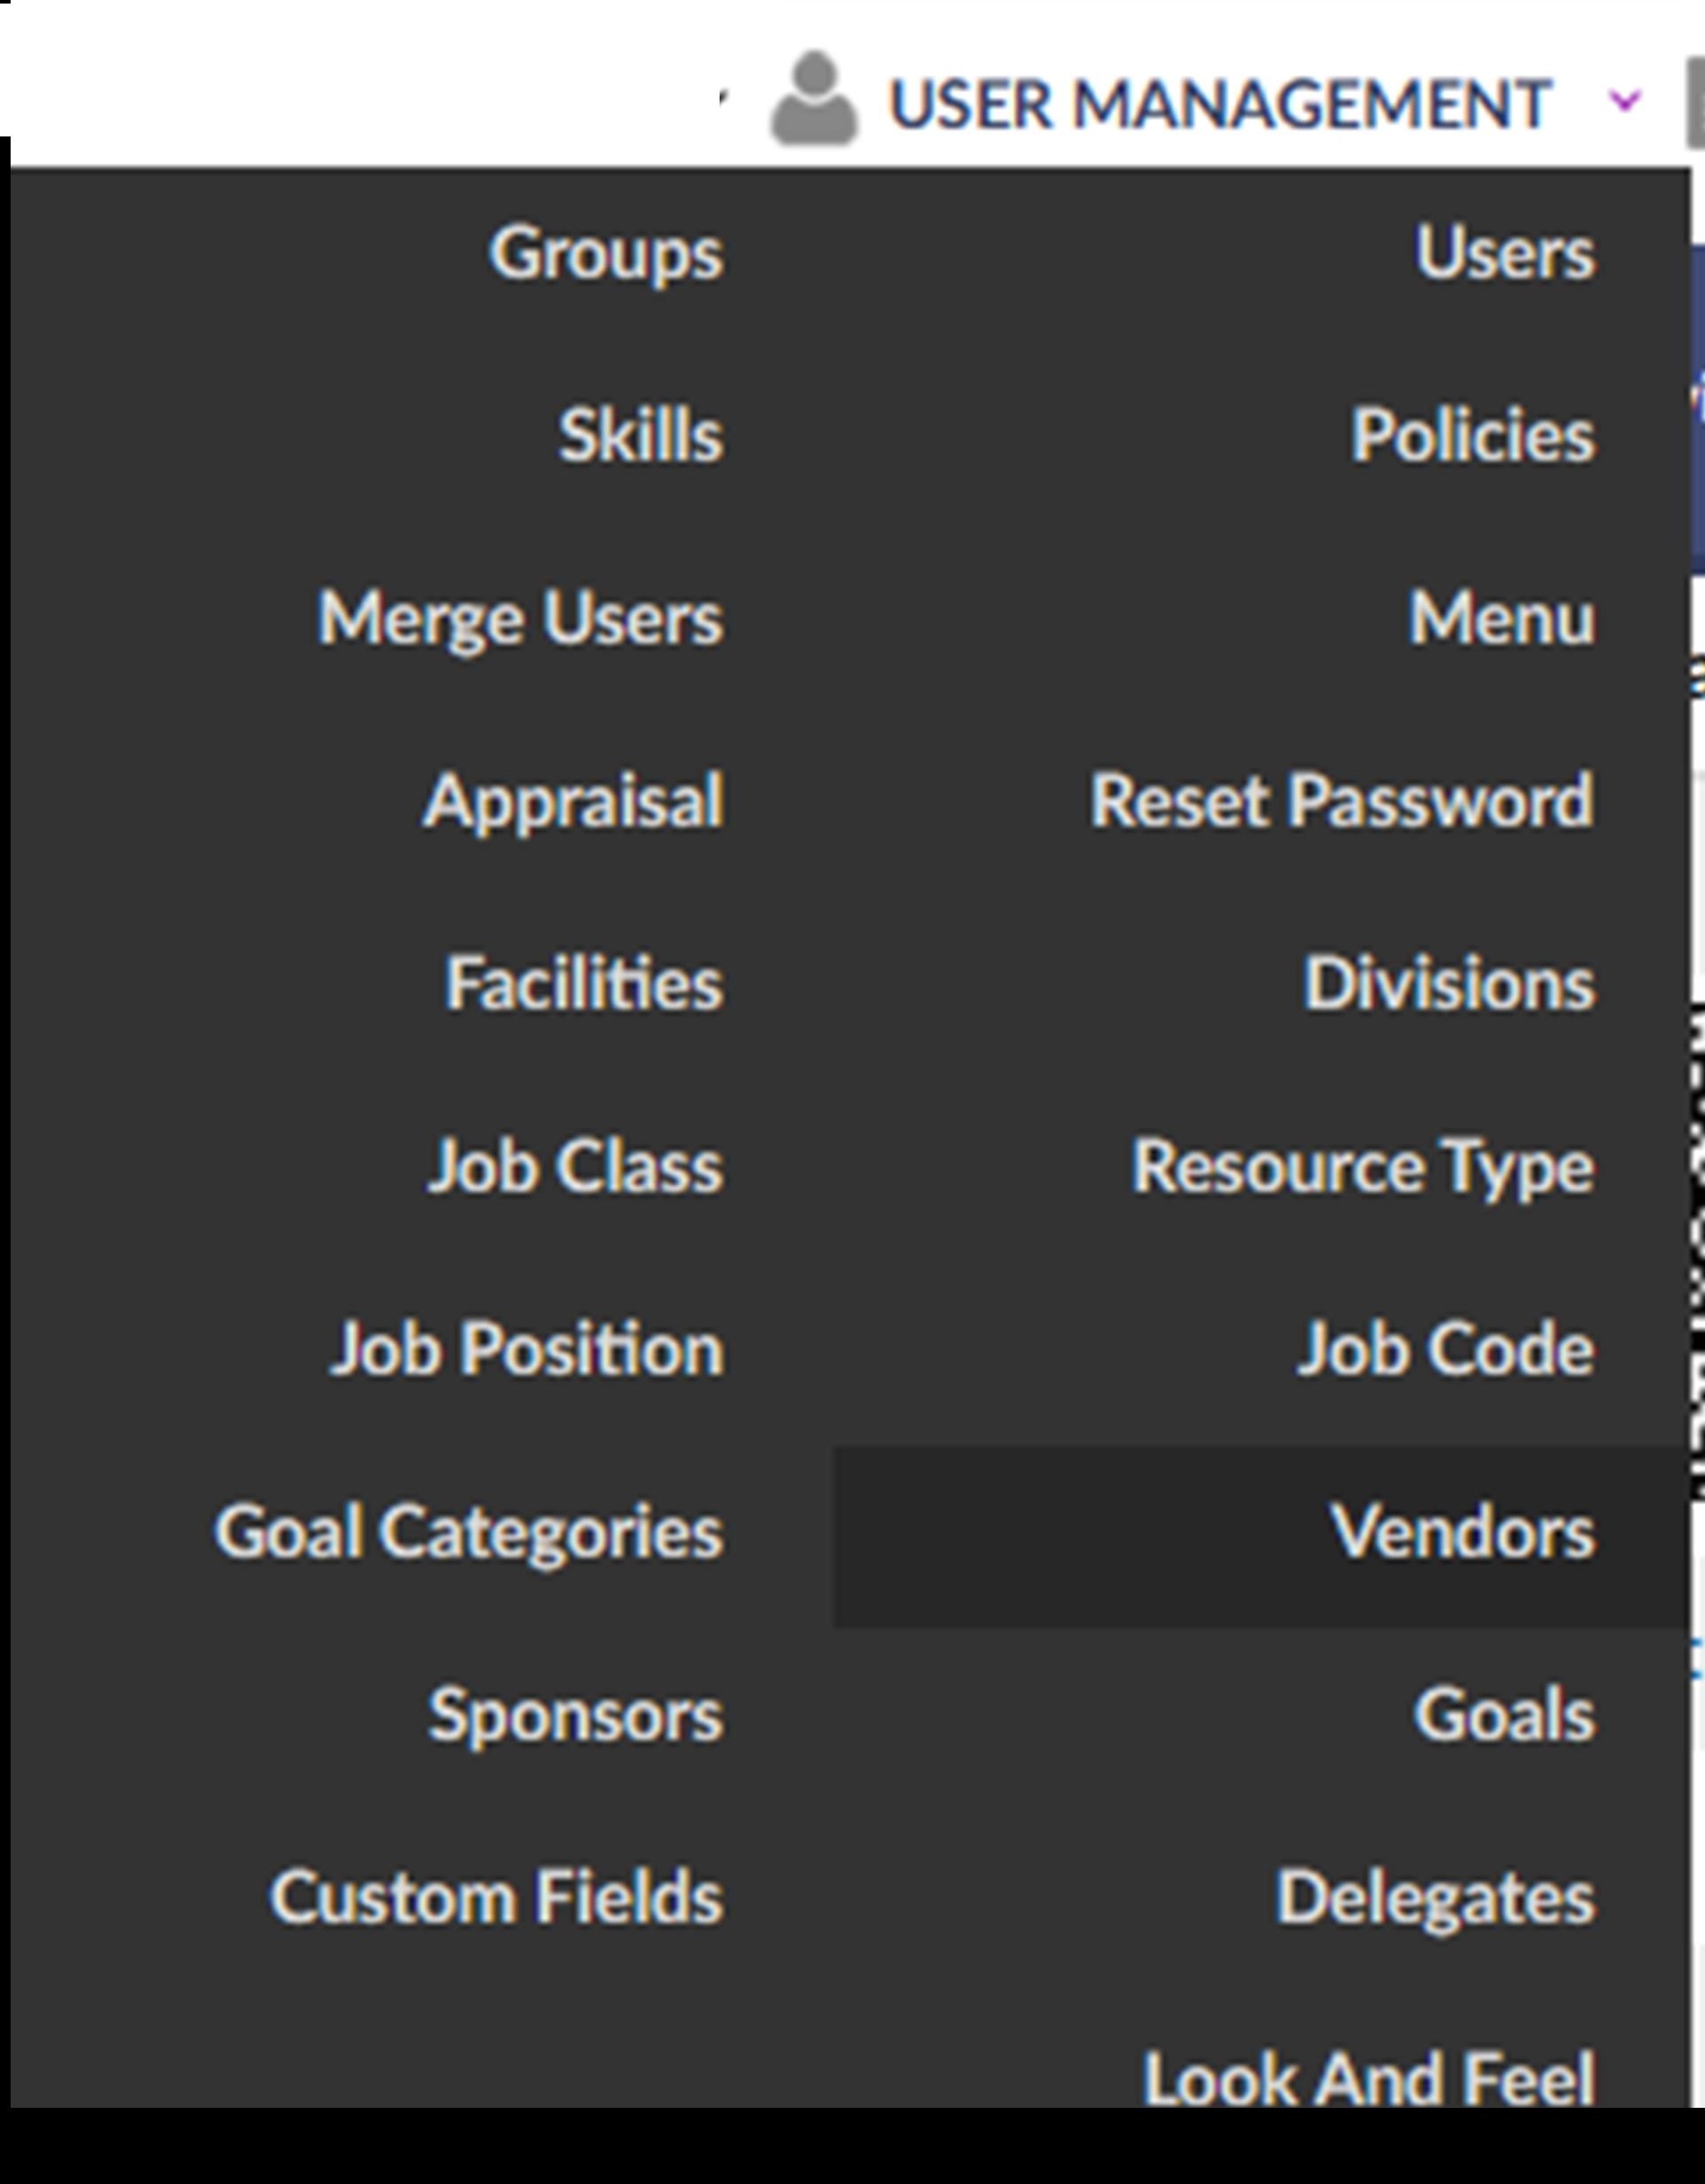
- 3 - This will bring up the Vendor List screen which displays Vendors that have previously been added to the system

Explanation of Columns: Vendor List
- - Column of checkboxes allows selection of single or multiple vendors (Use the Gear icon to add additional columns beyond default)

- Vendor ID – LMS System generated ID based on order of creation.
- Vendor - The name of the vendor
- Address - The vendor street address
- City - The vendor city
- State - The vendor state
- Delete – Red (X) icon. If available and if clicked, it will ask for confirmation to delete a Job Position (See section 2.4).
2.1 Add a Vendor
To Add a Vendor to the LMS system, follow these steps:
- 1 - Access the Vendor List as directed in the prior section
- 2 - Click on the New button near the top right portion of the screen.
- 3 - This will launch the New Vendor Details screen. The level of detailed entry will vary based on your organizational needs. (See Explanation of fields on the next page for next steps.)
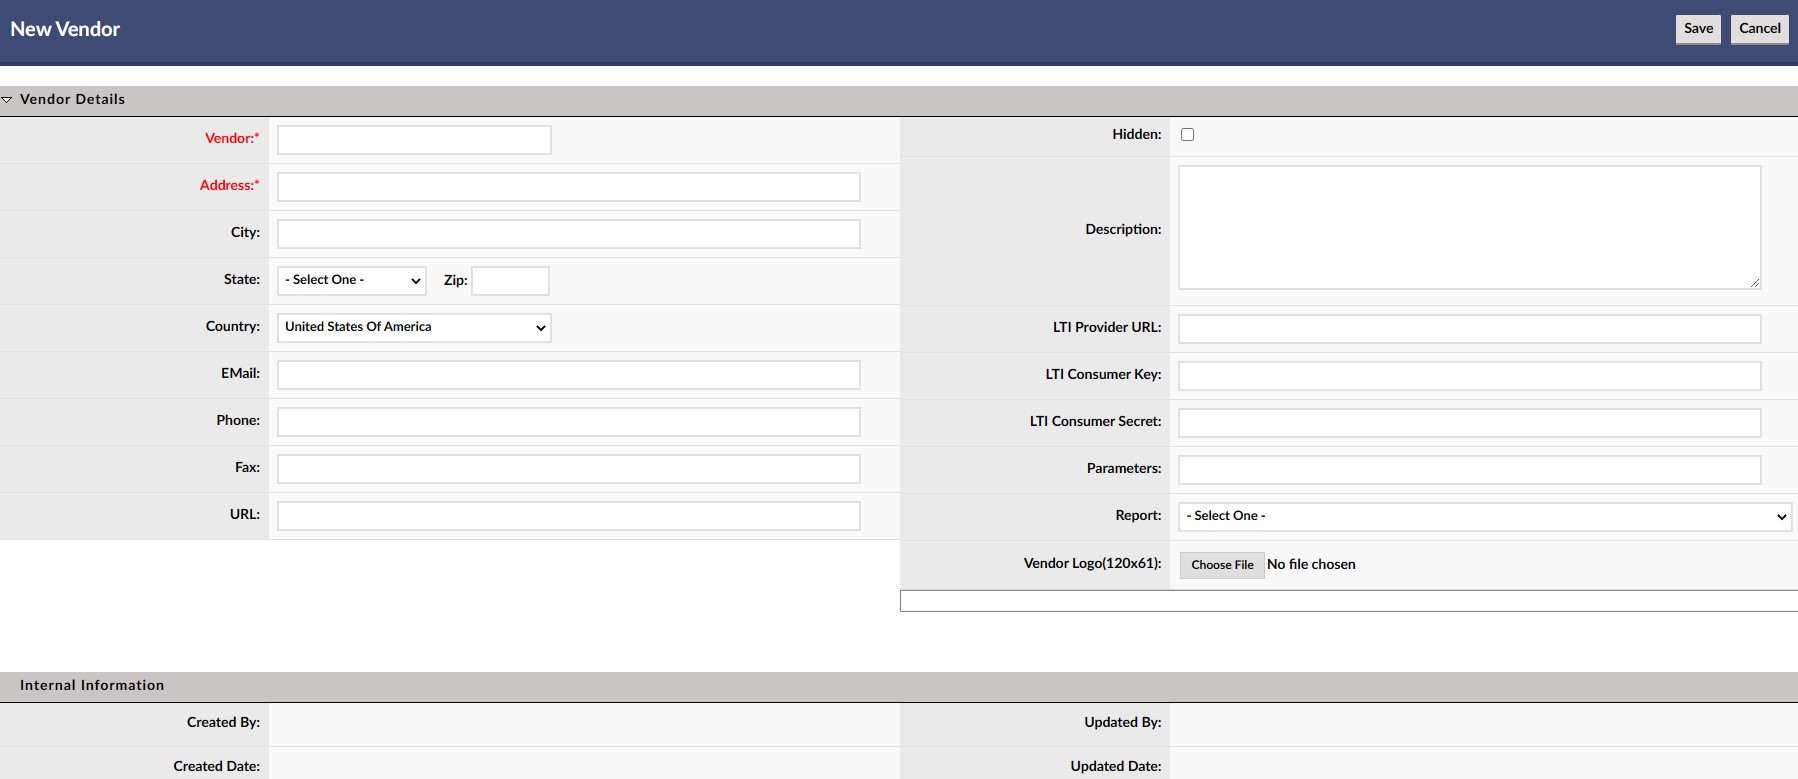
Explanation of Fields: New Vendor Details
- Vendor* - The name of the vendor
- Address* - The vendor street address
- City - The vendor city
- State - The vendor state (Selected from a drop down list
- Zip - The vendor zip code
- Country - The vendor country (Selected from a drop down list)
- Email - An email address for the vendor
- Phone - A telephone number for the vendor
- Fax - A fax number for the vendor
- URL - A URL address for the vendor
- Hidden - Check (select) if the vendor information is to be hidden
- - This will not delete the vendor, but it will not be available in other dropdown lists, for example when utilizing reports.
- Description - A description of the vendor
- LTI Provider URL - For LTI Only
- LTI Consumer Key - For LTI Only
- LTI Consumer Secret - For LTI Only
- Parameters - User for AHA module to enter key vendor and license information
- Report - A dropdown to select report template (for certain module use only)
- Vendor Logo - If desired, a logo can be associated with the vendor. Select the browse button to locate a picture format file (e.g. .jpg) from your internal directory system
(*) Required Fields
- 4 - Enter the required information of vendor name and address.
- 5 - Enter any desired optional information.
- 6 - Click the Save button located near the top right of the screen.
The vendor has now been created and will be available in the Vendor list. Repeat this step as necessary for all new vendors.
2.3 Edit Vendor Information
To edit existing vendor information:
- 1 - Hover over the User Management Dropdown Menuand select Vendors to access the Vendor List screen which displays Vendors that have previously been added to the system.

- 2 - Use the navigation, sort and search functions to identify the specific vendor whose information you wish to edit.
- 3 - Click on the row of the vendor you wish to edit (anywhere in the correct row and from the Vendor ID column on the left to the state column on the right)
- 4 - This will bring up the New Vendor Details page for the selected vendor.
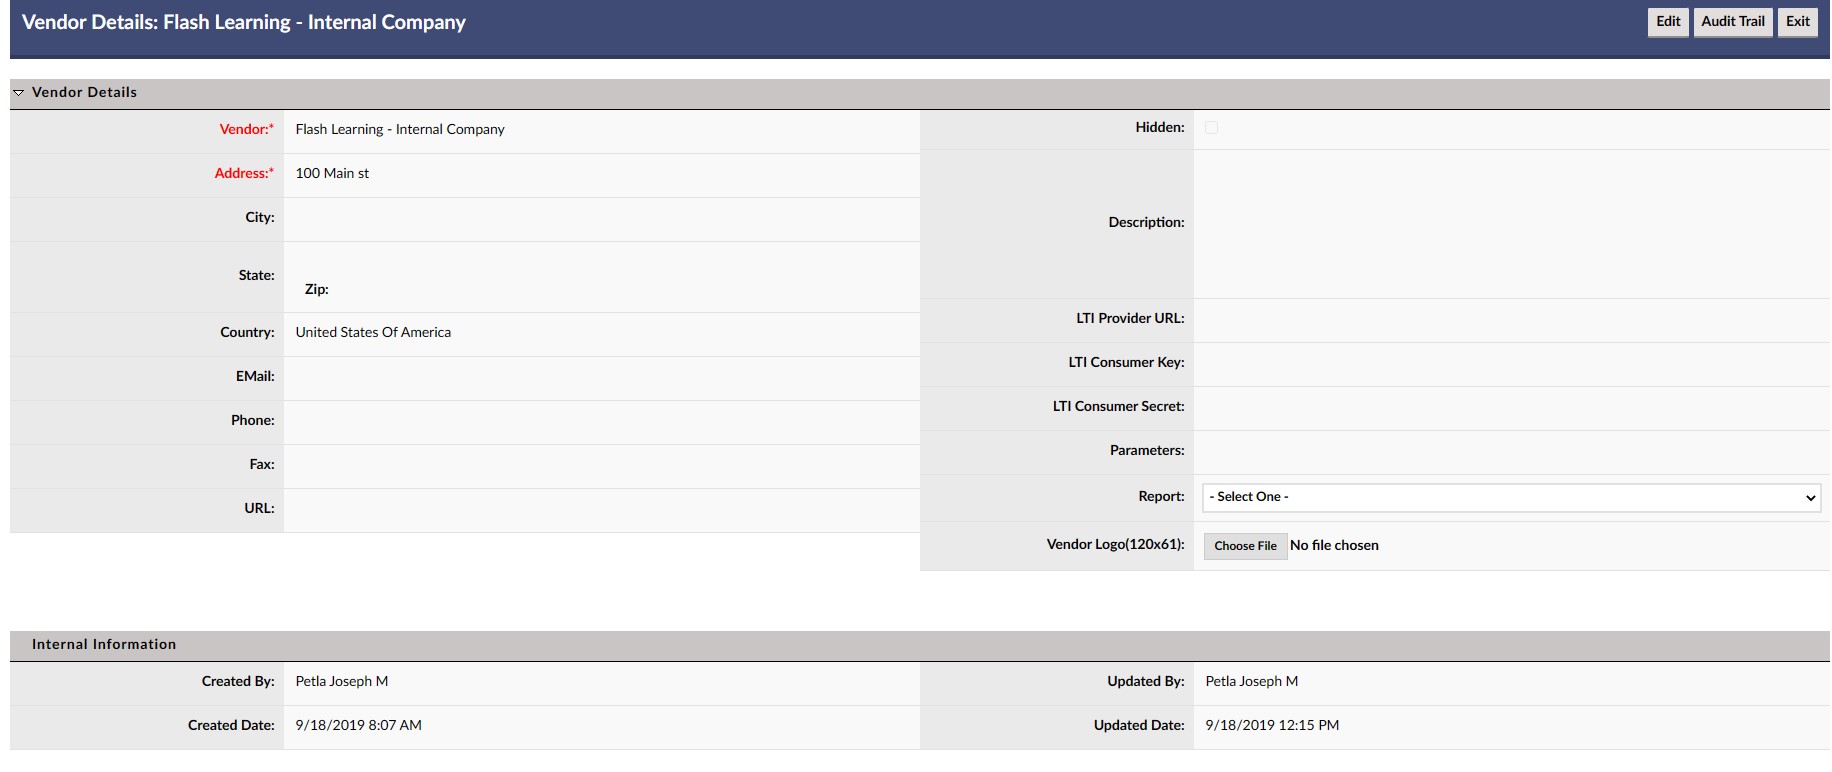
- 5 - Click the Edit button in the upper right hand corner to enter edit mode.
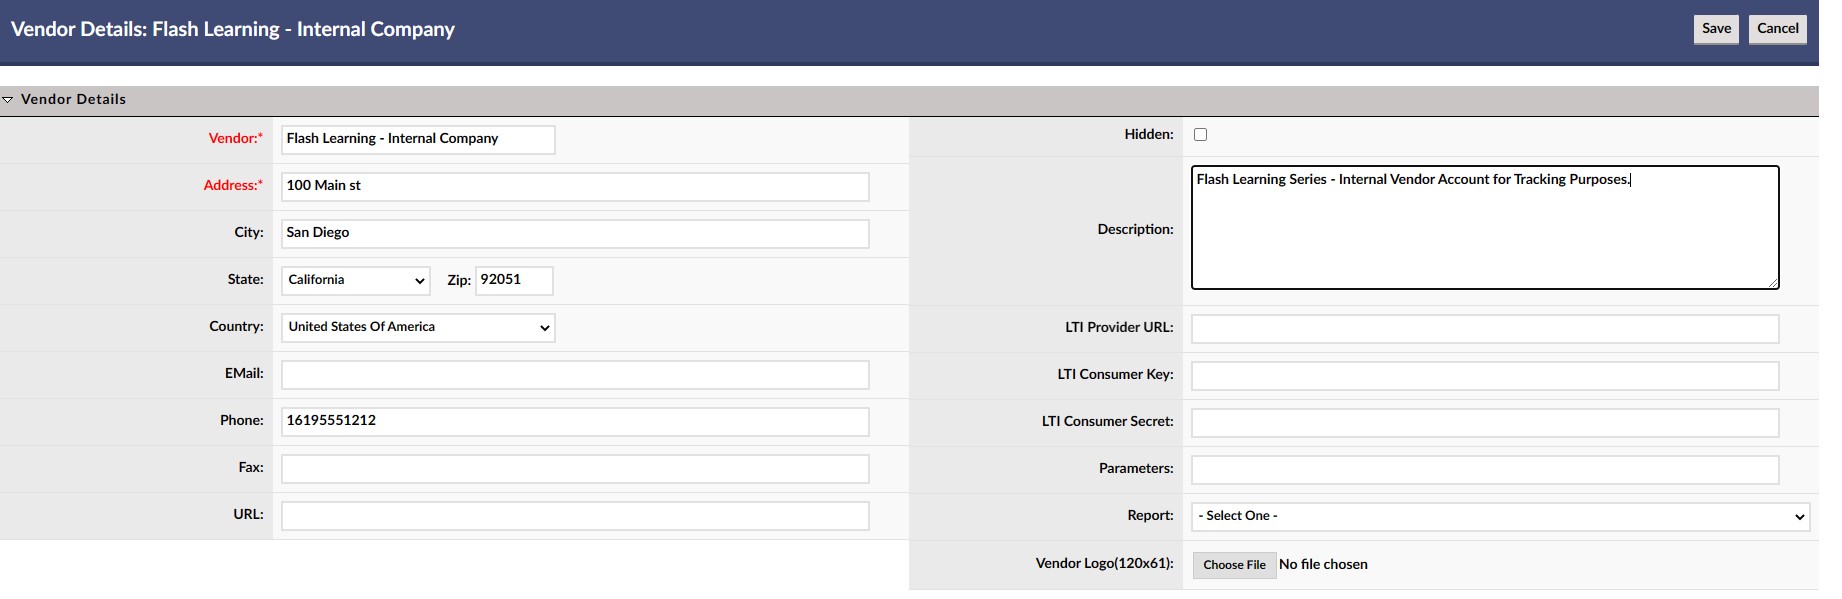
- 6 - Make desired edits and updates.
- 7 - Click Save to save the changes and updates.
The vendor's information has now been updated.
2.4 Delete a Vendor
To Delete a vendor from the LMS system,
- 1 - Hover over the User Management Dropdown Box and select Vendors to access the Vendor List screen which displays Vendors that have previously been added to the system.
- 2 - Use the navigation, sort and search functions to identify the specific vendor whose information you wish to edit.
- 3 - Click on the red (X) icon in the Delete column in the row of the vendor you wish to delete (You may need to use the gear box icon to make this column visible).

- 4 - A dialog box will popup asking you to confirm the deletion.
screenshot 07
- 5 - Click OK to confirm the deletion.