Catalogs - Admin Guide
See the updated Catalog articles in the Learnsoft Knowledge Base
CATALOGS - HOW TO GUIDE
CATALOGS - OVERVIEW
The purpose of this manual is to guide administrator(s) on how to effectively create catalog offerings and how to manage your current catalog. Catalogs organize courses with like characteristics. Creating multiple catalogs will provide the administrator with greater control and visibility.Additionally, creating new catalogs will reduce the number of courses per catalog assisting users to search for their desired course(s) more efficiently.
Another advantage to creating multiple catalogs is the ability to limit user access to any one or more catalogs. Not all users will need to see and/or have access to all catalogs within your catalog tree.
Objectives
Upon completion, you will be able to:- Create Catalog Tree
- Create Individual Catalogs
- Public Catalogs
- Private Catalogs
- Edit Catalog(s)
- Delete Catalog(s)
- Associate Courses to Catalog(s)
How to Create a Catalog
Accessing the Catalogs Feature
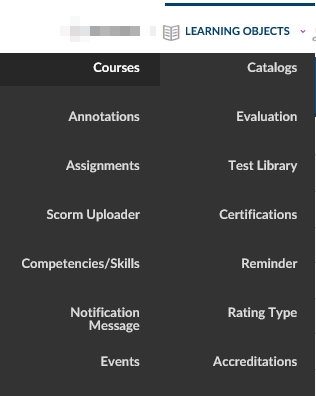
- Select Advanced View
- Hover over the Learning Objects dropdown Menu
- Click on the Catalogs option
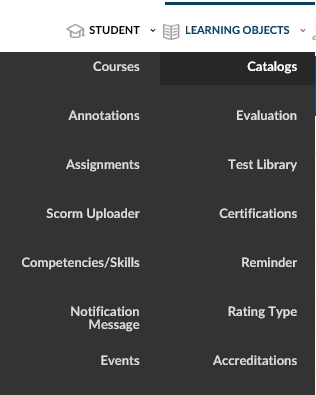
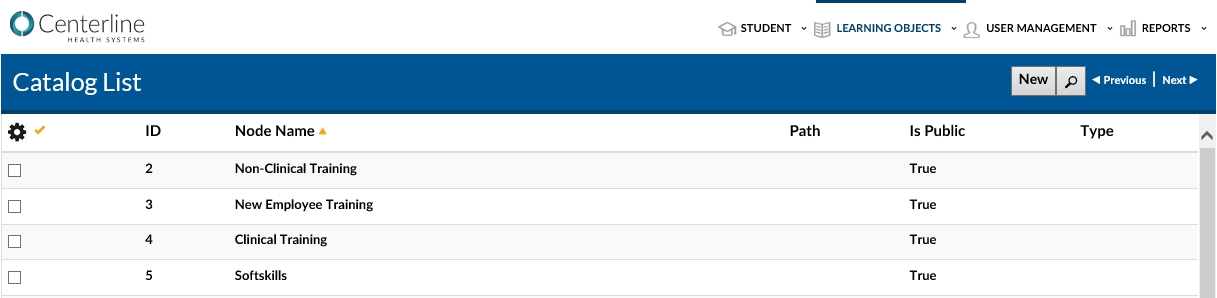
This will bring up the Catalogs List which provides a listing of all current catalogs.

Creating a New Cataloge
- To create a new Click the New Catalog button in the Upper right hand corner of the Catalogs List.
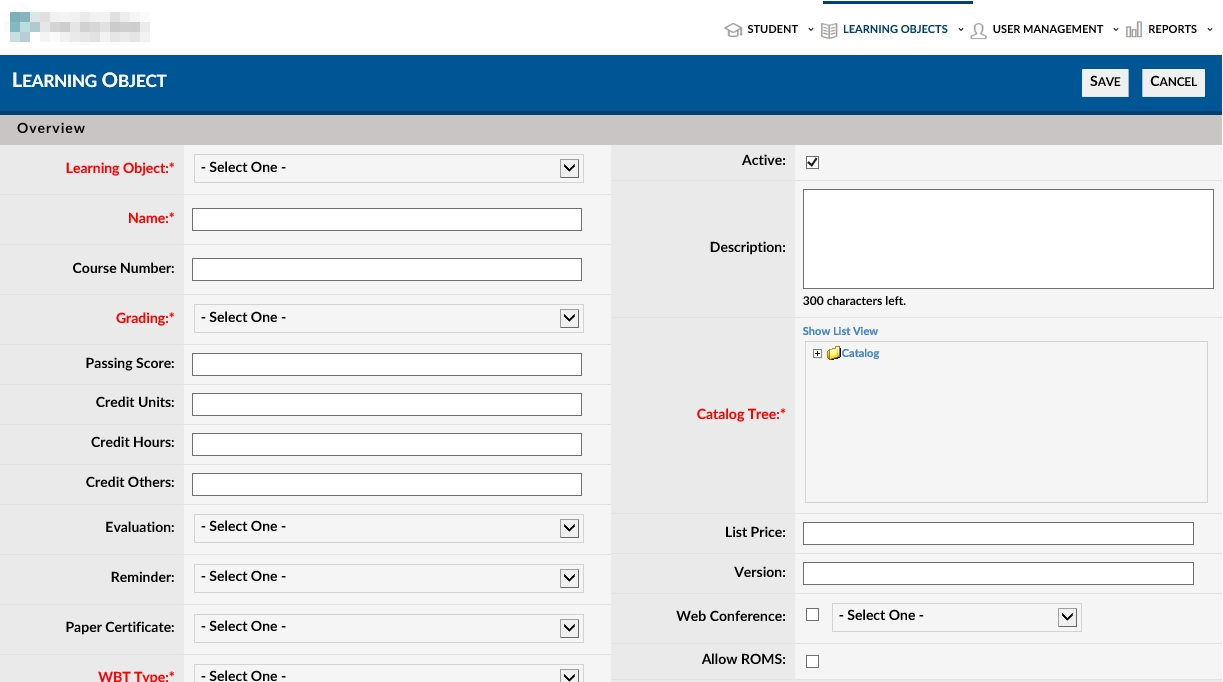
- The Catalogs Details page will load.
- Fill in required and mandatory fields (see next section)
- when complete click the Save button
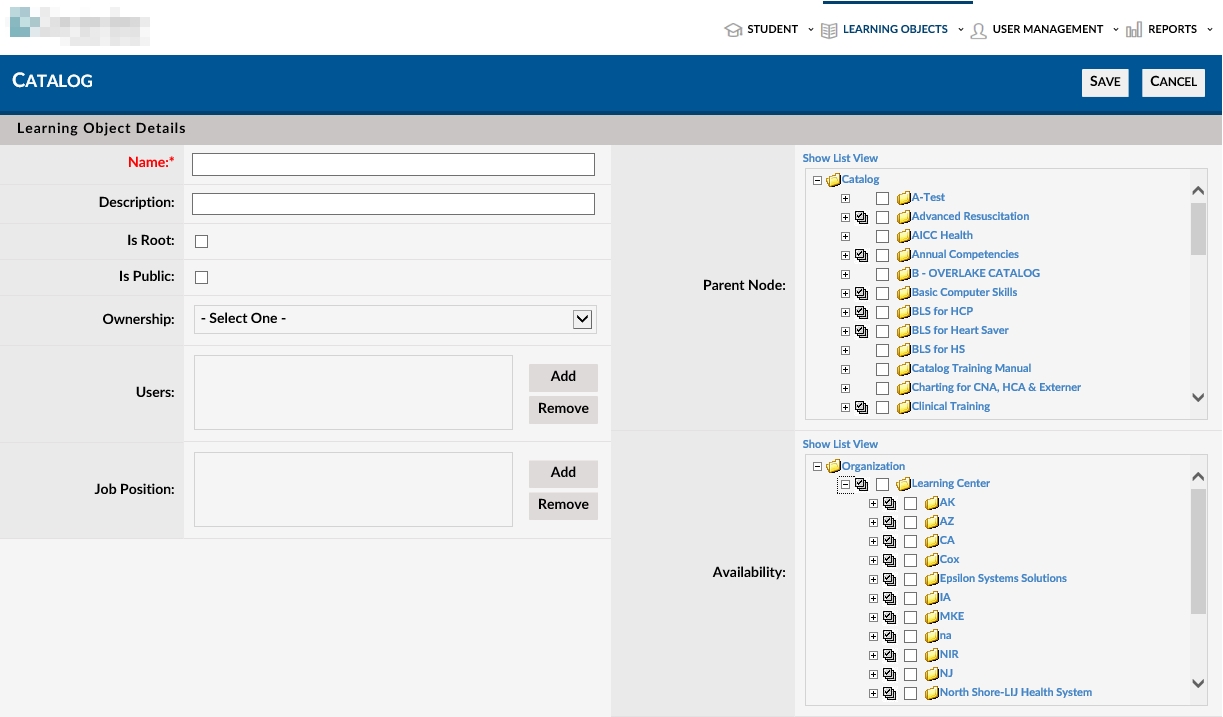
Explanation of Fields:
- Name The name of the Catalog to be created, to which certain courses are going to belong
- Description Free format description or details of the catalog. This will only be visible to other administrative users
- Is Root If this is the first catalog that is being created, it must be set as the root. All subsequent catalog should not have this box checked
- Is Public If this catalog is to be seen by all users, this box should be checked
- Owenrship The LMS provides the option to have catalogs protected by use and sight from other users on the system. Three options exist – The Private option will only allow users from the creator’s department to access this catalog. For example, if the person creating this catalog is in the Legal Department, then by specifying that this catalog is private will only allow users who are part of the legal department to see this course. By specifying “any other user(s)”, the box below needs to contain the names of the users who have access to this catalog.

- Users To add a user, click on the add button. Similarly to delete a user from the list, click the Remove button. By clicking one of the buttons, a user dialog box is displayed

- Job position To add a Job Position, click on the add button. Similarly to delete from the list, click the Remove button. By clicking one of the buttons, a job position dialog box is displayed
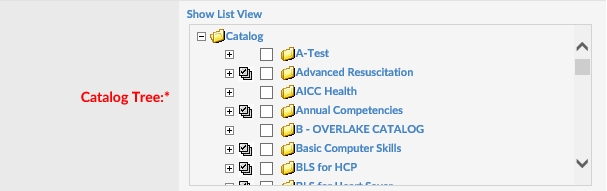
- Catalog Tree The right side of the screen displays the existing catalog structure, depending the level that is currently checked, it will add this node inside the checked node of the tree
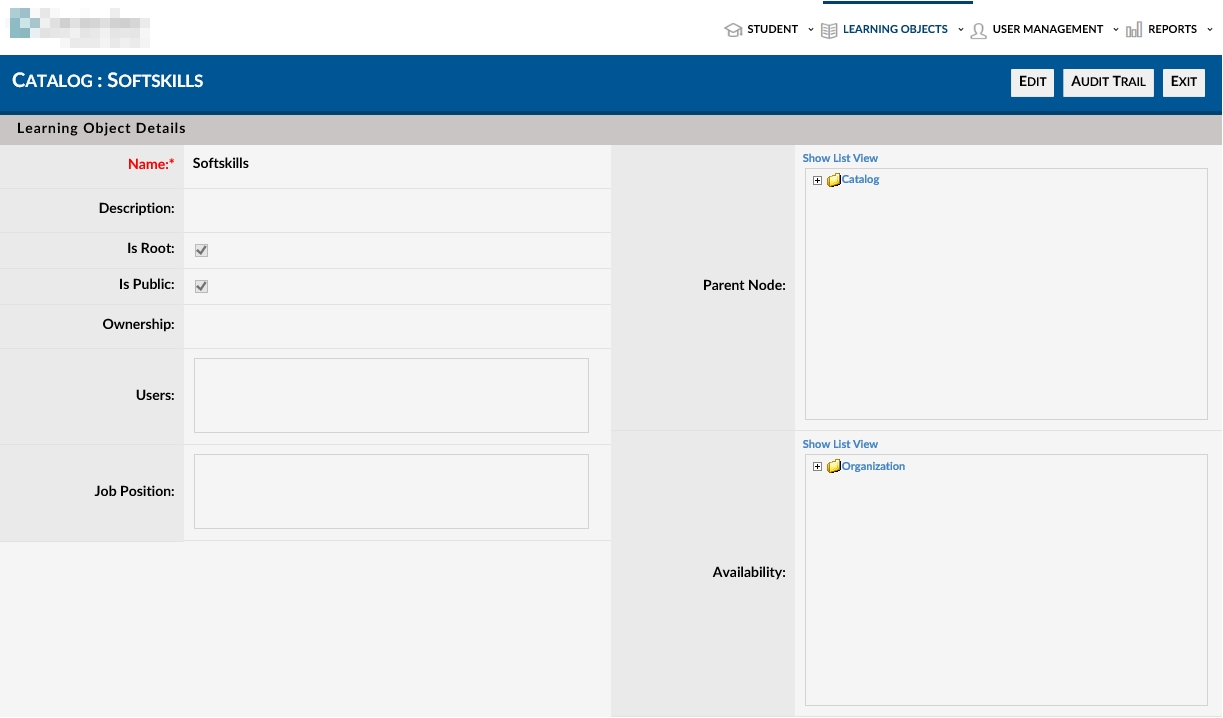
Editing an existing Catalog:
- From the "Advanced View " Learning Objects dropdown Menu, select "Catalogs" to bring up the catalogs list
- Click on the Catalog Name to bring up the Catalog Details Page for the selected Catalog
- Click Edit
- Make Needed Changes and Click Save
Associating Course(s) to Catalogs:
- Click on the Learning Objects Menu
- Click on the Courses option
- View Group, Select the Appropriate Course Type
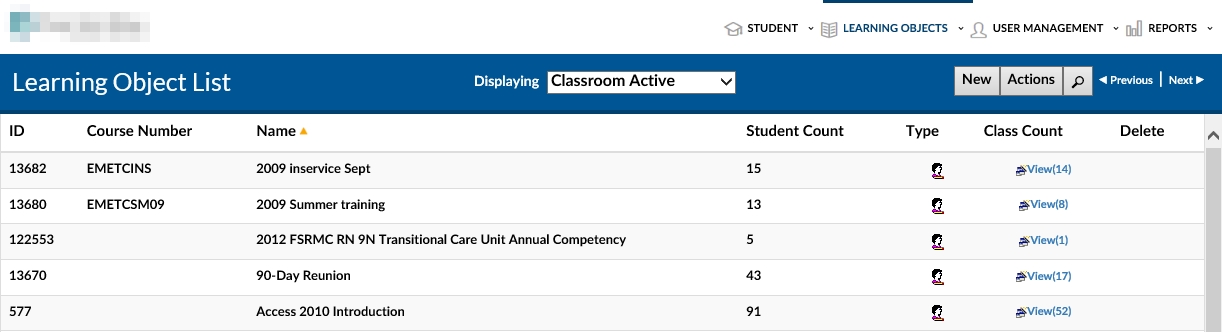
- Click On the Course Title
- Click Edit
- Select the Appropriate Catalog to Place the Course Within
- Click Save