Paper Certificate - How to Guide
Paper Certificate - How to Guide
- Are you a Client Super Admin? Your must have these rights to create a Paper Certificate
- Add Learnsoft.com to IE "compatibility view"
- Advanced View>Reports>New Report
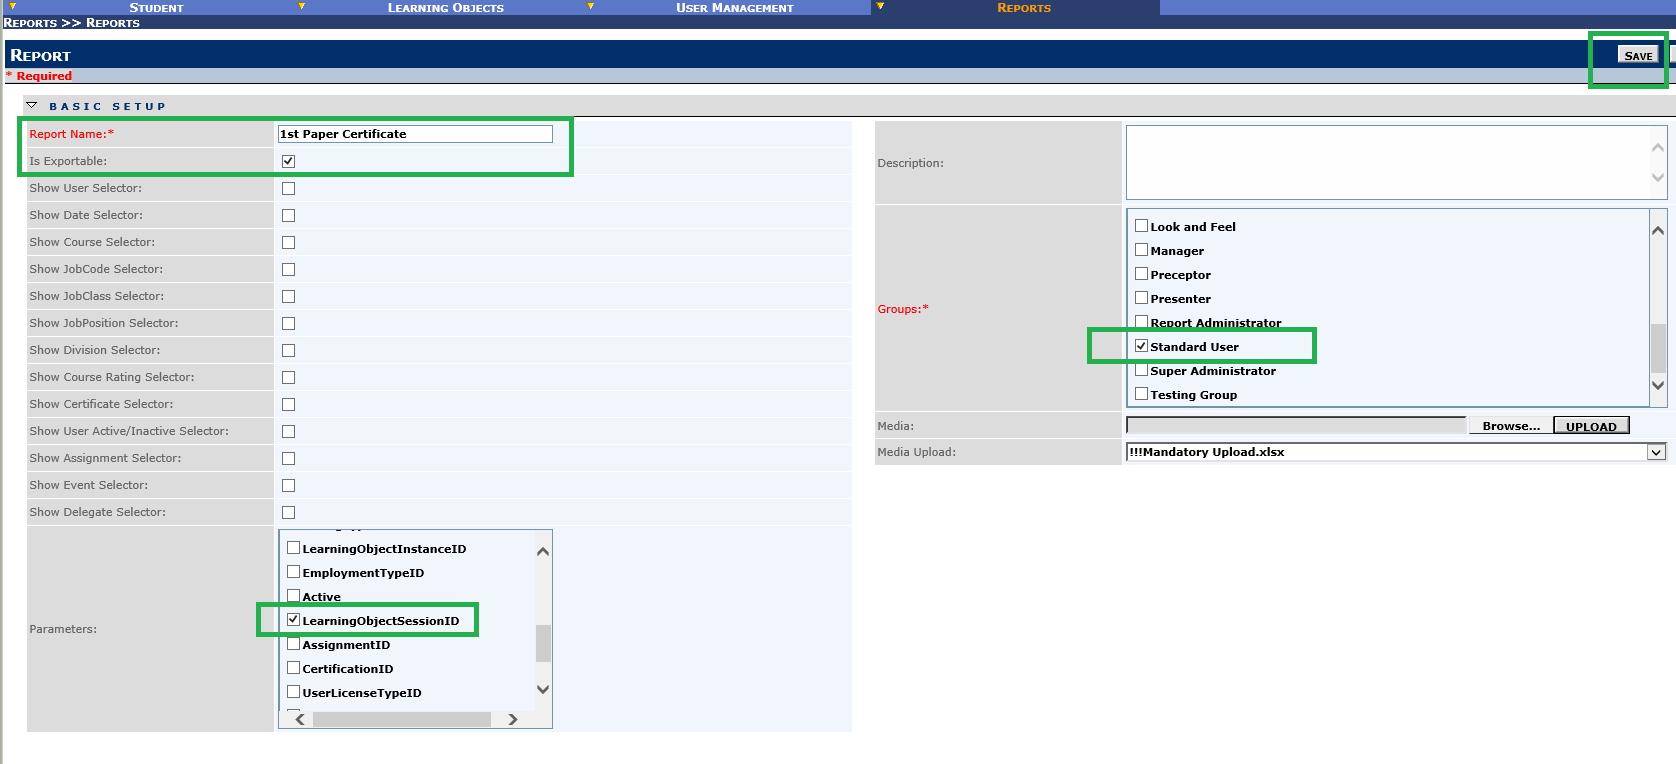
- Fill in the same selections as you see in the above image. The report name is unique, so name your certificate, and it will be displayed in a drop down list so you can select it in the course.
- Save>Exit>Find your report in the list of reports
- Click "User Defined Report" Next to the name of your Paper Certificate

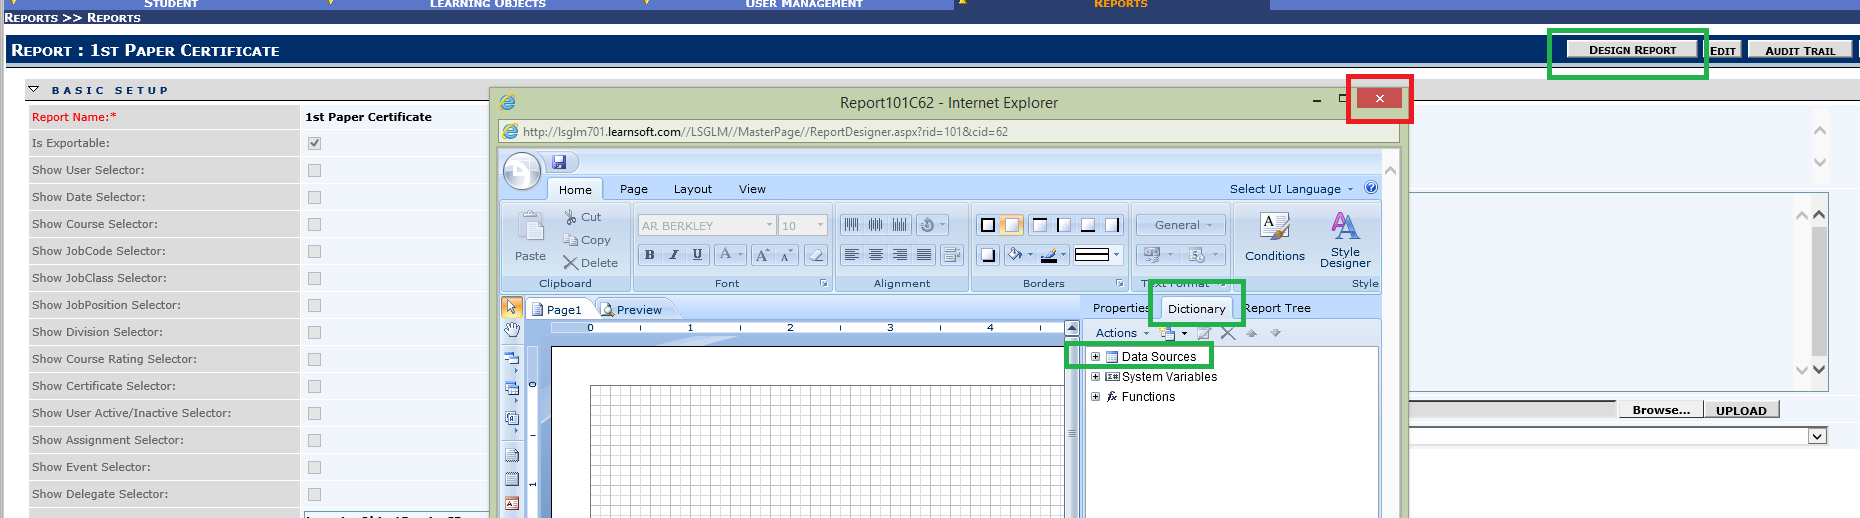
- Click the "Design Report" button>See the image below/See the report designer window popup.
- Click the Dictionary tab>Confirm you see "Data Sources" *If you don’t see it, click the red "X" to close the pop-up, and Click the "Design Report" button to relaunch it.
- Default view is portrait, To change to landscape view>Click the Page tab>Orientation>Select "landscape" see image below
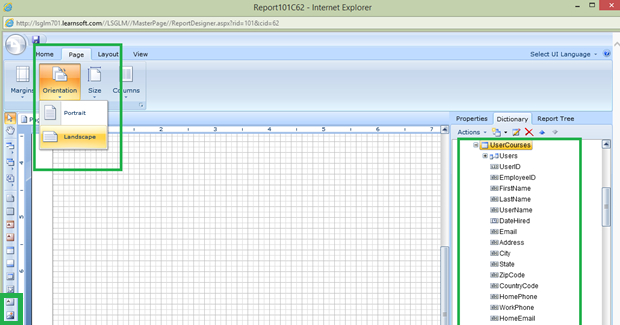
- Now Expand "Data Sources" on the right and find/Expand "UserCourses" (it’s last on the list). FROM ONLY here will you will drag your selections to the report designer.
- Drag them around until you are happy with their layout. Next we can add image or text using the small icon buttons on the left side
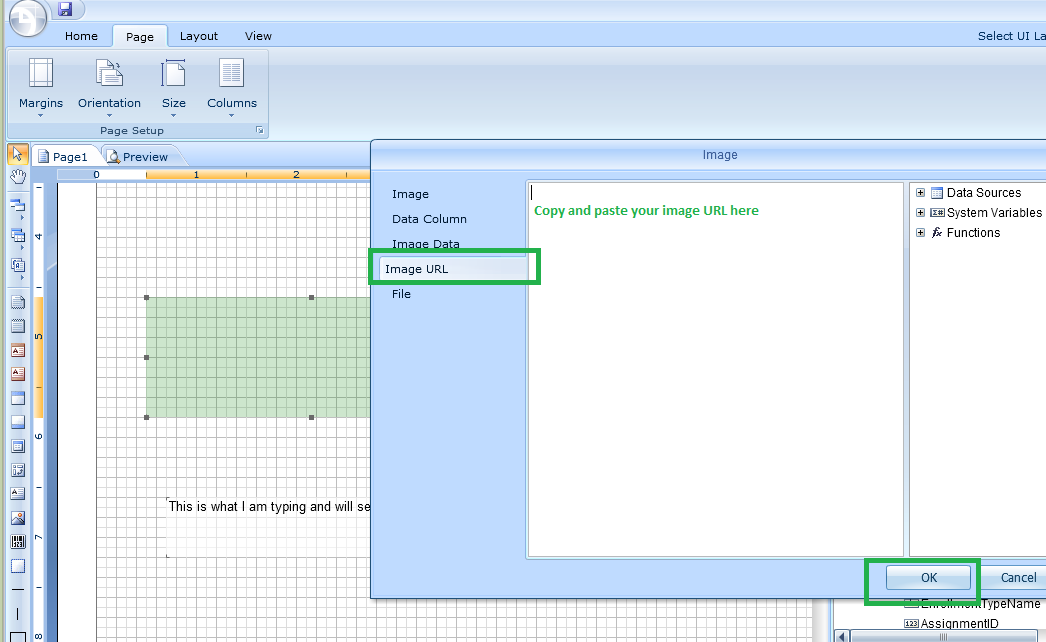
- Add Image – Click the image button>drag where you want the image>then size it. Double click the image field>Copy and paste the Image URL here. See image below
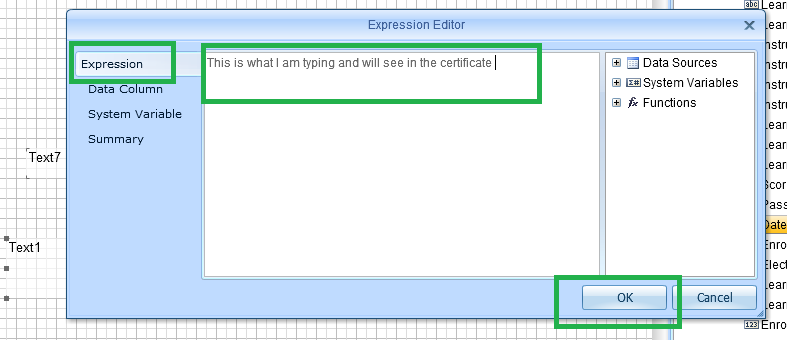
- Add Text – Click the text button>drag where you want it>then size it. To edit it>Double click the text field>See the Expressions Editor>Expressions Button>Enter the text as you wish to see in your paper certificate. See image below
- Save>Exit
- To view the Paper Certificate>Add it to a Classroom test course (with multisession enabled) by picking it in the "Paper Certificate" drop down list in your Learning Object (don’t use an online course for this test).
- Enroll in the course>Complete yourself
- Go to My Transcript to view the Certificate for the course
- If you’re happy with the way it displays, you’re finished.
- Otherwise, go back to Reports>Find it in the list, and go back to step 6. To edit/until you’re satisfied. Authored July 23, 2015 by E. Bloxham
Note added 8/14/2017 - Re: Updating Paper Certificates attached to a learning object If you simply update the design of an existing certificate, keeping the same name / path, the transcript will use the latest design version
If you change the learning object to a different certificate, it will use the latest design version of the initial certificate for users that completed before the changeover and it will use the latest same / name path of the new certificate for users completing after the change
So, Scenario #1
Learning Object – Certificate = Certficate1 with the Approver = John UserZ takes course and goes to transcript to print certificate it will Approver = John You change the design of Certificate1 to Approver = Sally UserZ goes to transcript to print certificate it will show Approver = Sally
Scenario #2 Learning Object – Certificate = Certficate1 with the Approver = John UserZ takes course and goes to transcript to print certificate it will Approver = John You edit Learning Object and select Certificate = Certificate2 Approver = Sally UserZ goes to transcript to print certificate it will show Approver = John (It points to the Certificat1 with latest info) UserX completes after change it will show approver=Sally (It points to Certificate2 with latest info)
If this certificate design is simply updated (but NO change to certificate attached to Learning Object) it displays the updated info because it uses the same path / certificate. If the certificate is changed within the learning object, then all completions prior to the change use the old path, all after use the new path.