Search Courses - Admin Guide
Note: Items in the Advanced View > Student Menu generally provide legacy access to individual features that are generally available and supported in more modern formats, such as in the Overview Page, Search Tab and elsewhere using the LMS or TMS (Performance Tab, User Profile) Simple View
Search Courses
The LMS system provides a detailed search function which allows the user to find specific sessions in the database. Note: The Student Menu is a legacy feature. You can find full access to Search function using the Simple View > Search Tab.The SEARCH option is the third way that a user can find a course. Admins can also enroll other users using this feature.
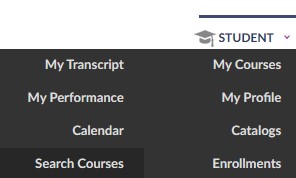
The Search Course feature is accessible in the Simple View by selecting the Search Tab. in the Advanced View, hover over the Student dropdown Menu and select Search.
To Utilize:
- 1 Hover over the Student dropdown Menu and click the SEARCH tab
A search screen with available search parameters displayed in icon format is presented to the user
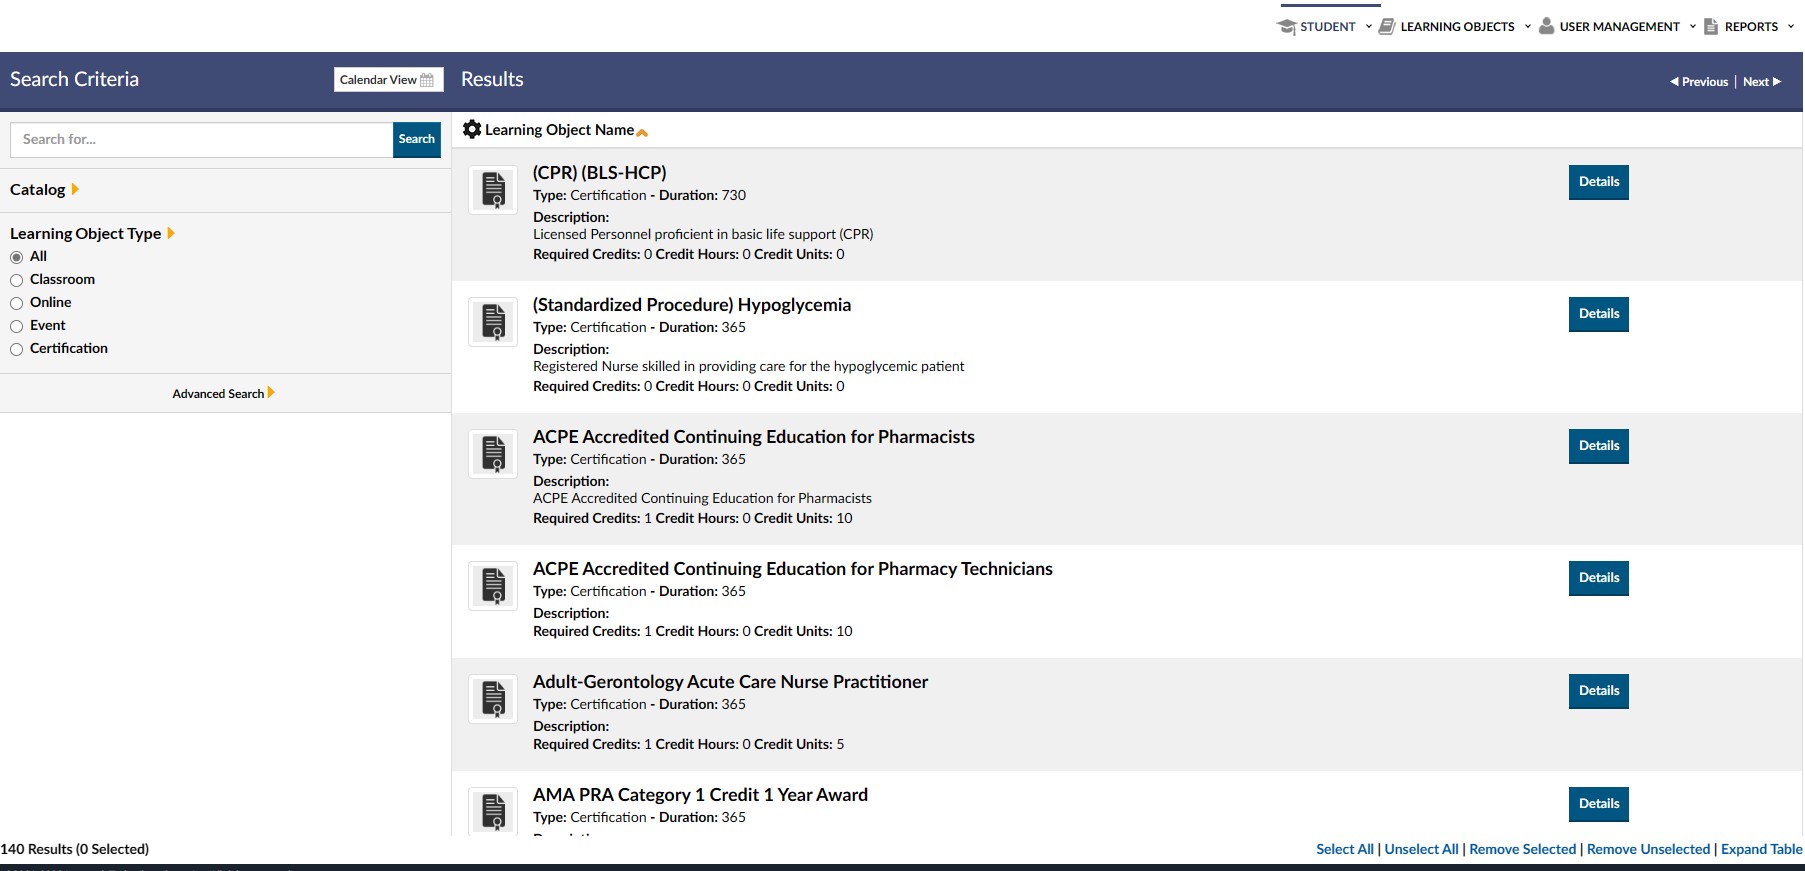
- 2 Select one or multiple parameters as the search criteria The system will search the available course database and return the courses that meet the search criteria
Explanation of Fields
- Course Type Any / Classroom / On-line / Event. Select the required radio button
- Search Text Search by whole or partial words – search looks into the course name, course description and course outline for a match of the search criteria
- Instructor Search by whole or part of the name
- Any Date Or if the DATE RANGE’ radio button is selected, then the user must enter a date range in the two fields below
- Start Date Click to display mini calendar from which date can be selected
- End Date Click to display mini calendar from which date can be selected
- Facility Select from the drop down list
- Training Vendor Select from the drop down list
- Room Select from the drop down list
- Topic Select from the drop down list
- CE Hours Select from the drop down list – useful if one requires a certain number of hours to satisfy your CE requirements, one can search for all courses that offer this number of CE hours
- Accreditation Select from the drop down list
- Job Position Select from the drop down list. If courses have been tagged with a job position, this parameter allows users to search for courses that have been specifically marked as being applicable for this job position
- 3 Next, click on the SEARCH button at the top right side of the screen –
To clear the search screen entries press the ‘CLEAR’ button.
A Learning Object List of courses that meet the selection criteria will be displayed.
Courses are designated as Instructor-led or Web based in the TYPE field by ICON type –
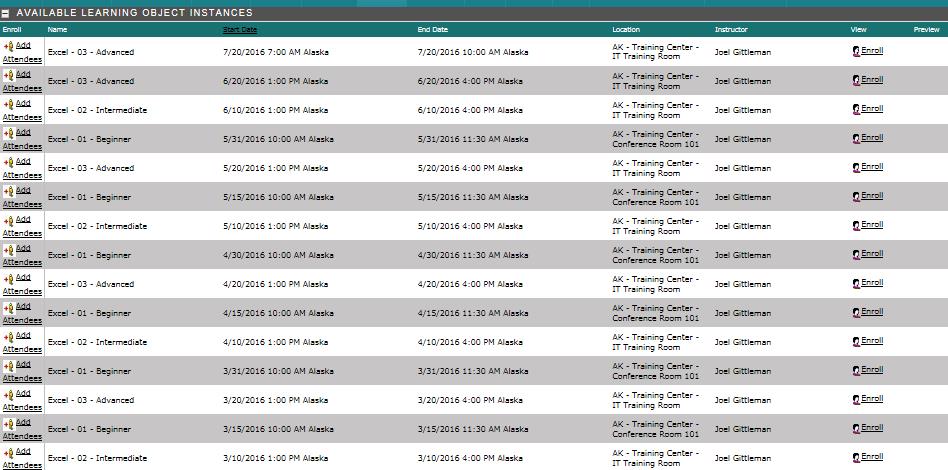
- 4 Click on the required class date to select it
ILT classes will typically have multiple VIEWS (instances) in the Class Count column, whereas web based courses will only have one.
- 5 Click on the VIEW( ) icon to display the details Clicking on the VIEW link will display all the class instances for this learning object.
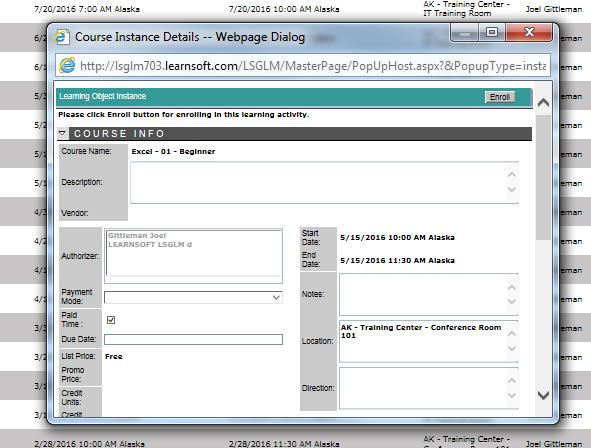
- 6 If authorization is required for this class, the user has the option to select one from the list displayed. Important details contained in this screen –
- (i) The location of the class
- (ii) Start and End times
- (iii) A course outline
- (iv) Directions to the classroom
- (v) The instructor(s)
- (vi) Any attachments – which can be documents or files that, are linked to this course. For example, pre-attendance course notes an overview or white paper.
See screen shot below
- 7 Click the ENROLL button at the top of the new window to enroll in the class
You have now been successfully enrolled in the class.
To Enroll others in the course,
- 1. Click on the Add Attendees icon to the far left of the row of the course instance to which you wish to add students.
- 2 This will launch the User Lookup Screen.
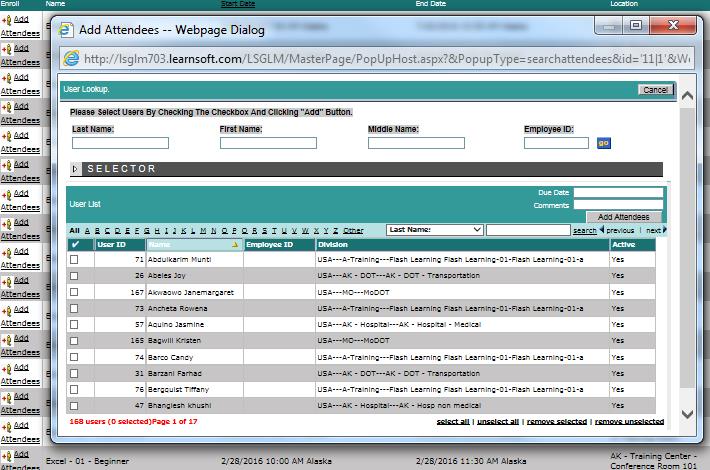
- 3 Use the navigation, sort and search functions to identify the specific students to enroll
- 4 Click on the checkbox to the left of these students and click the Add Attendees button