Calendar - Admin Guide
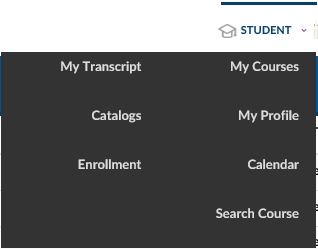
Note: Items in the Advanced View > Student Menu generally provide legacy access to individual features that are generally available and supported in more modern formats, such as in the Overview Page, Search Tab and elsewhere using the LMS or TMS (Performance Tab, User Profile) Simple View
Calendar
The Calendar view provides gives a graphical representation of courses available for you / your team's enrollment. Note: This is a legacy feature which has been supplanted by the Simple View > Search Tab > Calendar View and Search functions.To Utilize:
- 1 In the Advanced View, hover over the STUDENT Tab
- 2 Select Calendar
The current month is displayed in the calendar view. Courses shown are those for which you and possibly your team may be eligible to enroll.
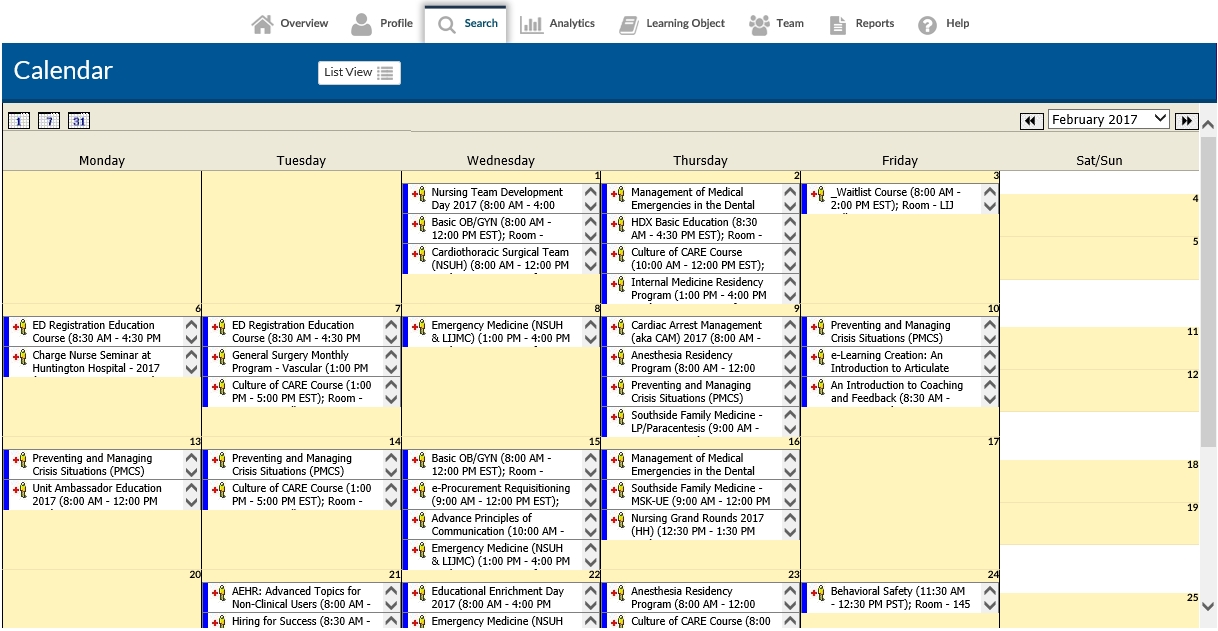
The Calendar can be viewed in three different day formats –
- (i) 1 day
- (ii) 7 day
- (iii) 31 day (default)
Use the arrows at the top of the calendar to move forward or backwards between months.
- 3 Select the required ILT course by clicking on it
- (i) Note: If one is searching for an instructor-led class, and there are no dates for these classes in the current month, nothing will be displayed
- (ii) Note: If wishing to Enroll other users, click the ADD icon of the course that you want to select . This icon brings up the dialog box, with all the students, who are reporting to the logon user. User can select each user by checking a checkbox and clicking “Add Attendees” button for the enrollment.
If there are dates in this month for the selected course, they will be displayed in the calendar.
- 4 By hovering the mouse over a date – details for this class will be displayed
- 5 Click on the required class date to select it A new window will appear (the Learning Object Instance) where all the details for this class are displayed.
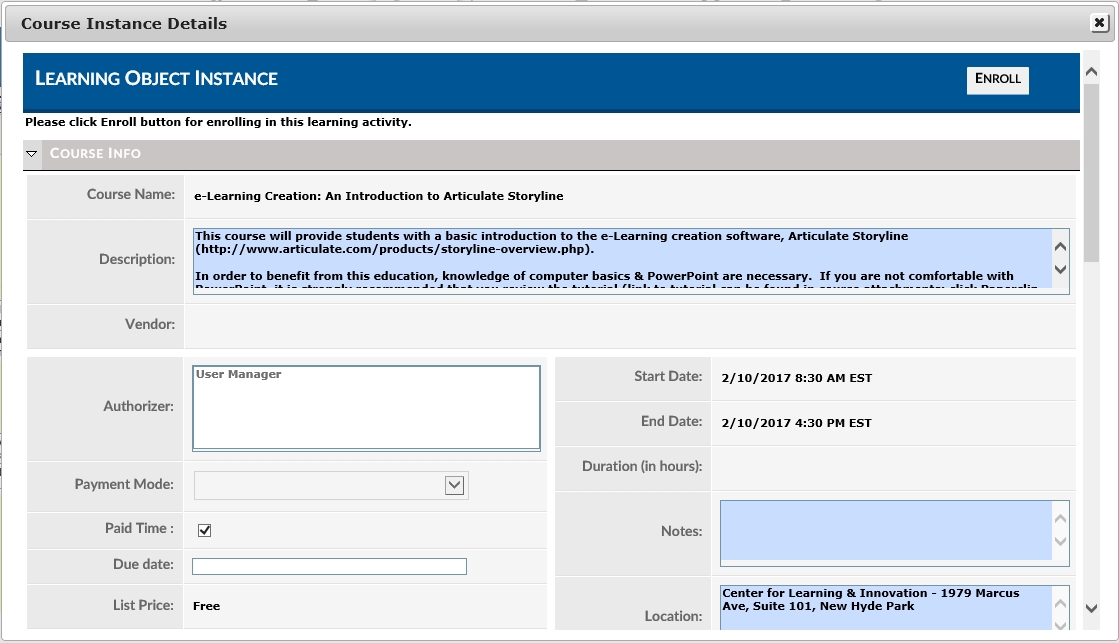
- 6 If authorization is required for this class, the user has the option to select one from the list displayed. Important details contained in this screen –
- (vii) The location of the class
- (viii) Start and End times
- (ix) A course outline
- (x) Directions to the classroom
- (xi) The instructor(s)
- (xii) Any attachments – which can be documents or files that, are linked to this course. For example, pre-attendance course notes an overview or white paper.
See screen shot below
- 7 Click the ENROLL button at the top of the new window to enroll in the class