Test Library - Admin Guide
Section 1: Test Library - Overview
Who Should Use This Guide
This guide is for - Learning Management System (LMS) Client Super Administrators and Administrators to enable them to utilize and train others in the use of the Test Library Feature and Functionality.
Test Library - Overview
In the Learnsoft LMS, Testing consists of a series of Assessment Tests that are organized in the Test Library. Once the test is created, test sessions are also created. Test sessions are associated with a specific test. Once a test session is created, it can be associated with an instructor-led or web-based training course.
The Test Library Feature allows the Administrator to list, create, modify, and delete test assessments. Test assessments include both test questions and test answers. These question / answer combinations can take the form of true / false, multiple choice, fill in the blank or free form text.
The basic steps to the Test Creation Process are: 1) Add a New Test Library; 2) Create a Test Instance; 3) Add Questions to a test; 4) Add Answers to the Questions; 5) (optional) Add Attachments to the Questions.
Once the test is created, it can be added to a course or similar Learning Object.
Add a New Test Library
A Test Library is simply a container for a test instance and is the basic building block of a test. To view a list of existing test libraries and to Add a New Test use the Advanced View > Learning Object dropdown box and select Vendors.
Create a Test Instance
A Test Instance is a schedulable version of a Test containing a number of attributes, for example, if the user can retake the test and how many times. It can be created after saving a new Test Library or by clicking the New Test Instance button when viewing the instance list of a specific Test Library. When associating a test to a Learning Object / course, it is the test instance which is selected.
Add Questions to a Test
After creating a Test Library, Questions can be added to the test. Options allow for randomization or ordering. Questions can be added by selecting to the View link in the Questions column of the desired Test library in the Test List and clicking the New Test Question button.
Add Answers to Questions
After creating a test Question, the creator may add new test answers for this question. For example, a multiple choice question may have a series of possible test answers in which one answer is deemed correct. Options allow for answer text, answer type, whether the answer is the correct and the order in which answers will appear to the user.
Add Attachments to Questions
After creating a test Question, the creator may add an attachment to the question. For example, a question may refer to information found in an attached image file.
Add a Test Instance to a Learning Object (Course)
To ensure users demonstrate sufficient understanding of course materials, it is common for most courses, both classroom and online, to have an associated test or tests. Once test instances have been created, they can be added to a Course during the creation (or editing) process using the Test textbox section, Add button and Test Instance lookup feature.
Objectives
Upon completion, you will be able to:
- Add a New Test Library
- Create a Test Instance
- Add Questions to the Test
- Add Answers to the Questions
- Add an Attachment to a Question
- Add a Test Instance to a Learning Object (Course)
Section 2: Test Library - How to Guide
2.1 Add a Test Library
The Test Library is a basic container for test instances, test questions and test answers. It is the basic building box of a test and the term Test and Test Library are often used interchangeably (Similar to Course and Learning Object).
To Add a Test Library to the LMS system, follow these steps:
- 1 - Click on the Learning Objects Dropdown Box.
- 2 - Click Test Library.
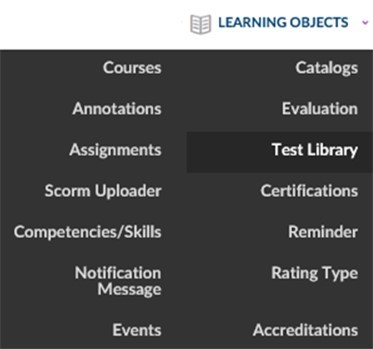
- 3 - This will bring up the Test Library / Test List page which displays Test Libraries (Tests) that have previously been added to the system
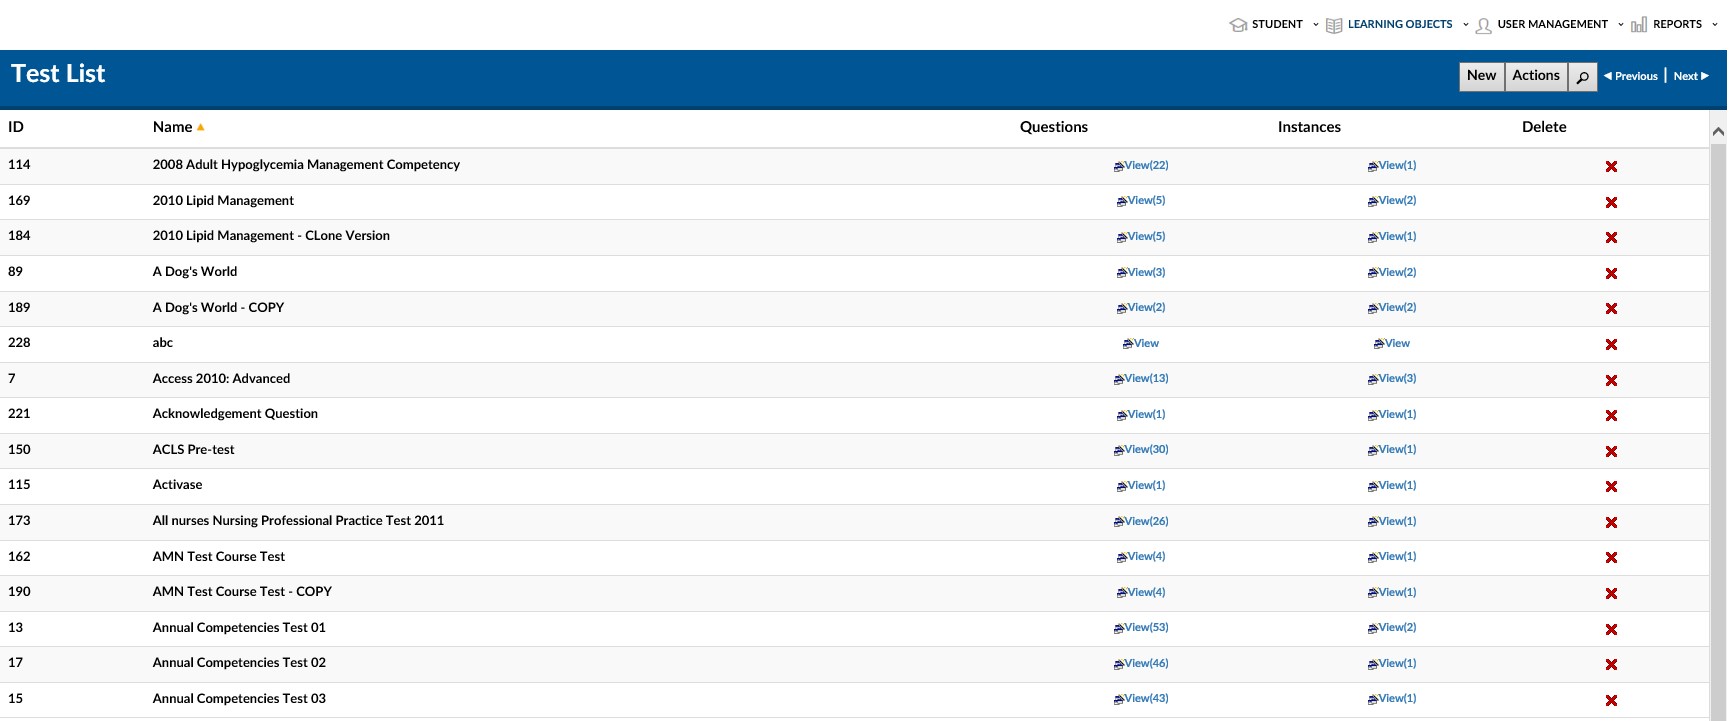
- 4 - Click on the New Test button near the top right portion of the screen.
- 5 - This will launch the Test Library / Test Details screen. The level of detailed entry will vary based on your organizational needs (See Explanation of fields on the next subsection).

Explanation of Fields: New Vendor Details
- Vendor* - Dropdown menu which allows selection from a list of previously entered vendors.
- These can be external vendors or the organization itself. See separate Vendors Feature guides for further details.
- Scorm Test - A checkbox that if selected indicates that the test library will use a previously created SCORM object as a test.
- Create Forum - NOT CURRENTLY ACTIVE – When activated in the future, it will associate the test with an optional social module
- Name* - The name of the test library (test).
- 'Scorm Course - A dropdown box containing a list of previously uploaded SCORM Test Objects. Used in conjunction with the Scorm Test checkbox.
(*) Required Fields
- 6 - Enter the required information of vendor and name.
- 7 - If a SCORM test, check the Scorm Test checkbox and Select the Scorm Course.
- 8 - Click the Save button located near the top right of the screen.
The Test Library / Test has now been created and will be available in the Test Library / Test List.
2.2 Create an Test Instance
Just as the LMS system requires the creation of both a Learning Object (Course) and a course instance (where users enroll in a specific course instance), similarly it requires the creation of both a test library (test) and a test instance. The test instance will be selectable when associating a test to a learning object / course.
Adding an Instance
There are two ways to create a test instance
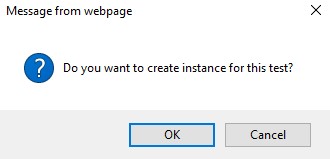
- A - Upon saving a new test library, a popup box will be prompt the creator to add a new test instance.
- 1. Click Yes to create a new test instance at this point.
- B - Upon Accessing the Test List (by using the Advanced View > Learning Objects dropdown box and selecting Test Library), …

- 1 - Click on the View Link in the Instances column of the Test Library to which you wish to add a new instance.
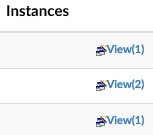
- 2 - This will bring up the Test Instances Screen for the Selected Test Library.

- 3 - Click the New Test Instance button
Either method will bring you to the Test Instance Details page.
Adding Test Instance Details
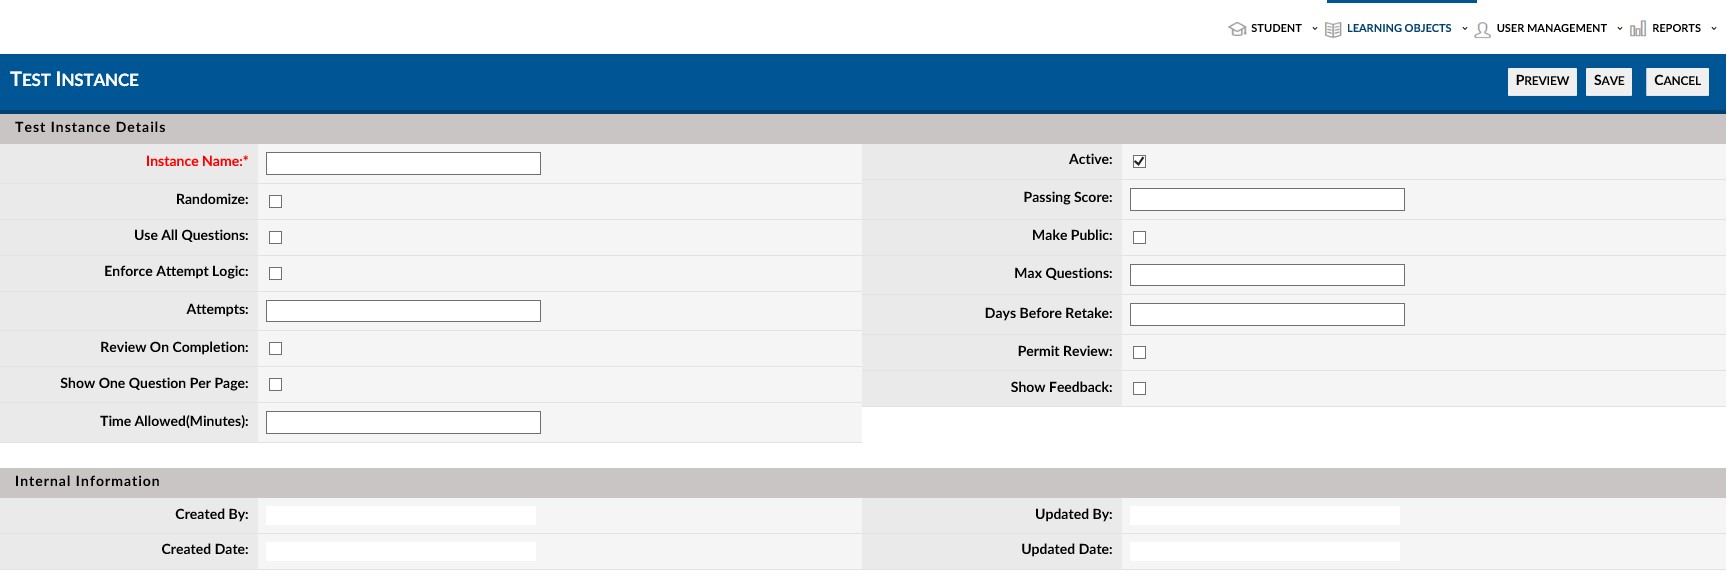
- Enter the Required Instance Name.
- Either check Use All Questions checkbox or enter numeric value in Max Questions
- Enter optional attributes as desired (See Explanation of fields on the next subsection.)
- When finished click Save.
- This will return you to the specific Test Library Instance List with the new instance now added to the Instance List.
- Select Exit to return to the Test List.
Explanation of Fields: Test Instance List
- Instance Name* - This is the name for the test instance. This name will be displayed when the user adds the test instance to a course.
- The first Test Instance Name is usually the same as the Test Library (Test) Name.
- Randomize Checkbox - The Randomize option let the test questions order to be random every time the user takes the test.
- Use All Questions Checkbox - This option let the test use all questions for the Test
- Enforce Retake Logic Checkbox - This option allows the user to Retake the test
- Retake Attempts - If the Enforce Retake Logic Checkbox is checked, this will indicate he number of retake attempts the user may make
- Review on Completion checkbox- if selected, The correct answers will be displayed only after completion of the test
- Show One Question Per page Checkbox - If checked, only one question is displayed per page
- Passing Score - This is the score required to pass the test.
- Note: This can be overridden by entering a different passing score at the course or learning object level
- Make Public Checkbox - By Checking this option the test will be available to all users
- Max Questions - The maximum number of questions to be displayed in the test from a pool of all questions.
- Days before Retake - This is related to Retake logic and the number of days is the days after which a user can take the test after retake attempts
- Permit Review Checkbox - This lets the user to see the incorrect answers in Red after completion of each Test Attempt
- Show Feedback - This shows the feedback for each question in blue if the comments section for each question is filled out.
(*) Required
2.3 Adding Questions to a Test
- Navigate to the Test List (Advanced View > Learning Objects > Test Library)
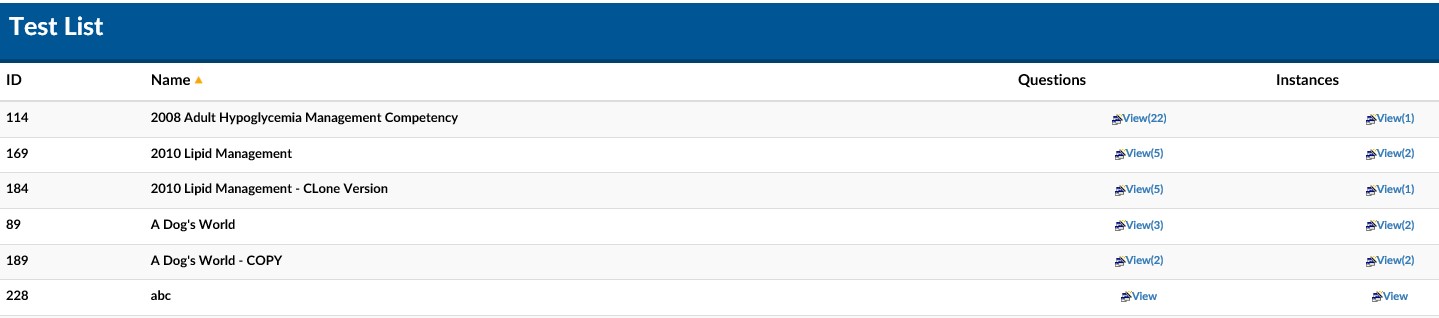
- 1 - Use the navigation and search functions to find the Test Library to which you wish to add questions.
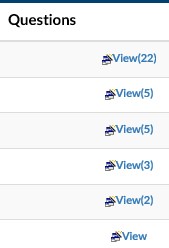
- 2 - Click on the View link in the Questions Column of the row of the Test Library to which you wish to add questions
- If questions are already present, there will be a number next to the View link.
- 3 - This will launch the Test Question List that displays all the test questions associated with this specific Test Library
- This list should be empty when first adding questions.

- 4 - Click the New Test Question Button.
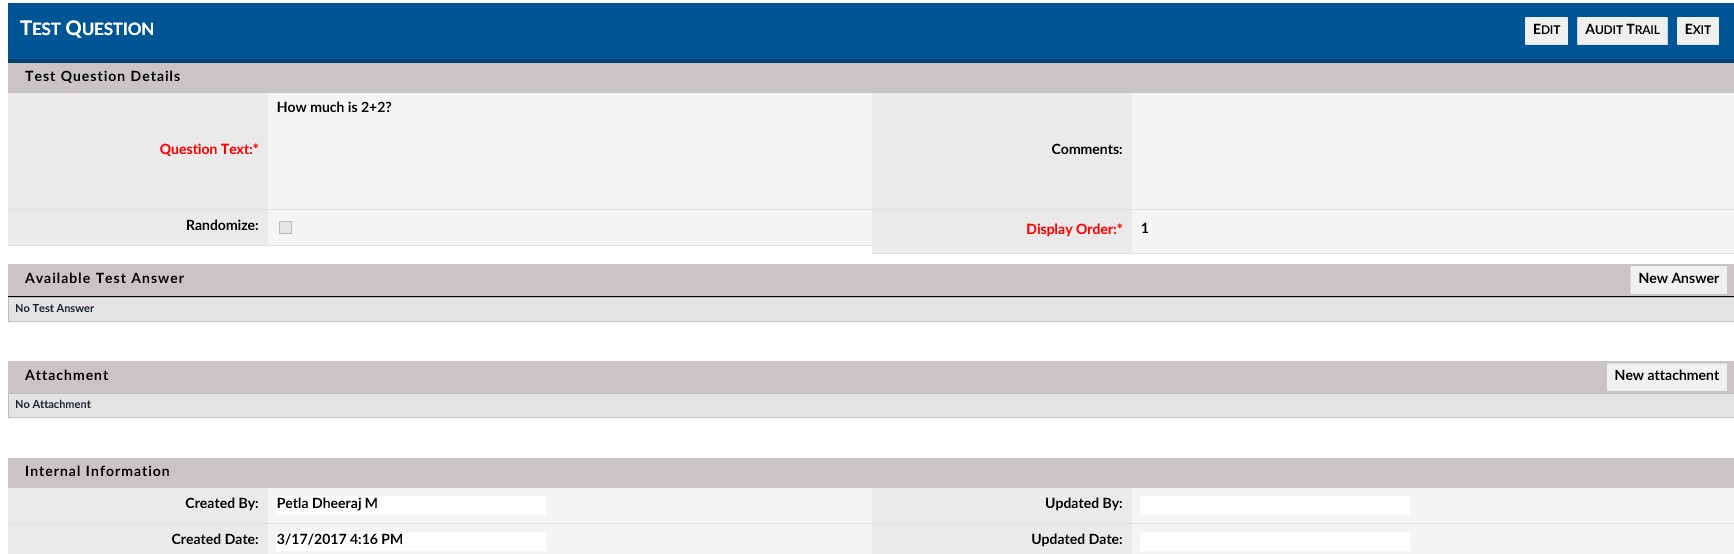
- 5 - This will launch the Test Question Details page.
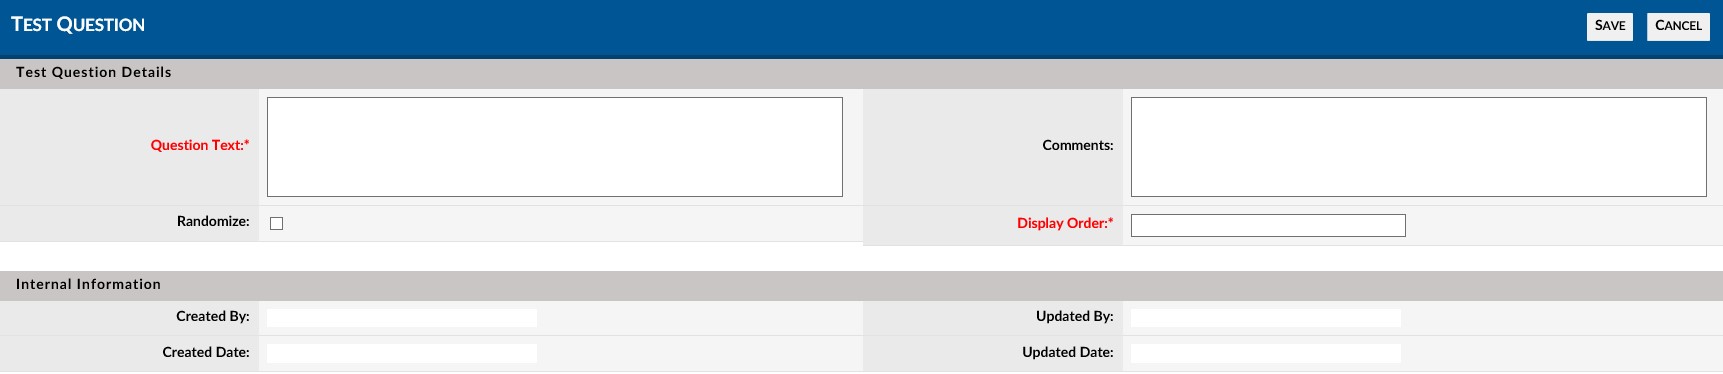
Explanation of Fields: Test Instance List
- Question Text* - This is the question as it appears to a user while taking the test
- Randomize checkbox - Select If questions are to appear in random order
- Comments - This is the feedback for the question that would appear after the test is completed if show feedback is selected in the Test Instance
- Display Order* - This is the order in which the questions are displayed on the assessment
(*) Required
- 6 - Enter information in the required fields: Question Text and Display Order.
- 7 - Enter optional attributes as desired (See Explanation of fields on the next subsection.)
- 8 - When finished click Save.
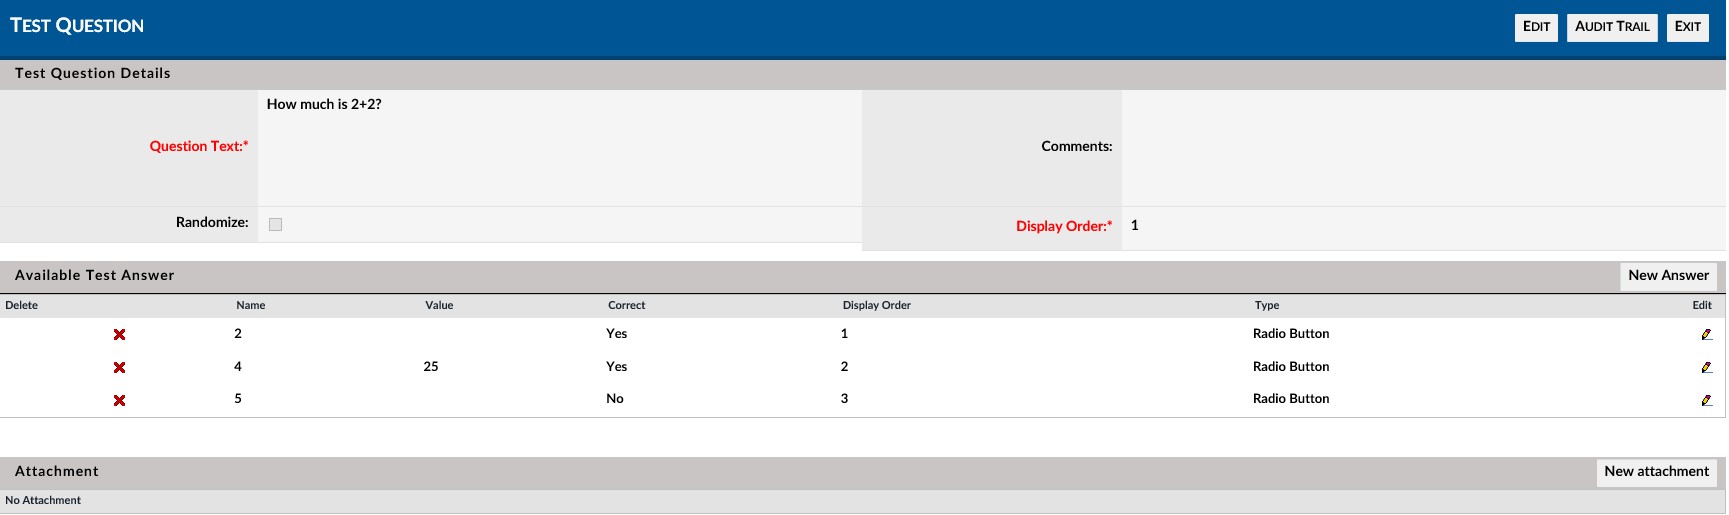
- 9 - This will save the question and display the saved question details and will add two new sections:
- Available Test Answer - Allows you to add both correct and incorrect answers to the question (For details see section 2.4).
- Attachment - Allows you to add an attachment to the question. For example, you can add an image which can be referenced in the question (For details see section 2.5).
- 10 - To enter additional questions, click Exit to return to the Test Question List which now shows your new question(s)

- 11 - Repeat steps 4-10 to add all desired test questions to the selected Test Library.
2.4 Adding Answers to Test Questions
- 1 - Navigate to the Test Question Details page of the Test Question to which you wish to add answers.
- 2 - After adding a test question, the creator will be automatically returned to this page to allow immediate entry of answers.
- 3 - If adding (or editing) test answers at a later time, navigate to this page as directed in the previous section.
- 4 - Navigate to section Available Test Answer and click the New Answer button.
- - If there are previous answers, they will be listed and can be selected for editing by clicking the pencil icon to the right of the row of the selected answer or deletion by clicking on the red (X) icon to the left of the row of the selected answer.

- 5 - This will launch the Test Answer Details page in a popup window.
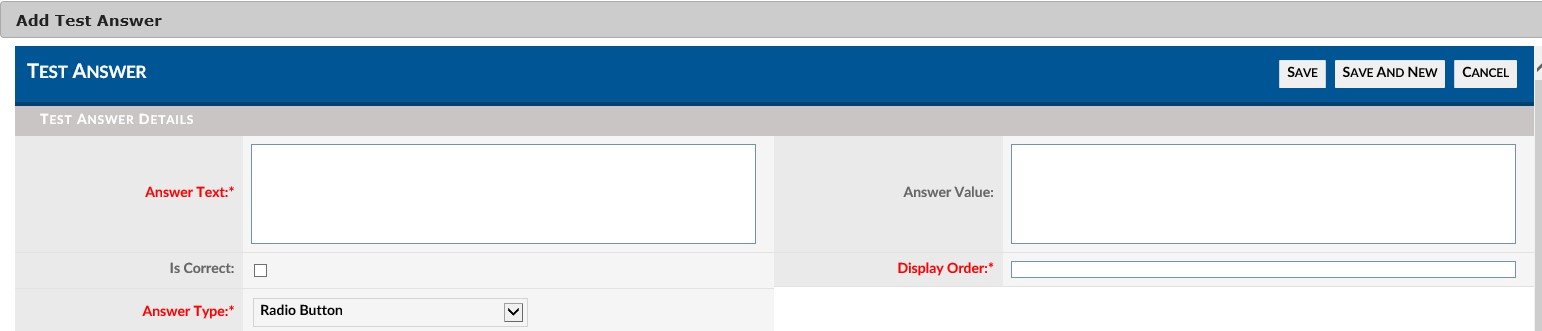
Explanation of Fields: Test Answer Details Popup Window
- Answer Text* - This is the answer as it appears to a user while taking the test
- Is Correct? checkbox - This is box to be selected if the above answer text is the correct option
- Answer Type* - Allows for a dropdown selection of controls by which the user can select an answer. Options include: Check Box, Radio Button, Text Area, Text Box
- Answer Value - Generally, this field is left blank and the system will copy over the Answer text when saving the answer. If desired a separate value may be used for display in reports.
- Display Order* - This is the order in which the answers are displayed on the assessment
(*) Required
- 6 - In the Answer Text textbox, enter a possible answer as you would like the user to view it when taking the test.
- 7 - Select the Answer Type from the drop down box.
- 8 - Enter a number in the Display order for this particular answer as part of the group of answers to be added to this question.
- 9 - If this is the (a) correct response, select the Is Correct? Checkbox.
- 10 - When completed entering information and If desiring to add additional answers to this question, click the Save and New button.
- This will save the answer and launch a blank Test Answer Details popup page for a new answer. Repeat steps 3-10 for all additional answers.
- 11 - If finished entering all answers for this question, click the Save button.
- 12 - This will return you to the Test Question Details page with the saved answers now visible in the Test Answer section.
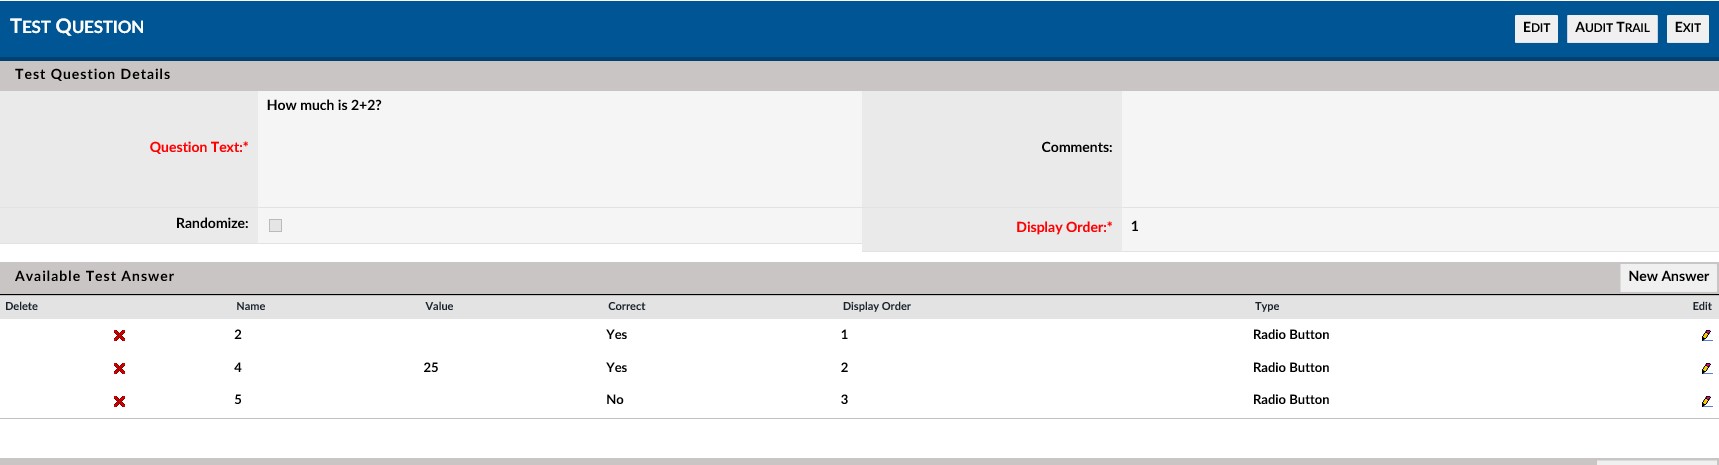
Example of Test Answers added to a Test Question
For example, if the Test Question is "How Much is 1 +1?" and this is a multiple choice test with three possible answers, yet only one correct answer, the creator might set up the following responses.
- Example Test Answer #1 - Answer Text = "4", Is correct? = Not Selected, Answer Type = Radio button, Display Order = "1"
- Example Test Answer #2 - Answer Text = "2', Is correct? = Selected, Answer Type = Radio button, Display Order = "2"
- Example Test Answer #3 - Answer Text = "3', Is correct? = Not Selected, Answer Type = Radio button, Display Order = "3"
2.5 Adding Attachments to Test Questions
- 1 - Navigate to the Test Question Details page of the Test Question to which you wish to add answers.
- After adding a test question, the creator will be automatically returned to this page to allow immediate entry of answers.
- If adding attachments at a later time, navigate to this page as directed in section 2.3.
- 2 - Navigate to section Attachment and click the New Attachment button.
- If there are previous attachments, they will be listed with icons and can be selected for deletion by clicking on the red (X) to the left of row of the attachment.
- 3 - This will launch the Add Attachments screen in a popup window.
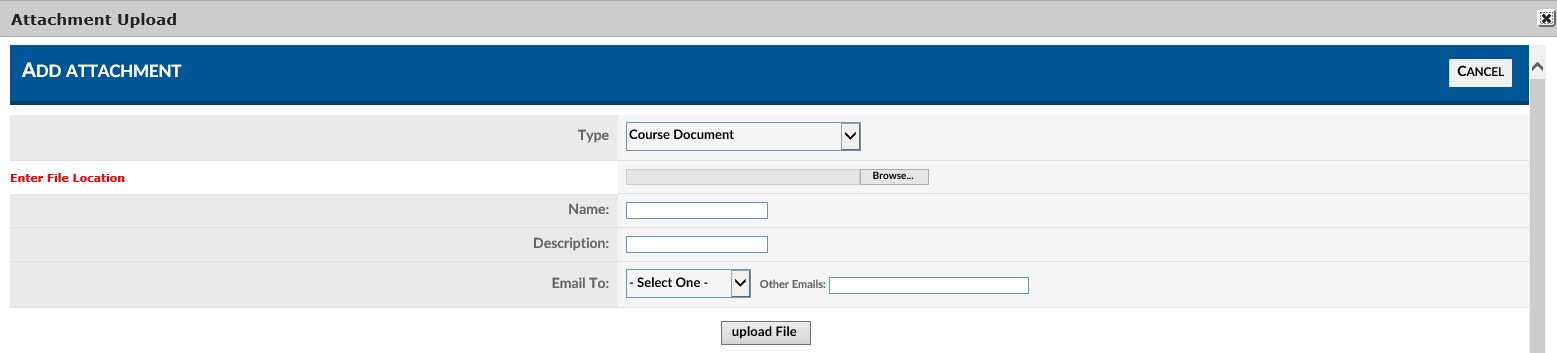
Explanation of Fields: Add Attachment Popup Window
- Type - The type dropdown will show the following: Course Document, Others, Primary Image and User Document
- Enter File Location*- Click on Browse Button and select the document or image to upload from your computer
- Name - Enter a name for the document or image.
- Description - Enter a description for the document or image.
- Email To: - Dropdown box that allows a selection of User, Manager, User and Manager or Others. Document will be emailed to that person or persons.
- Other Emails textbox - If email to dropdown box selection is others, then enter the email address of the person(s) to receive the email. Separate multiple email addresses with commas.
(*) Required
- 4 - Select the document using the Enter File Location./ Browse button. This will launch a familiar windows style File Upload popup box.
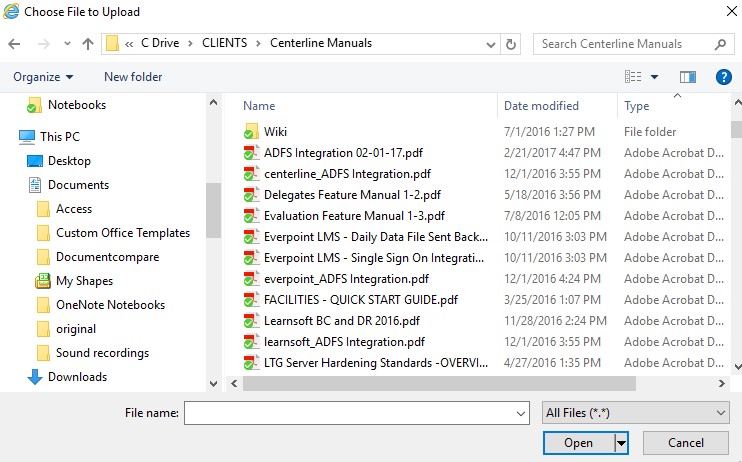
- 5 - Navigate to the desired file and click the Open button to attach it to the test question.
- 6 - Enter the optional information as desired and click the Upload file button.
- 7 - The popup box will close and the screen will return to the Test Question Details page with an icon and information in the Attachments section representing the file just uploaded.

2.6 Adding a Test Instance to a Learning Object (Course)
This document will assume Administrators already know how to navigate, create and edit Learning Object (Courses) and Course Instances. If not, see separate Courses - How to Guide.
How to Select a Test instance in the Learning Object (Course) Details Page
Whether adding a new course or editing an existing course:
- 1 - Access the Learning Object (Courses) Details page of the specific course to which you wish to add a Test(s).
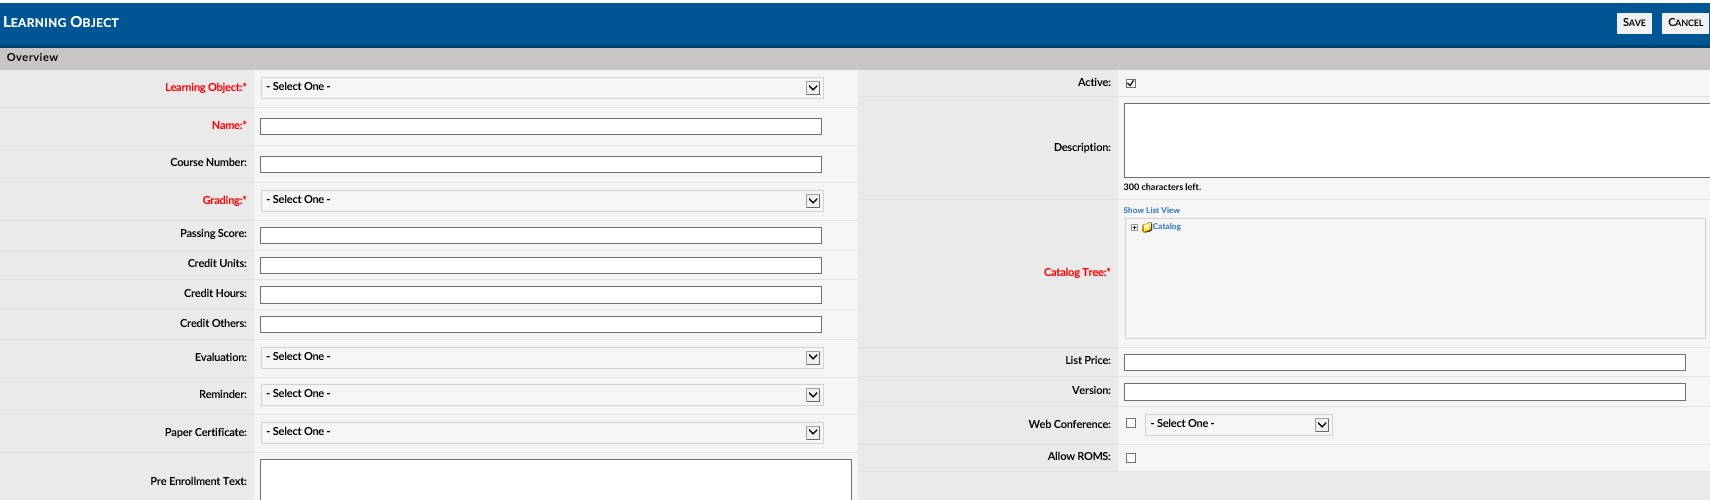
Screenshot 22
- 2 - Navigate to the Test section which is just a few lines below the required WBT Type dropdown box and just above the Same As section.
- Note - you need to be creating a new course or in edit mode of an existing course.

Screenshot 23
- 3 - Click the Add button to launch the Test Instance Lookup / Test Instance List screen in a popup window.
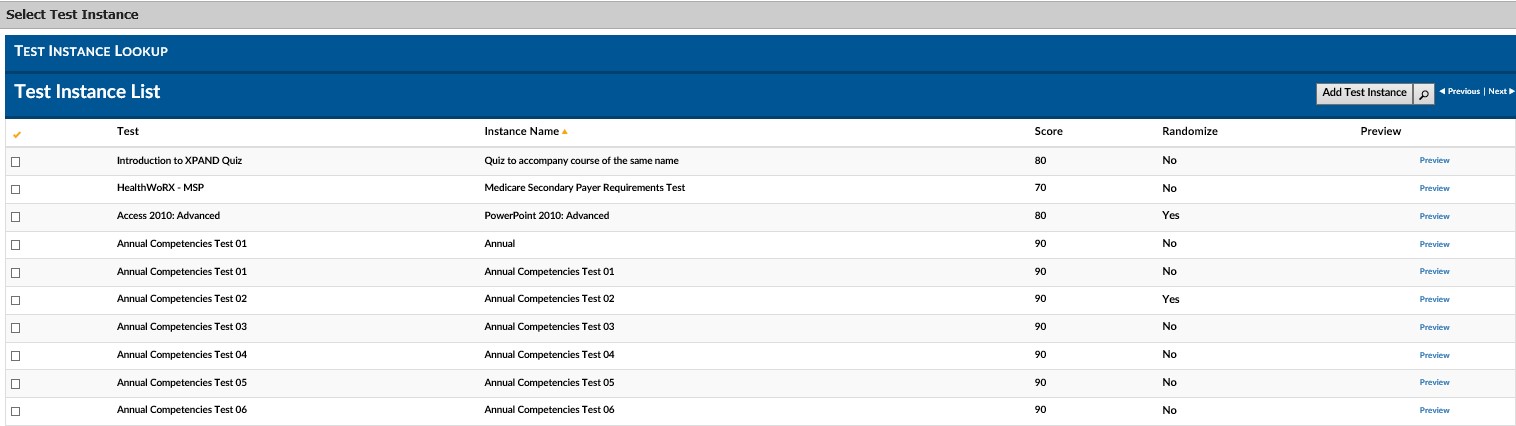
Screenshot 24
- 4 - Use the navigation and search features to find the specific test instance(s) you wish to add.
- 5 - Click on the check box to the left of the row of the desired test instance(s) and click the Add Test Instance button.
- 6 - The Course Details screen will reload with the specific test instance(s) now associated to the Course.

Screenshot 25