Evaluations - Admin Guide
SECTION 1: EVALUATION FEATURE - OVERVIEW
Who Should Use This Guide
This guide is for - Learning Management System (LMS) Client Super administrators and Administrators to enable them to utilize and train others in the use of the Evaluation features and functionality as both creators and users.
Evaluations - Overview
The purpose of this manual is to guide administrator(s) on how to effectively manage the Evaluation functionality of the LMS. Evaluations enable the creation, distribution, completion collection, aggregation and reporting of appraisal information.
The Learnsoft LMS supports the use of two basic kinds of Evaluations –
- Class / Instructor Evaluations completed by students. (Evaluations can also be used by instructors to evaluate students in a class).
- Performance Evaluations related to the Talent Management modules of the Learnsoft system, in which a manager or peer evaluates an employee
This guide will focus on the Class / Instructor Evaluations.
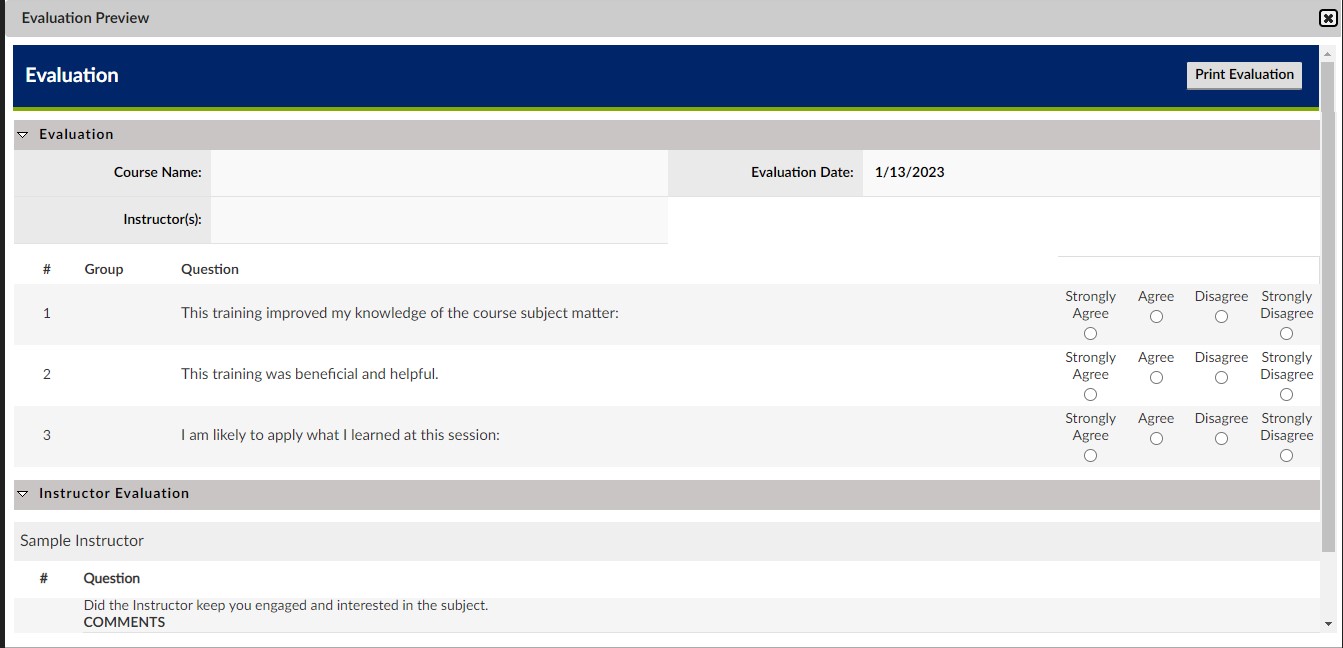
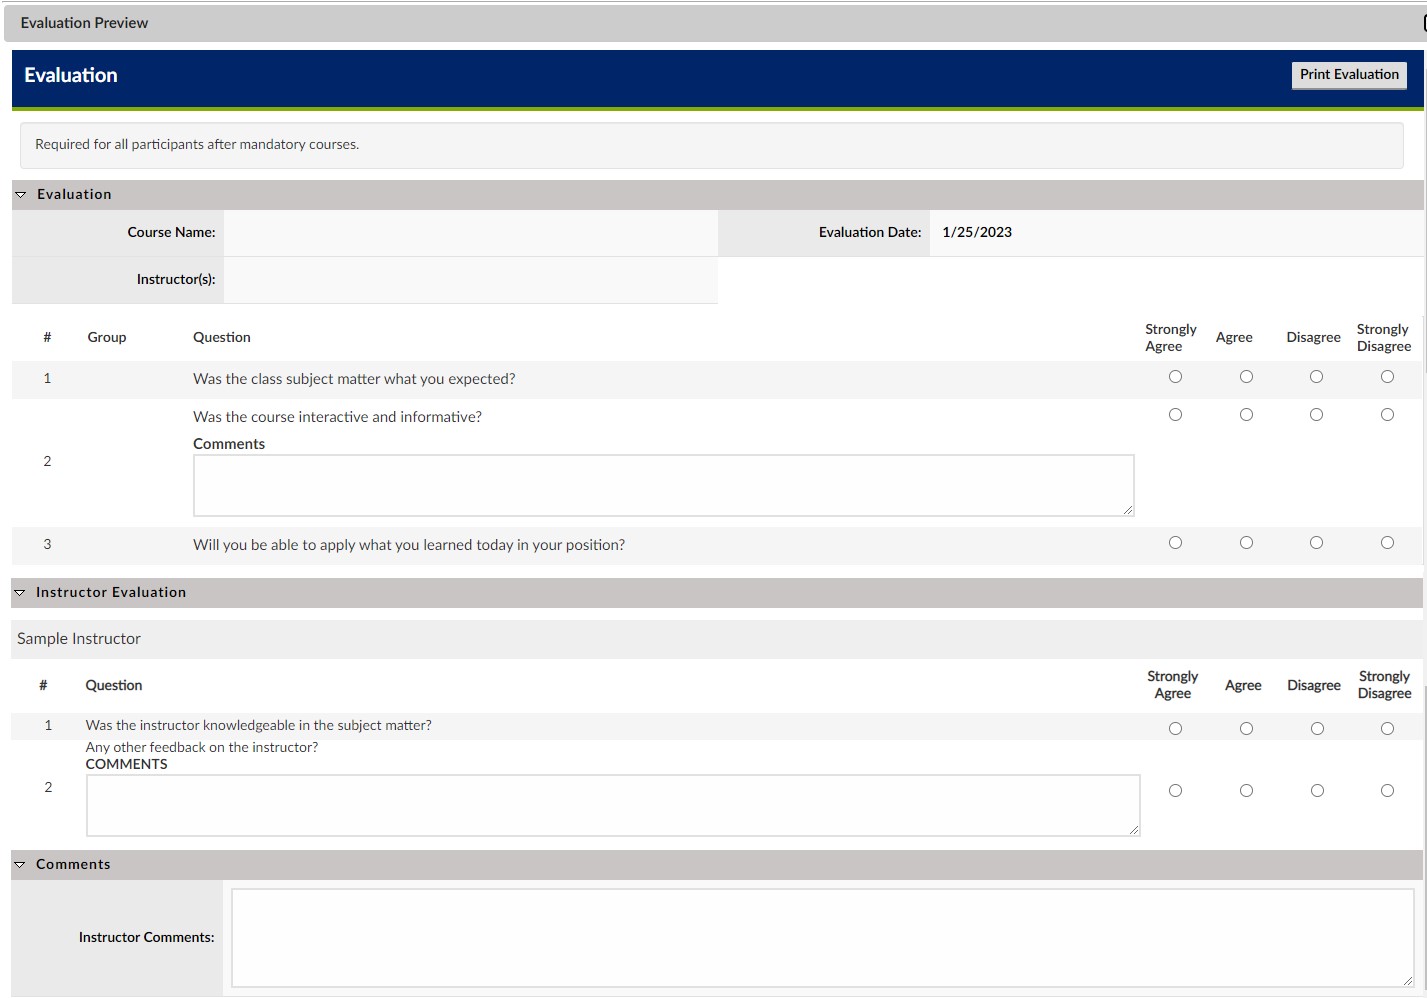
A Sample Evaluation form is below:
The Evaluation Process
There are 3 basic activities associated with evaluations: 1) Creation; 2) Use; 3) Reporting.
- Evaluation Creation: There are four basic steps to the Evaluation Creation Process:
- 1) Create Ratings – Evaluation Answers and Scoring (see separate Rating Type – How to Guide)
- 2) Create Evaluations – Name the evaluation, select the evaluation type, associate default rating and select attributes.
- 3) Create Evaluation Questions – After the evaluation is saved, specific questions to include in the evaluation form can be added and rating, scoring, comments and additional attributes selected.
- 4) Apply Evaluations to Courses – At the course level, select the specific evaluation from a dropdown list of saved evaluations; at the instance level, select whether to make the evaluation mandatory.
- Evaluation Use - From a user standpoint, the user needs to access, complete and save the evaluation.
- ''''Evaluation Reporting - Finally, the administrator, manager or instructor can view evaluation related reports.
Objectives
Upon completion, you will be able to:
- Create Evaluations
- Create Evaluation Questions
- Add an Evaluation to a Course
- Access and Complete Evaluations
- Aggregate and Report Evaluations
SECTION 2: EVALUATION FEATURE –HOW TO GUIDE
Section 2.1: Create an Evaluation
How to Access the Evaluation Feature
Each specific Evaluation is created using the Advanced View > Learning Object dropdown menu.
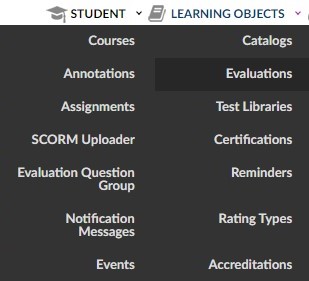
- Click on the Learning Objects Dropdown Box
- Click Evaluations
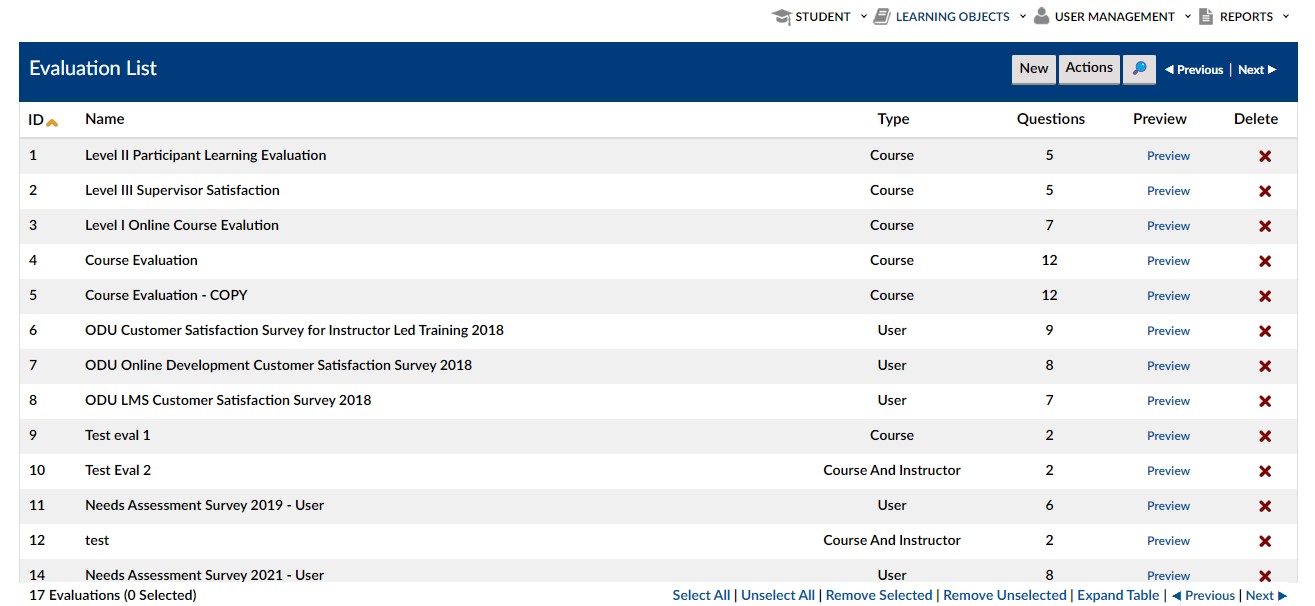
This will bring up the Evaluation List screen which displays Evaluations that were previously added to the system.
How to Add a New Evaluation
To add a New Evaluation
- Click on the New button near the top right portion of the screen.
- This will launch the Evaluation Details screen.
- Complete the Required fields Entity Type and Evaluation name.
- Enter the optional field information.
- The level of detailed entry will vary based on your organizational needs and the specific fields (attributes) shown may vary depending on the Evaluation Entity Type selected. (See Explanation of fields on the next page for next steps.)
- When complete, click Save
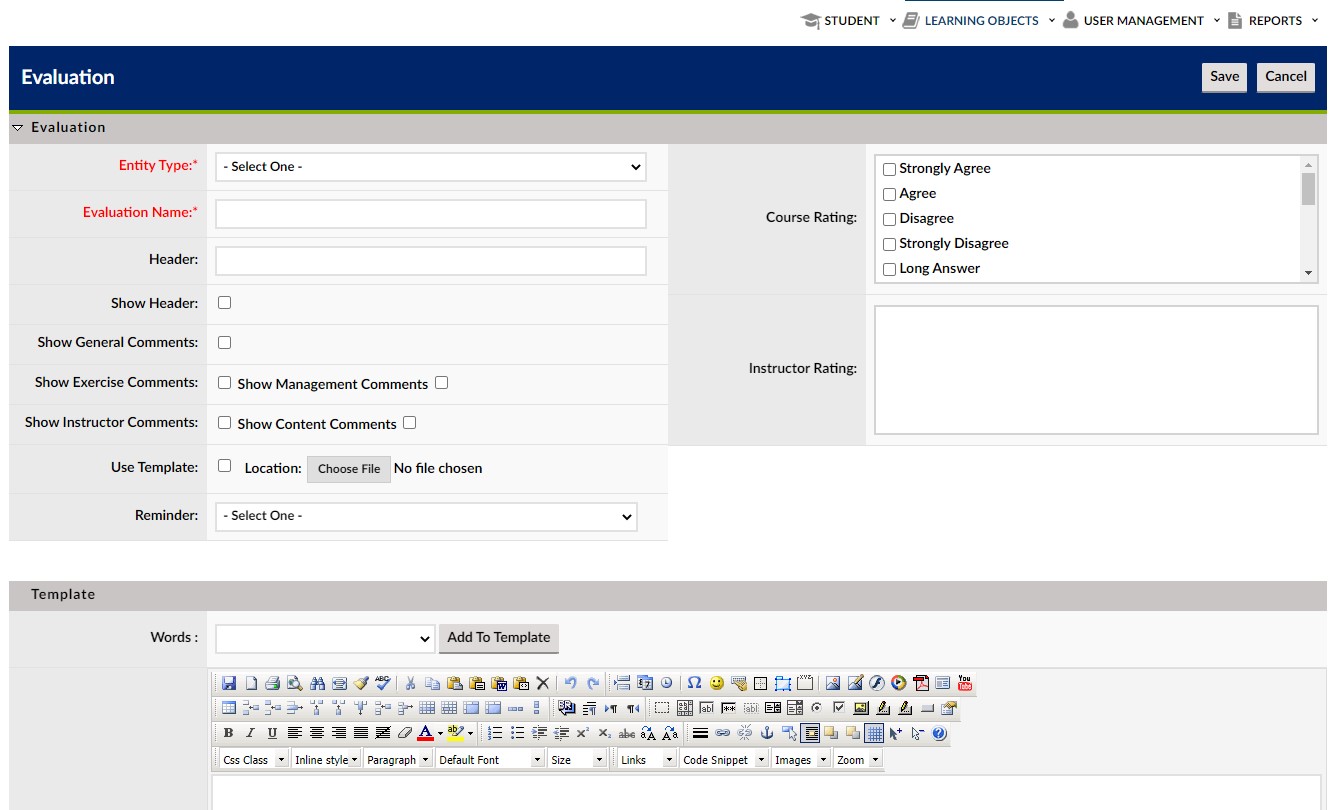
- Entity Type – The type of Evaluation, such as Course, Instructor, and Course & Instructor.
- Evaluation Name – A name for the evaluation. Follow organizational naming conventions. Best practice recommendations include being consistent and using names that will be easily recognizable in future keyword searches.
- Header – This would be the text showing at the top of the evaluation.
- Show Header – Checkbox that if enabled shows the header text at the top of the evaluation. If not selected, no header will show.
- Show General Comments – A checkbox that if enabled shows a textbox in which the user can enter general comments.
- Show Exercise Comments – A checkbox that if enabled shows a textbox in which the user can enter data calculations.
- Show Management Comments – A checkbox that if enabled shows a textbox for manager comments.
- Show Instructor Comments– A checkbox that if enabled shows a textbox for instructor comments.
- Show Content Comments– A checkbox that if enabled shows a textbox for content comments.
- User Evaluation – Part of the 360 Degree Performance Management Module of the TMS (Talent Management Suite). Please see separate guide for details
- Weight – Part of the 360 Degree Performance Management Module of the TMS (Talent Management Suite). Please see separate guide for details
- Manager Evaluation – Part of the 360 Degree Performance Management Module of the TMS (Talent Management Suite). Please see separate guide for details
- Weight – Part of the 360 Degree Performance Management Module of the TMS (Talent Management Suite). Please see separate guide for details
- Subordinate Evaluation – Part of the 360 Degree Performance Management Module of the TMS (Talent Management Suite). Please see separate guide for details
- Weight – Part of the 360 Degree Performance Management Module of the TMS (Talent Management Suite). Please see separate guide for details
- Peer Evaluation – Part of the 360 Degree Performance Management Module of the TMS (Talent Management Suite). Please see separate guide for details
- Weight – Part of the 360 Degree Performance Management Module of the TMS (Talent Management Suite). Please see separate guide for details
- Compensation – Part of the 360 Degree Performance Management Module of the TMS (Talent Management Suite). Please see separate guide for details
- Merit Based – Part of the 360 Degree Performance Management Module of the TMS (Talent Management Suite). Please see separate guide for details
- Use Template - Allows you to import a template for a customized evaluation “look and feel”.
- Template Location – The file directory location of the template file. Clicking browse will provide a familiar windows explorer file tree to allow finding location of the template file.
- Reminder - Dropdown box that allows association of a reminder with completion of the evaluation. Selection is from an existing set of reminders created in the LMS system.
- Course Rating - A selection of checkboxes representing various course ratings created in the ratings type section of the LMS.
- Manager Rating - Part of the 360 Degree Performance Management Module of the TMS (Talent Management Suite). Please see separate guide for details.
- Instructor Rating - A selection of checkboxes representing various course ratings created in the ratings type section of the LMS (only accessible if an instructor or course & instructor type are selected).
- User Rating - Part of the 360 Degree Performance Management Module of the TMS (Talent Management Suite). Please see separate guide for details
- Template – A textbox where html code can be manually or auto (see template location) loaded to ensure the evaluation has a custom look and field.
* Required Fields
The Evaluation is now created, and the system will display the completed Evaluation Details page (You can see the Evaluation Name in the upper left-hand corner) in read / only mode. The Evaluation will also be available in the Evaluation List (previously shown). Repeat the above steps as necessary for all Evaluations required.
To Edit, click on the Edit button in the group of buttons in the upper right corner.
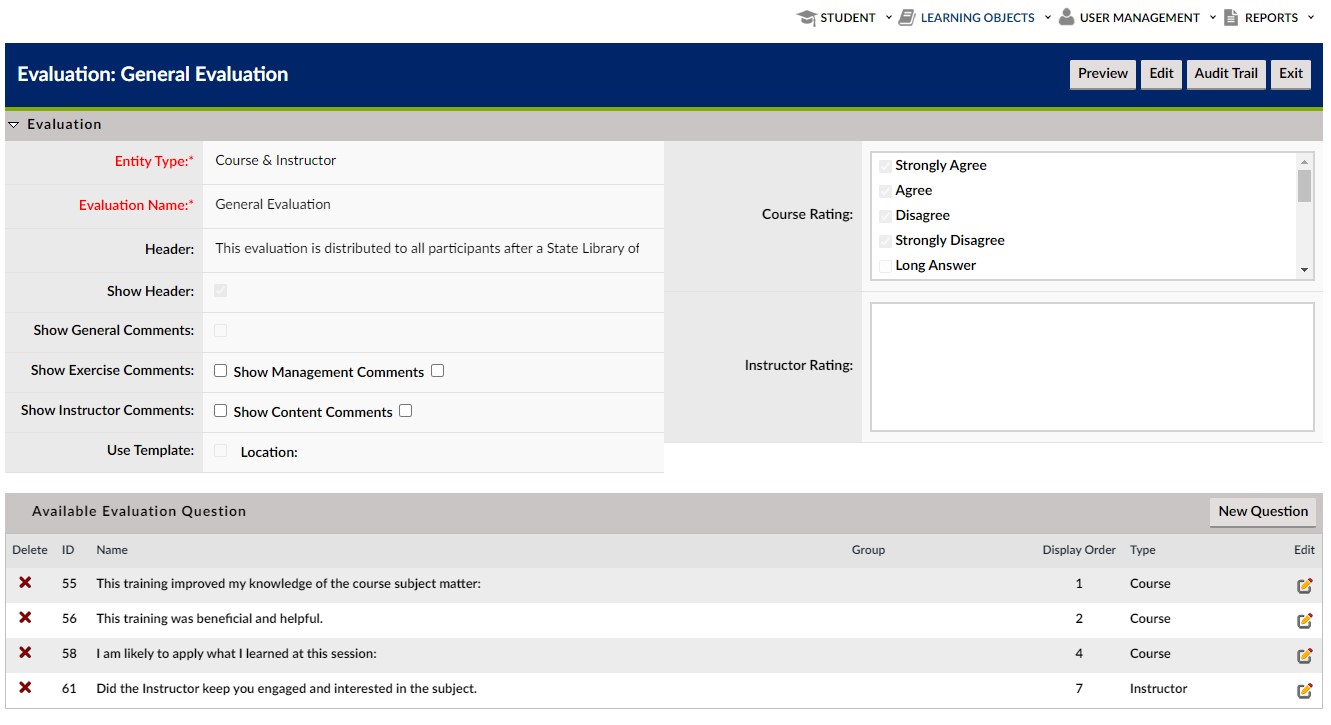
Section 2.2: How to Add Questions to an Evaluation
Upon creation of an evaluation (or when selecting an evaluation from the Evaluation List), a new section will appear just above the Template text box. This section - Available Evaluation Question - will allow the designer to add specific questions to the evaluation. To do so:
- Click the New Question button on the right side of the Available Evaluation Question section (about ½ down the Evaluation Details page).
This will bring up the Evaluation Question / Question Details popup page.

Explanation of Question Detail Fields:
- Question*- A text box where the creator can type in the question to be asked of the evaluator (e.g. “How would you rate the instructor’s performance?”)or comments or directions to help the evaluator respond (e.g. “Please enter comments to help make our course better.”)
- Rating - A text box that will list a single or group of predefined ratings that the creator can populate or remove using the Add / Remove buttons (and associated dialog). Note, ratings added in this section will override defaults created in the previous section and can allow for different answer types in a single evaluation.
- 'Entity Type*- A dropdown box allowing the creator to select the type of entity to which the evaluation applies. Types may include: Course, Course and Instructor, Instructor (The TMS system also ads Organization Goal, Personal Goal and User). Note: When selected various other attributes described in this table may or may not be visible / enabled
- Question Group – Allows the grouping of questions for both ordering and later reporting purposes.
- Display Order – the order in which the question will display within the evaluation / question group grouping.
- Weight- The particular weighting of this question as part of the scoring of all the questions in the evaluation
- Show Comments – If selected, a comments textbox will be shown in which the user can add comments.
- Force Comments – if selected, the user MUST enter comments in the comments textbox or an error message will pop up and prevent the user from saving the evaluation.
- Exclude from calculation- if selected, will exclude this question from the scoring system of the evaluation.
- Hide Ratings – if selected, will hide the rating types from the user. Often used with comment boxes where no associated rating is needed (e.g. “Please enter comments below”)
- Multiple Ratings Selection – if selected, will allow the user to choose more than one response from the list of rating types.
- Min. Score Force Comments – textbox to enter a numeric minimum score where if the user selects a rating type with a value below that score, they will be required to enter comments.
- Max. Score Force Comments – textbox to enter a numeric maximum score where if the user selects a rating type with a value above that score, they will be required to enter comments.
- Optional- If selected will allow the user to skip the question and not have to answer it.
- Enter the required information.
- Enter any optional information.
- Click the Save button located near the top right of the screen.
The Question has now been created and the system will display the completed Evaluation Details page (You can see the Evaluation Name in the upper left-hand corner) in read / only mode and the question will appear in the Available Evaluation Question Section.
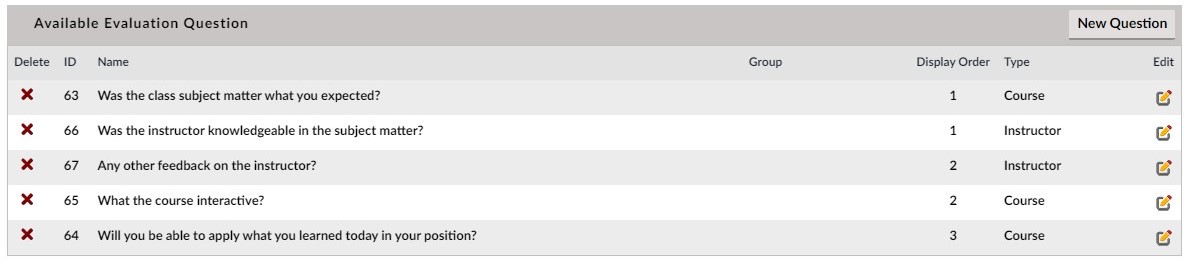
If you want to edit the question, click on the pencil icon on the right side of the question. If you want to Delete the Question, click on the red X icon on the left side of the question. To add another question, click on the New Question button and follow the steps outlined above (Note: You may also use the Save and New button, when enabled, to save a question and directly set up a new question).
Repeat the above steps until all questions associated with this evaluation have been entered and saved.
After saving, you can click the Preview button to see a preview of the Evaluation.
Section 2.3: Adding an Evaluation to a Course
This document will assume Administrators already know how to navigate, create and edit Learning Object (Courses) and Course Instances. If not, see separate Courses – How to Guide.
How to Select an Evaluation in the Learning Object (Course) Details Page
Whether adding a new course or editing an existing course:
- Access the Learning Object (Courses) Details page of the specific course to which you wish to add an evaluation.
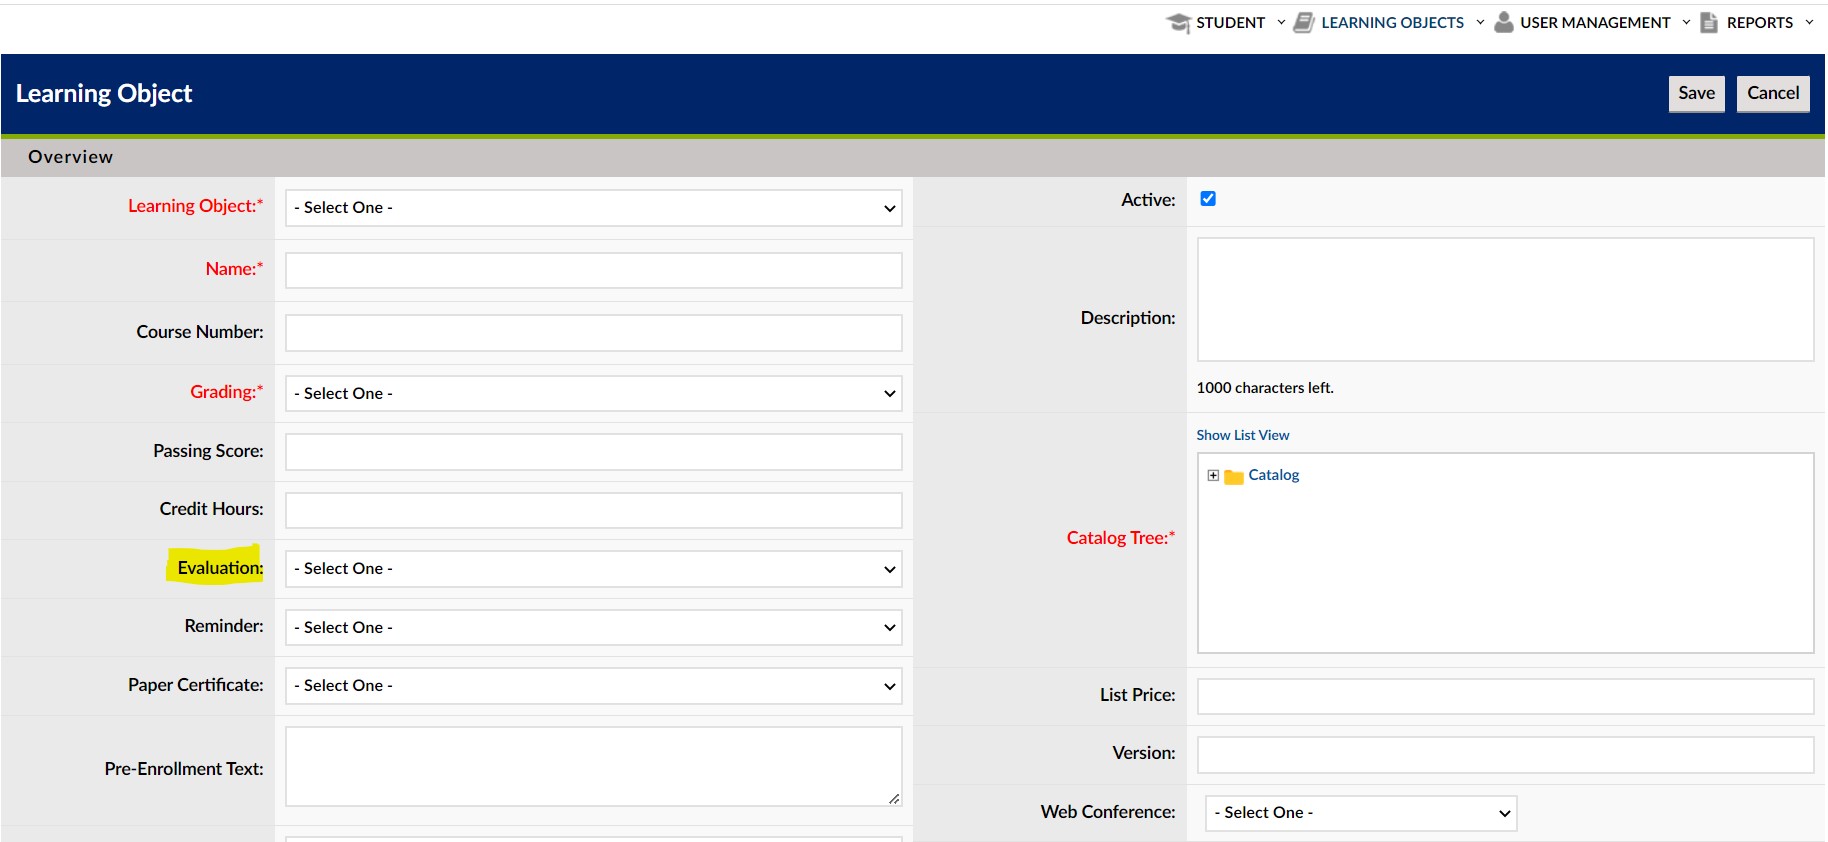
- Navigate to the Evaluation option and associated dropdown box on the left side of the page about ½ way down
- Select the evaluation to associate with this course from the Evaluation dropdown box.

- When complete with all entries or edits, make sure to save the course entries / updates by clicking the Save button.
(Optional) How to Make an Evaluation Mandatory in a Class Instance
By default, completion of evaluations is optional. To make an evaluation mandatory (user will not receive credit for the course until the evaluation is (and other requirements are) complete):
- Create or edit a specific course instance for which you wish to make the associated evaluation mandatory (Navigate to the Learning Object Instance Details page).
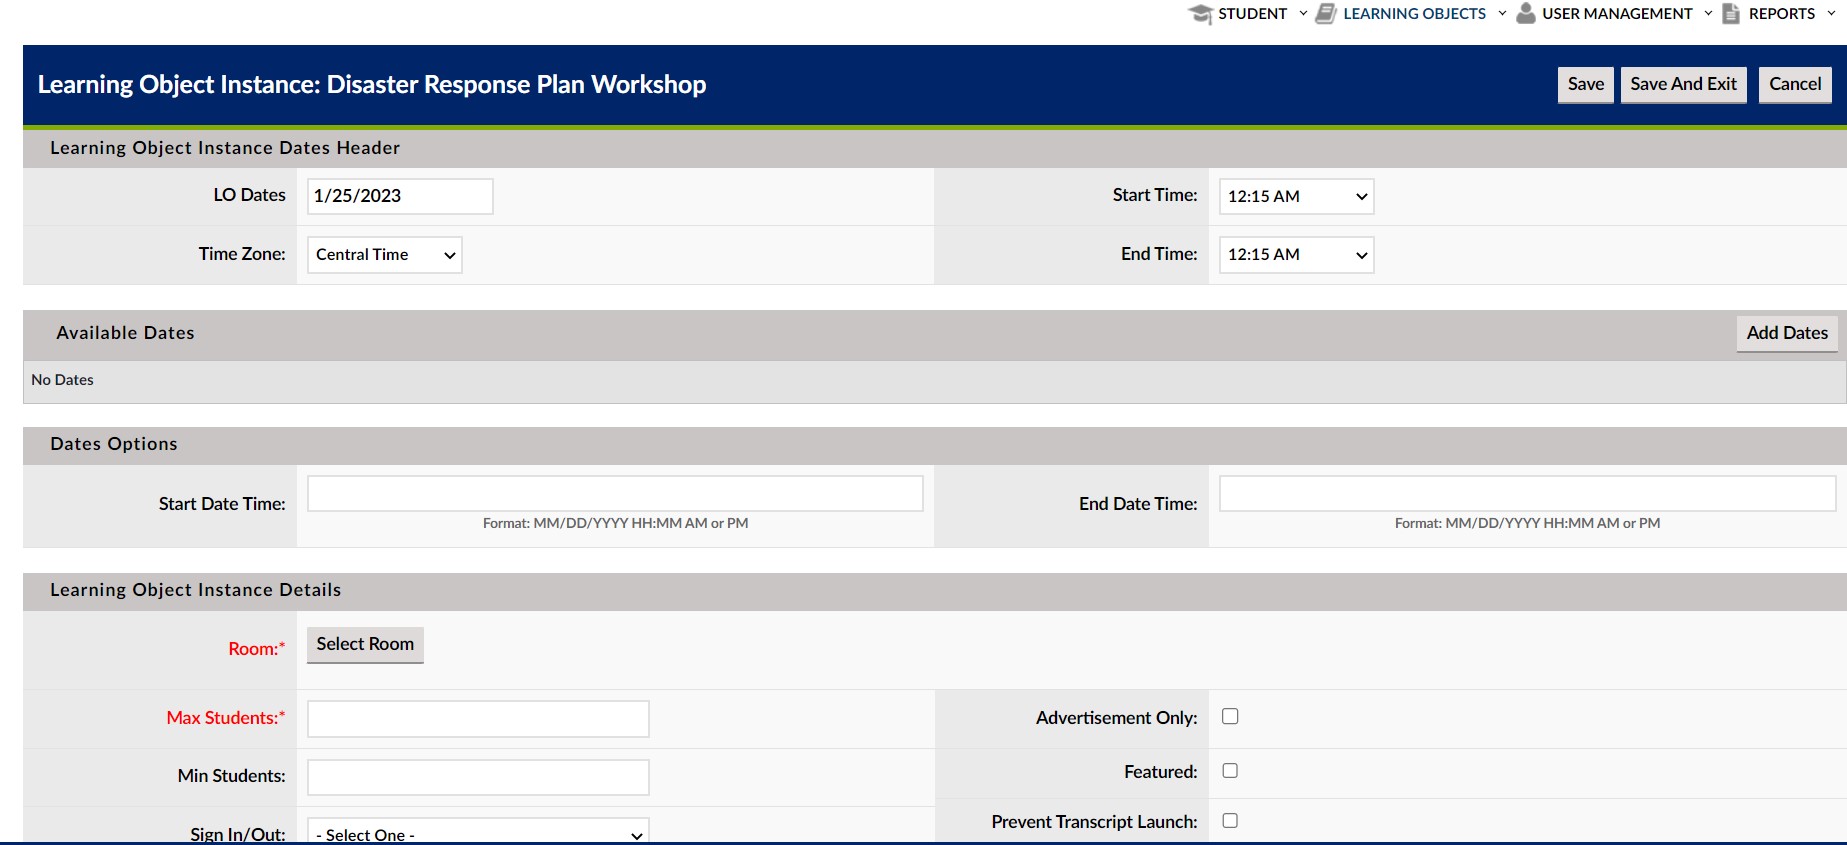
- Click the checkbox to the right of the Force Evaluation text in the right-hand group of course instance attributes.

- When complete with all entries or edits, make sure to save the instance entries / updates by clicking the Save (or Save and Exit) button.
(Optional) How to Set Evaluation Start Days
By default, completion of evaluations is optional. To make an evaluation mandatory (user will not receive credit for the course until the evaluation is (and other requirements are) complete):
- Navigate to the desired course instance by following step 1 of the prior section.
- Enter the number of days in the Evaluation Start Days Text box (Below the Force Evaluations textbox)

- When complete with all entries or edits, make sure to save the instance entries / updates by clicking the Save (or Save and Exit) button.
Section 2.5: Accessing and Completing Evaluations
When an Evaluation is associated with a report, it will show as an icon (paper & pencil) and link (Evaluation) to the right of the course name in the listing of courses in the (Simple View) My Courses Tab.
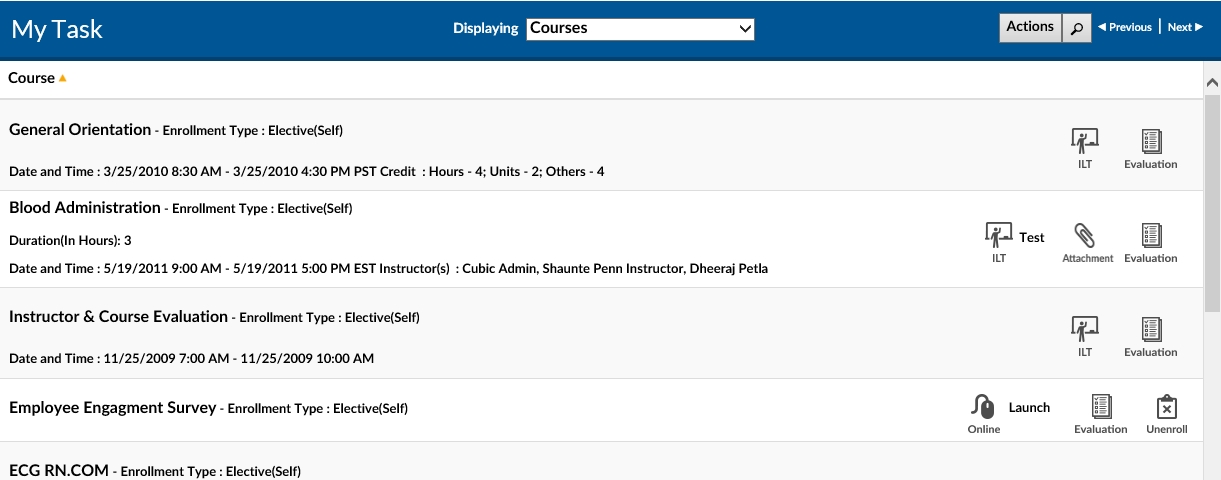
To access and complete the evaluation,
- Click on the Evaluation icon / link.

- This will launch the evaluation form in a separate window.
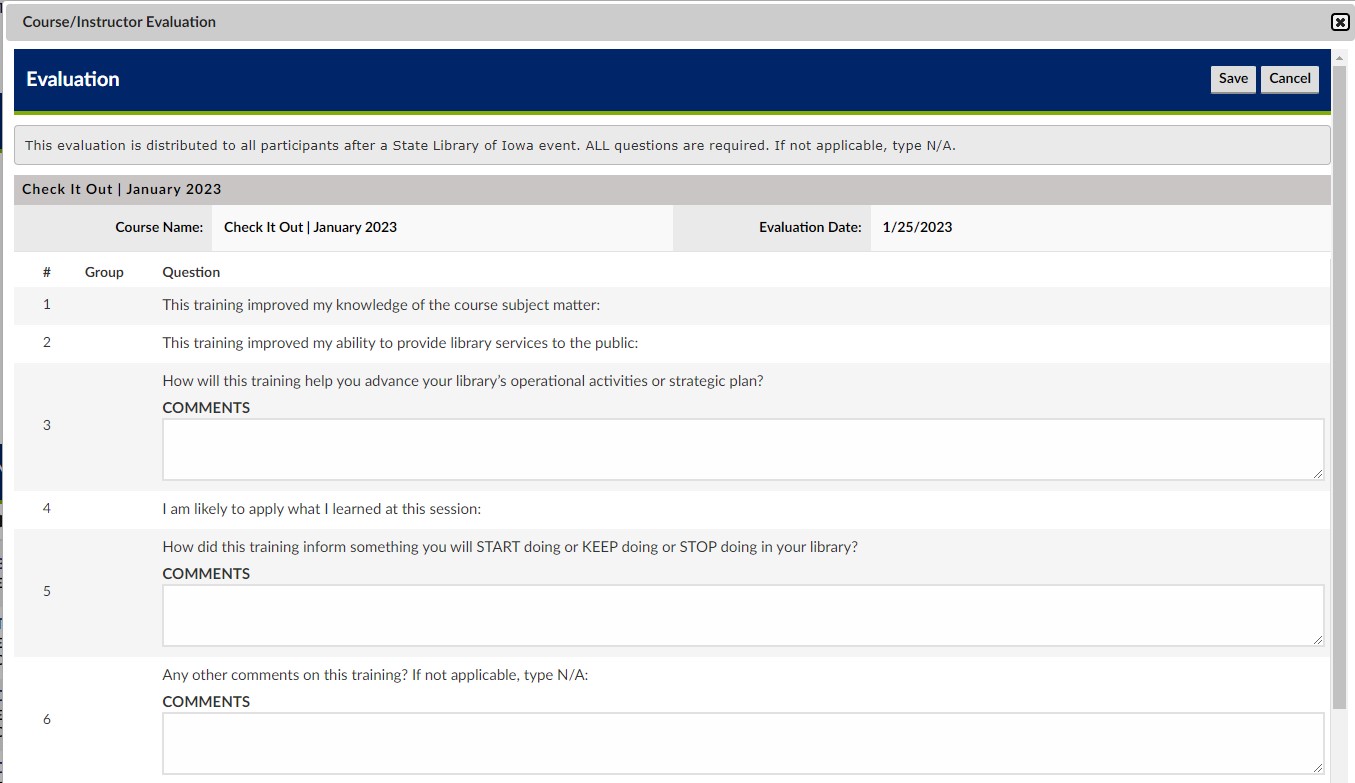
- Complete the evaluation.
- Follow directions as to whether to select a single or multiple ratings and whether comments are required or optional.
- When finished click the Save button.
- If required information is missing, a popup message may prompt you to enter such information prior to being able to save successfully.
Section 2.6: Viewing Evaluation Reports
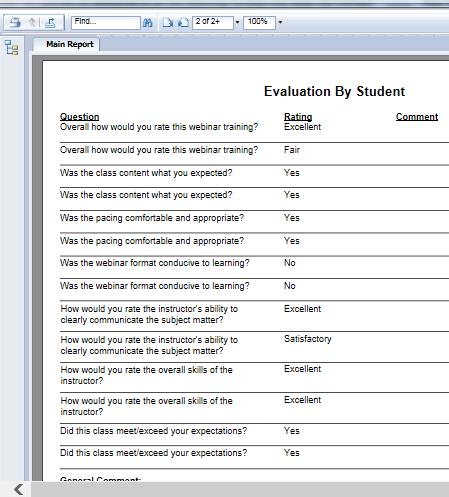
There are a number of Standard Reports that are associated with classroom / instructor and performance evaluations. For details on how to access, view, print and export reports, please see the separate Reports – How to Guide.
Below is a sample of an Evaluation Details Report: