ROMS - HOW TO GUIDE
SECTION 1: ROMS – FEATURE OVERVIEW
Who Should Use This Guide
This guide is for - Learning Management System (LMS) Client Super administrators and Administrators to enable them to utilize and train others in the use of the ROMS Functionality as both creators and users.
ROMS - Overview
What are ROMS?
ROMS stands for Relative Object Management System. In the Learnsoft LMS, ROMS are a feature that allows a series of objectives (also called a skills / competencies Checklist) to be associated to a course and demonstrated / reviewed prior to the user receiving credit for the course.
For example, after taking a CPR course, a nurse may be required to show that they can demonstrate the required steps necessary to show proficiency in CPR (E.g. 1) Check for responsiveness, 2) begin chest compressions -Push down in the center of the chest 2 inches 30 times, 3) Tilt the head back and lift the chin. Pinch nose and cover the mouth with yours and blow until you see the chest rise. Give 2 breaths). . A manager or proctor can review to ensure the student performed each step in a satisfactory manner when measured against predetermined objectives.
Once the entire Checklist of skills is completed and recorded (and, if necessary, receives approval or is considered passing) in the LMS, the student can receive credit for the course.
Course Overview
The purpose of this manual is to guide administrator(s) on how to effectively add and associate ROMS to courses.
There are four basic steps to the ROMS Process: 1) Add a skill / competency to the LMS System; 2) Enable ROMS at the Course Level; 3) Add a Checklist of Objectives (derived from skills / competencies) to a course; 4) Access the Checklist of Objectives for demonstration / testing purposes then mark / grade accordingly.
The first three steps are accomplished by those with permission to create skills and courses and add ROMS. The final step is for users and those authorized to ensure objectives are met, for example Proctors.
Add a skill / competency to the LMS System
ROMS are associated with skills. These can be part of an external standard, for example Meeting an OSHA requirement for labeling of hazardous chemicals, or part of an internal process, for example, Showing how to greet patients properly at a particular company’s outpatient center.
Skills are added in the Advanced View > User Management Drop Down menu (& selecting “Skill” from the “User Manager” section).
Note, if desired Skills have previously been created, this step can be skipped.
Allow ROMS at the Course level
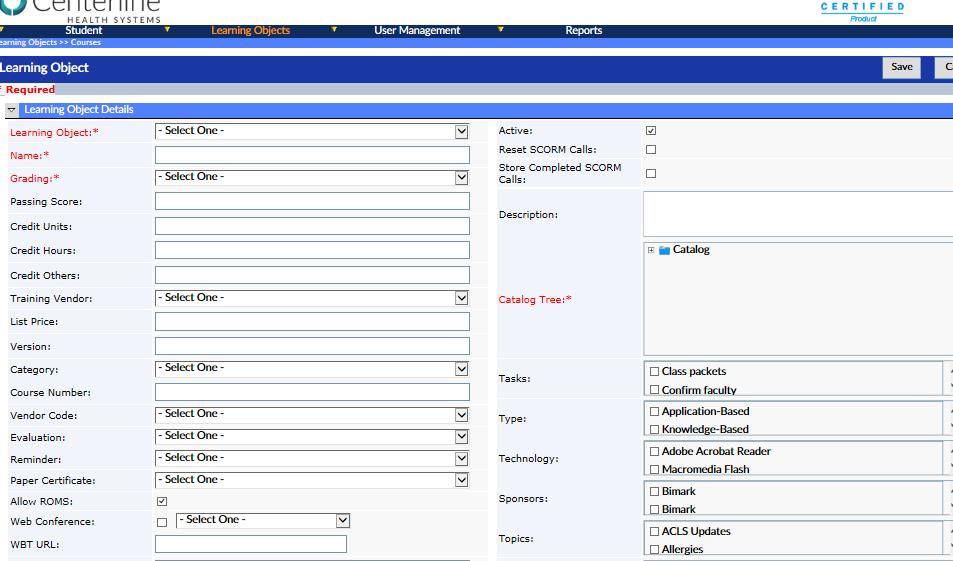
For ROMS to be active and utilized, it must be enabled at the Learning Object Course level. This can be done when creating a course or when editing a course after it has been created. To enable ROMS, simply ensure that the Allow ROMS checkbox is checked.
Add a Checklist of Objectives to a Course
After creating a course and enabling ROMS, when viewing Course details, there is a section named Available Objectives. If there are Objectives already associated with this course, they will be visible and editable in this section. To associate a new Objective with this course, click on the New Objectives button. This will launch the Learning Object Objectives details screen, which will allow you to both associate an already created skill / competency and enter additional objective information
Access & Use the Checklist
When enrolling in a course, the user will be able to see the ROMS drop-down box below the Course Name in their Course List (“My Courses”). The user simply uses the drop-down to select the specific ROMS that will apply to them and confirms via a pop-up confirmation. Once confirmed all predefined attributes for the specific selected ROMS section will be applied.
Objectives
Upon completion, you will be able to:
- Add a Skill / Competency
- Allow ROMS at the Course level
- Add a Checklist of Objectives to a Course
- Access & Use the Checklist
SECTION 2: ADD A SKILL / COMPETENCY TO THE LMS SYSTEM ==
ROMS are associated with skills / competencies. These can be part of an external standard, for example Meeting an OSHA requirement for labeling of hazardous chemicals, or part of an internal process, for example, showing how to greet patients properly at a particular company’s outpatient center.
To Add a Skill / competency to the LMS system, follow these steps (Note, if Skills have previously been created, this step can be skipped):
2.1 How to add a Skill to the LMS system
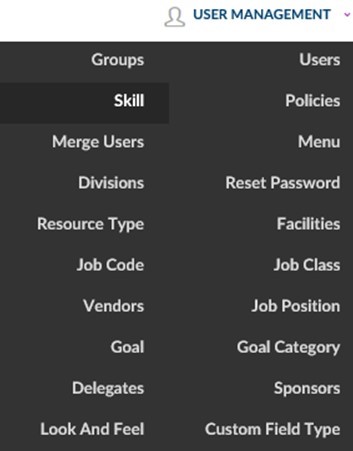
- Click on the User Management dropdown box.
- Click Skill.
This will bring up the Skill List screen which displays Skills that have previously been added to the system.

To add a New Skill
- Click on the New Skill button near the top right portion of the screen.
This will launch the New Skill Details screen. The level of detailed entry will vary based on your organizational needs. (See Explanation of fields on the next page for next steps.)
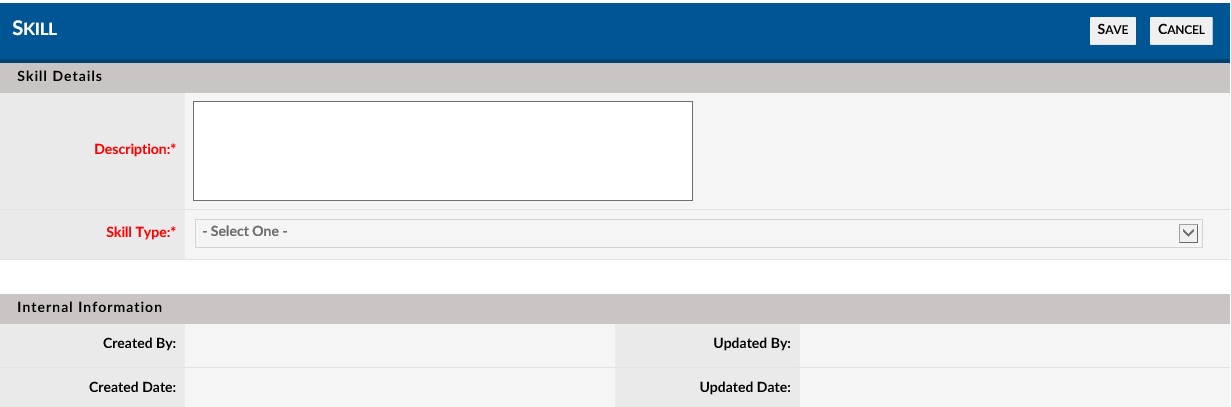
Explanation of Fields: Skill Details
Description* - Also called a competency. This is a description of the skill that will need to be demonstrated by the student
Skill Type * - NOTE: NOT CURRENTLY ENABLED
''''* Required Fields
- Enter a description of the skill in the description field (This can also be understood as the competency which will be tested).
- Click the Save button located near the top right of the screen.
The Skill has now been created and will be available in the Skill List. Repeat this step as necessary for all Skills to which ROMS will be associated.
Section 2.2: Allow ROMS at the Course level
For ROMS to be active and utilized, it must be enabled (allowed) at the Learning Object Course level. This can be done when creating a course or when editing a course after it has been created. To enable ROMS, simply ensure that the Allow ROMS checkbox is checked in the Learning Object Course Details Page.
2.2.1 How to Allow ROMS on the Learning Object Course details page
This document will assume the user is already familiar with creating and editing Learning Object Courses. Accordingly, when creating or editing this information for a course in which you wish to allow ROMS:
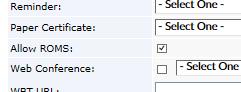
- Check the Allow ROMS checkbox.
- Ensure that you click the Save button when finished adding all elements desired.
Section 2.3: Add a Checklist of Objectives to a Course
After creating a course and enabling ROMS, when viewing Course details, there is a section named Available Objectives. If there are Objectives already associated with this course, they will be visible and editable in this section. To associate a new Objective with this course, click on the New Objectives button. This will launch the Learning Object Objectives details screen, which will allow you to both associate an already created skill / competency and enter additional objective information.
Note: this guide will assume you have already been trained on how to add and edit courses and create course instances. Accordingly, to add an Objective to an existing course in the LMS system, follow these steps:
2.3.1 How to Add an Objective to a Course
- Select the specific Learning Object Course to which you wish to associate an ROMS and open the (Course) Learning Object Details Page
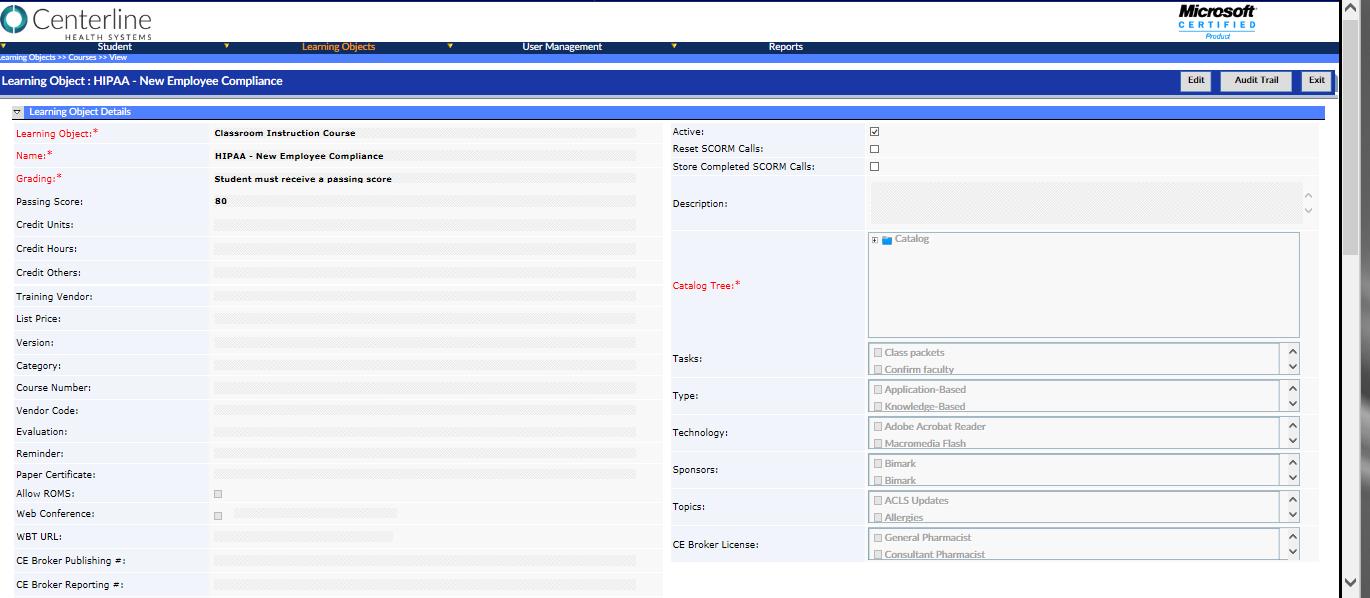
:# Note: Do NOT select “Edit” Mode (Do not click on the EDIT button which allows you to edit Course details, but makes ROMS info read only.
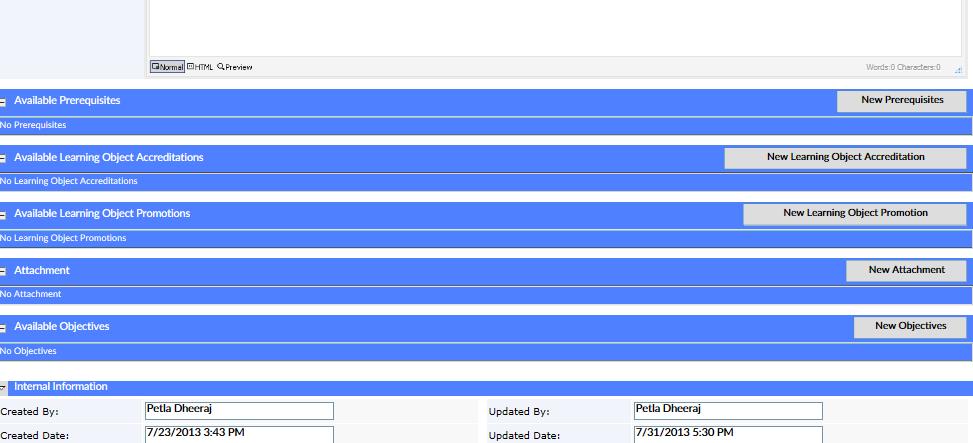
- Scroll down to the Available Objectives section (in the lower portion of the page).
Screenshot 07
- Click on the New Objectives button on the right side of the Available Objectives section.
- This will bring up the Learning Object Objectives Details page in a separate (pop-up) browser window. It is here where you specify attributes for this specific ROMS / Course association. (The level of detailed entry will vary based on your organizational needs. (See Explanation of fields on the next page for next steps.)
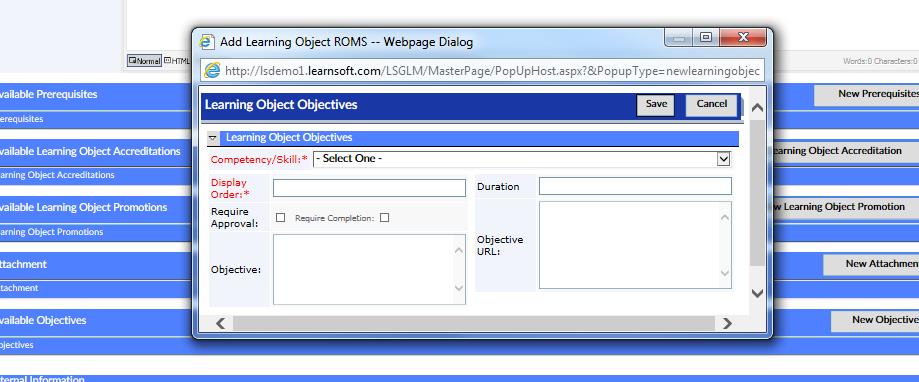
2.3.2 Explanation of Fields (Attributes): Add Learning Object Objectives Details
- Competency / Skill* - The name of the ROMS selected from a dropdown list of previously created skills / competencies (See section 1).
- Display Order* - The order in which objectives will be displayed in the Checklist. (For example, if adding two different objectives to a course and you want this one to display first, enter 1. If you want it displayed second, enter 2).
- Require Approval - If checked then an authorized person must approve the objective to receive course credit.
- Require Completion - If checked then the specific objective must be marked as complete to receive course credit
- Objective - The specific objective being demonstrated / tested. Can also use to give direction or Instructors to users and those authorized to review
- Duration - The number of days the competency is valid (For example, if one year, enter 365
- Objective URL - An external URL that can be used to show objective details.
- '*Required Fields
- Enter the required information.
- Enter any desired optional attribute information.
- Click the Save button located near the top right of the screen to save the attribute association between this particular Course and Objective.

Screenshot 09
The Learning Object Objective has now been added to this course. It will now show in the bottom portion of the Available Objectives Screen. Repeat this step as necessary for all Objectives to be applied to each particular course.
Below is a screen shot showing a single course with four associated Objectives, each with different competencies. Together, these will comprise a Checklist of Objectives.

Section 2.3. b Force ROMS at the instance level
Check the FORCE ROMS checkbox at the course instance level
Section 2.4: Access & Use the Objectives Checklist
After enrolling in a course with associated objectives, both the user and authorizer (for example, a Proctor), need to access the Objectives Checklist to both demonstrate competency (User) and approve or note as completed, as required (Authorizer / Proctor).
This guide will assume users are already familiar with enrolling, taking and launching courses. This section will focus on specific additional items that will be seen and must be selected.
2.4.1 How Access & Use the Objectives Checklist- USER
This manual assumes that users do know how to select and enroll in courses and view their courses. When viewing their courses in the My courses view, the user will see a red arrow/ bullseye icon with the word Checklist written just below the image
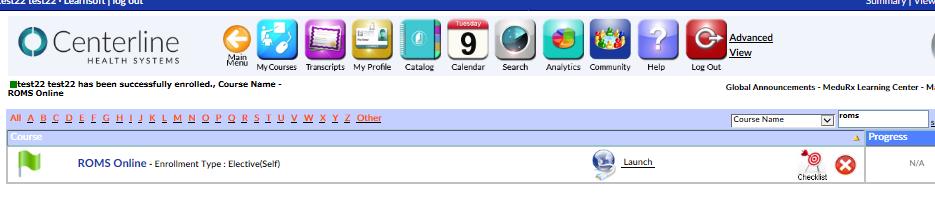
- To Access the Checklist of Objectives, click on the Checklist icon.
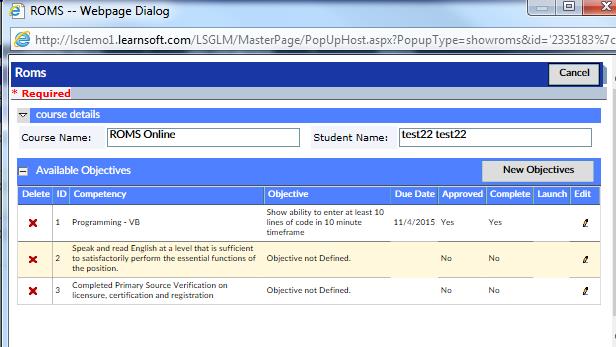
- This will launch a separate pop-up ROMS window with a line by line listing of each Available Objective for the selected Course (Course Name) and Student (Student Name).
- The attributes ID, Competency, Objective, Due Date, Approved, Complete, Launch and Edit (pencil icon) will also show if available.
- The “Delete” icon will not be available to the user.
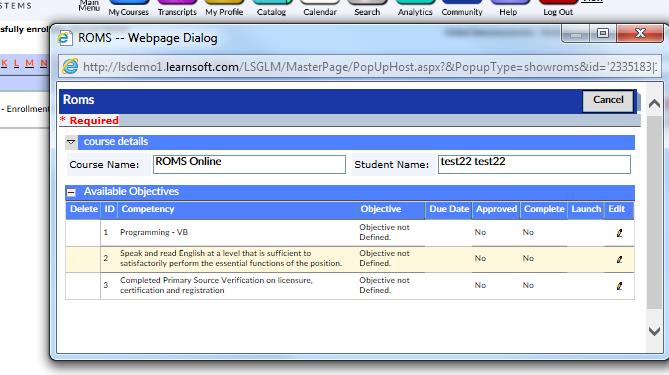
- To view and comment on a specific Objective/ Competency, click on the edit (pencil) icon for the corresponding row.
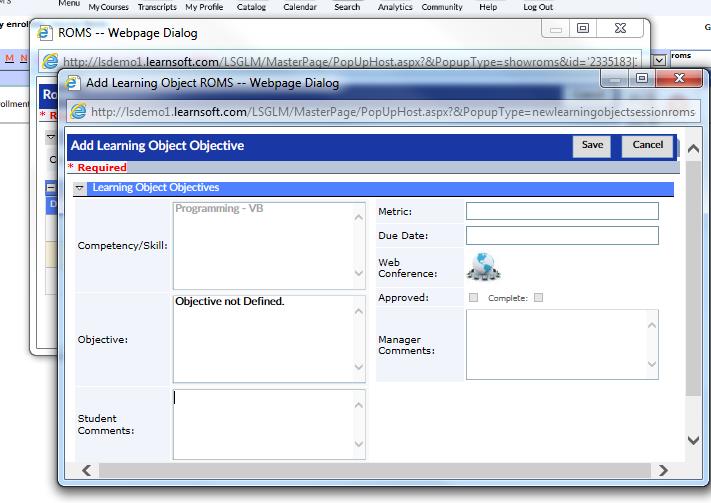
- This will launch a separate pop-Learning Object Objectives detail page where the user can review more detailed information and add comments.
- The user is only able to edit / add comments to the Objectives, Student Comments and Metrics text boxes. They are not able to adjust any other section nor able to mark their status as Approved or Complete.
- To Save their Edits, click the Save button on the upper right hand corner. To Cancel; click Cancel. Either will return the user to the prior screen.
2.4.2 How Access & Use the Objectives Checklist- Approver / Proctor
This manual assumes those given the ability to approve competencies / skills, such as proctors are already familiar with accessing, enrolling and updating student / course info
When accessing the Advanced View >Student > Enrollment feature (and, if desired to narrow down choices, using selectors, such as View Group and Course Name) and viewing users who have associated ROMS Objectives, the Approver / Proctor will see a link named Checklist in the Actions Column.
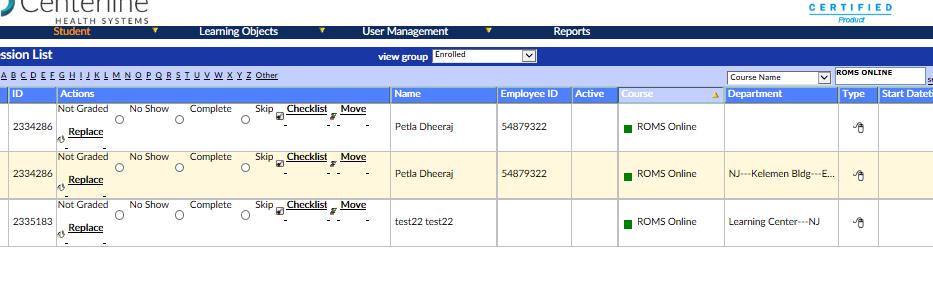
- To Access the Checklist of Objectives, click on the Checklist link.
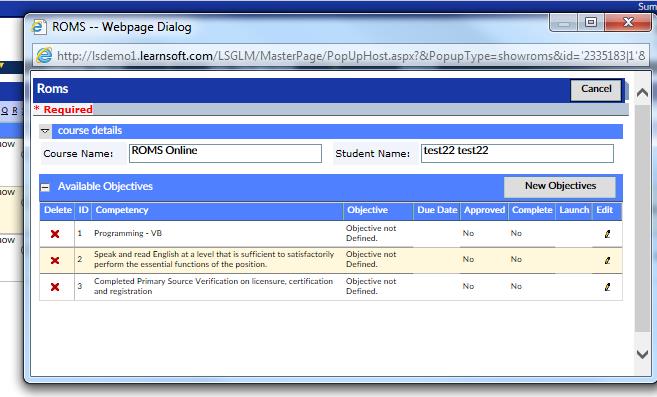
- This will launch a separate pop-up ROMS window with a line by line listing of each Available Objective for the selected Course (Course Name) and Student (Student Name).
- The attributes ID, Competency, Objective, Due Date, Approved, Complete, Launch and Edit (pencil icon) will also show if available.
- The “Delete” (Red X) icon will be available to the authorizer / proctor (but not the student)
Screenshot 15
- To view and comment on a specific Objective/ Competency, click on the edit (pencil) icon for the corresponding row.
- This will launch a separate pop-Learning Object Objectives detail page where the authorizer / proctor can review more detailed information, add comments, approve and mark as completed.
- The authorizer / proctor is able to edit / add comments to the Objectives, Manager Comments and Metrics text boxes. They are can set a due date and are able to mark the status as Approved or Complete.
- To Save their Edits, click the Save button on the upper right hand corner. To Cancel; click Cancel. Either will return the user to the prior screen.

Screenshot 16
Upon Saving the Prior screen will be updated with the new information.
Screenshot 17
Once all Objectives are marked as Approved and / or Completed (depending on requirements), the student will be eligible to receive credit for the course.