DELEGATES - QUICK START GUIDE
DELEGATES - QUICK START GUIDE
What is a Delegate?
Delegates allow the creation of reusable groups of targeted users (similar to an email distribution list) that can then be quickly added to courses, assignment and reports.
How to Add a Delegate
- The Delegate feature can be accessed using the Advanced View > User Management > Delegates dropdown menu.
- This will bring you to the Delegate List page where you can view, edit, delete existing assignments and create (and schedule) new Delegates.
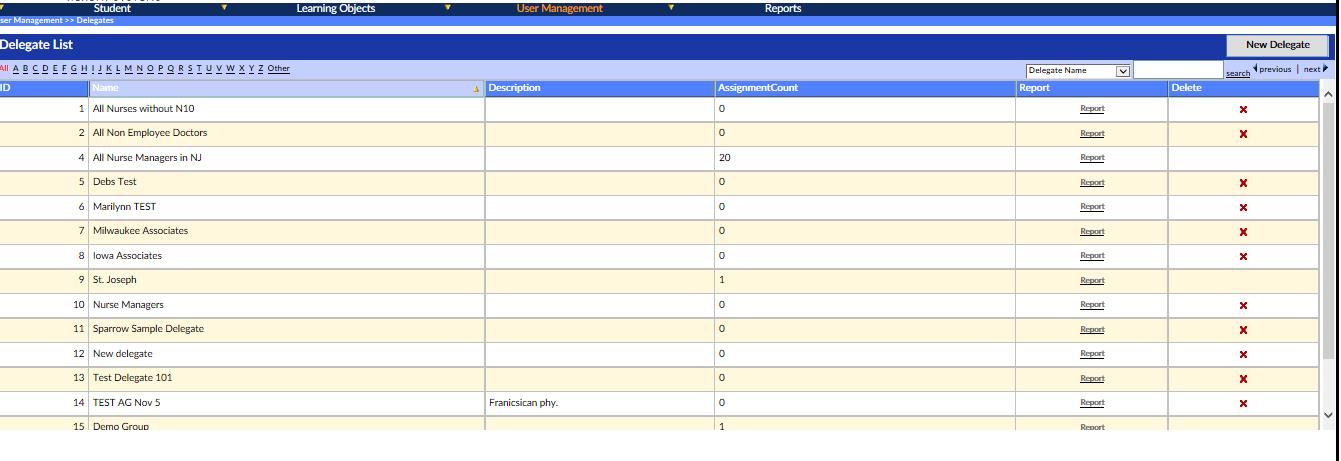
- To add a delegate, click on the New Delegate button in the upper right hand corner of the Delegate List page.
- This will launch the Delegate details page which consists of two main sections: Delegate info and Selectors

- The only required entry in the Delegate info section is a Name for the delegate list.
- It is good practice to enter a description, but it is not required.
- There are special checkbox selectors which you can use if you want the delegate list restricted to predefined employment and leadership levels (a TMS function)
- In the Selectors section of the Delegate Details page, the creator is able to choose a scope by which groups of users can be added to the delegate list. Additionally, the creator can both add and exclude specific individual users. Choose a selector or multiple selectors from the following options.
- Job Class, Job Code or Job Position selectors allow you to add groups of users with these attributes to the delegate (for example, you can select users with the job position “managerâ€). To do so, click the Add button of the desired selector, then use the lookup screen to find desired items and click the Add Job (Class, Code or Position) button to add to the delegate and populate the associated text box.
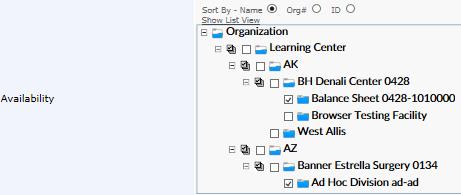
- The Availability selector, which uses a tree structure and usually represents some type of company organization chart, allows the creator to specify which parts of the organization to include in the Delegate list. By clicking the (+) button the tree will expand to show deeper levels of the organization. The creator can select which part of an organization will be eligible to be part of the Delegate list by simply clicking the checkbox next to that listing (location, division, department, etc.)
:# The Available Users and Exclude Users selectors allow you to add specific individual users to or exclude specific users from an assignment. To do so, click the Add button of the desired selector, then use the lookup screen to find desired items and click the Add user button to add to or exclude from the delegate and populate the associated text box.


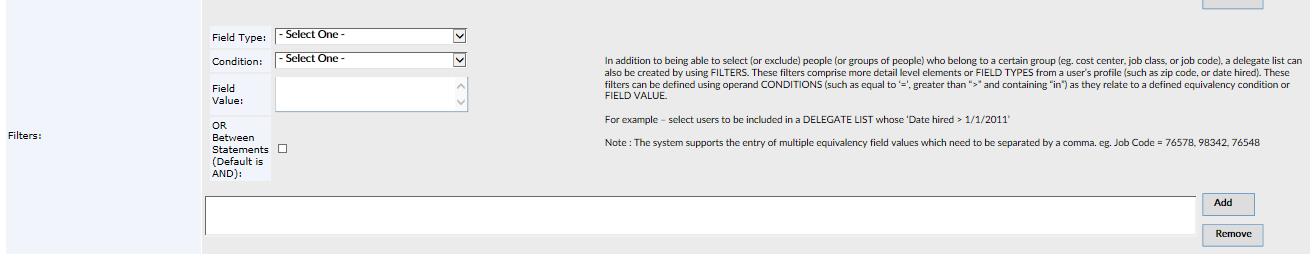
:# The FILTERS selector allows you to refine your delegate members by the use of formulas consisting of Field Types (variables that are typically found in a User’s profile), operand Conditions (e.g. =, <) and Field Values (e.g ‘Date hired > 1/1/2011’).
- :# To do so, select the Field Type and Conditions from dropdown lists and enter a Field Value. Click the Add button to add the formula(s) to the delegate.
- Once all field entries and selectors have been defined. Click the Save button to save the delegate.
How to View Delegate Members
- To View a report of delegate members from the delegate list
- Navigate to the Delegate List using the Advanced View > User Management > Delegates dropdown menu and sort / search to find the desired delegate.
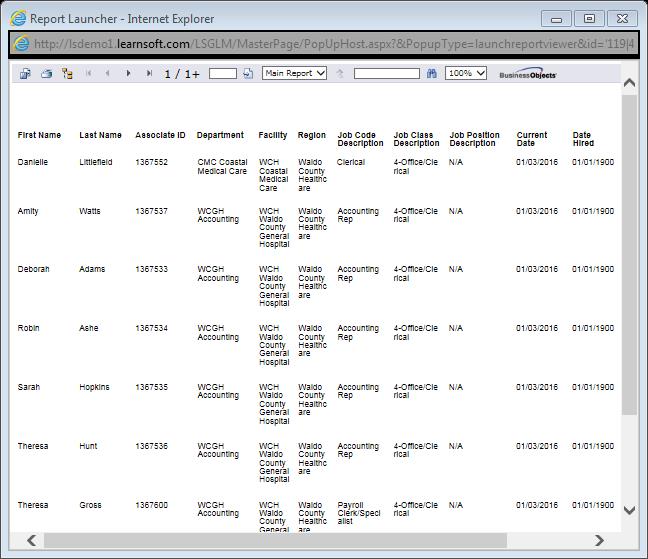
- Click on the Report hyperlink found in the Report Column of the row of the delegate which you wish to review. This will launch a report listing all users associated with this delegate.
- To View a listing of the top 100 delegate members from the delegate details page
- Navigate to the Delegate List using the Advanced View > User Management > Delegates dropdown menu and sort / search to find the desired delegate.
- Click on the row of the delegate to launch the delegate details page.
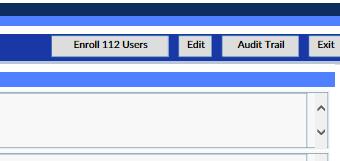
- The Enroll xxx Users button in the upper right hand corner will display the total number of user members of the delegate.
- Also, a textbox just below the filters section will both provide a listing of the total number of delegates and a scrollable list of (up to) the top 100 delegates

How to Add a Delegate to a Learning Object / Course Instance
To add a Delegate to a Learning Object / Course Instance from within the Delegate Feature.
- Use the Advanced View > User Management > Delegates dropdown Menu to navigate to the Delegate List. Sort / search to find the desired delegate.
- Click on the row of the selected Delegate and the associated Delegate Details page load.
- Click the Enroll xx Users button (see screenshot 6, above) to enroll the users in a Learning Object / Course.
- The Learning Object Instance List will launch in a popup window.
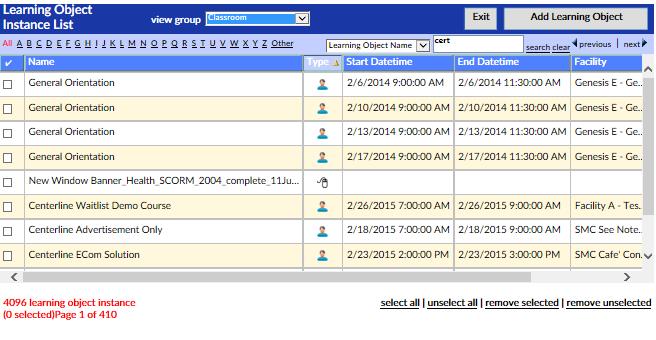
- Use the filters and lookups to find the desired Instance(s) and check on the boxes in the left most column to select those instances.
- Click on the Add Learning Object button to enroll the delegate.
- The popup window will close and the Delegate List will reopen. It will show a listing of each delegate member and provide confirmation (or a notice if unable to confirm) of their enrollment in the instance.

- Click Exit to return to the Delegate list.