Notification Messages - Admin Guide
Section 1: Notification Messages - Overview
Who Should Use This Guide
This guide is for - Learning Management System (LMS) Client Super Administrators and Administrators to enable them to utilize and train others in the use of the Notification Message Feature and Functionality.
Notification Messages - Overview
In the Learnsoft LMS, the Notification Messages feature is where the CSA can manage the event based messaging system that provides emails to users, managers and others based on system events, such as enrolling in a course.
The LMS integrates with an e-mail service as a method to inform employees/users via e-mail about updates to their learning activities.
In the Notification Message Feature, Administrators are able to create custom messages in the system that pertains to many different policies within the LMS.
A new feature allows these customized messages to also be assigned at the specific Learning Object / Course level, allowing for a far greater degree of message customization than in the past.
An even newer feature allows the CSA to set up Global System Notification Messages that will be displayed to all users at the top of the screen and / or in a separate pop-up window. These messages can even contain videos (See the separate Global System Notification Message How To Guide).
To access the Notification Message Feature, navigate to the Advanced View, hover over the Learning Object dropdown menu and select Notification Messages.
Objectives
Upon completion, you will be able to:
- Access the Notification Message Feature
- Understand the Notification Message Field options
- Override Defaults to Customize System-Wide Notification Messages
- Clone Defaults to Create Customized Notification Messages
- Add Customized Messages to Individual Learning Objects / Courses
- Understand the Messaging Hierarchy
Section 2: Notification Messages - How to Guide
2.1 How to Access the Notification Message Feature
Notification Messages inform employees/users via e-mail about updates to their learning activities.
To access the Notification Message feature:
- 1 - In the Advanced View, Hover over the Learning Object Dropdown Box
- 2 - Click Notification Messages.

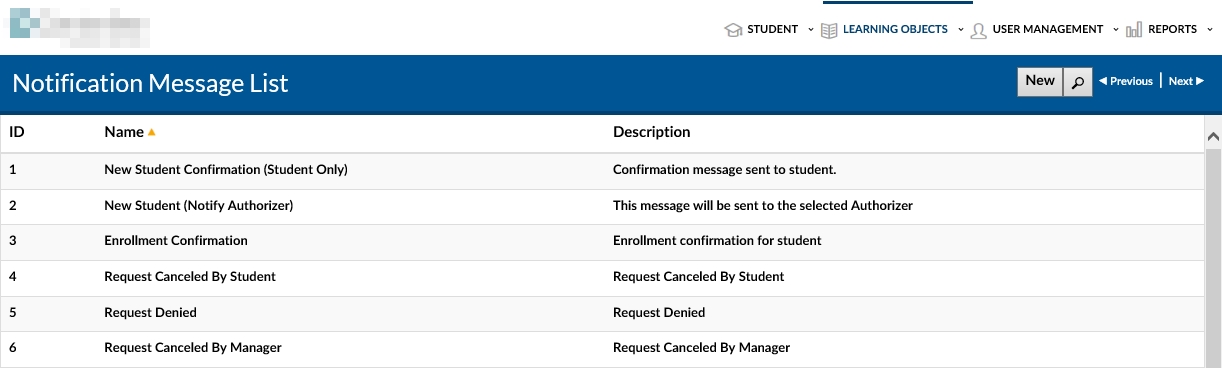
- 3 - This will bring up the Notification Message List screen which displays Notification Messages that have previously been added to the system
- Note: By Default there are thirteen (13) different Notification Message Types, each associated with a specific system Policy and event.
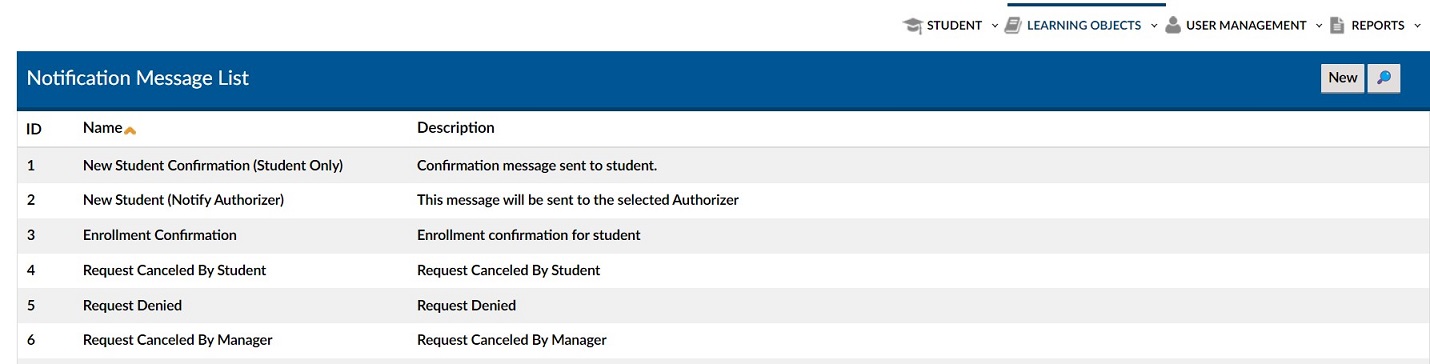
Explanation of Columns: Notification Message List
- ID - LMS System generated ID based on order of creation.
- Name - The name of the Notification Message, usually associated with the action launching the message.
- Description - A description of the Notification Message, usually associated with the action launching the message.
2.2 How to Understand the Notification Messages Details Page Fields
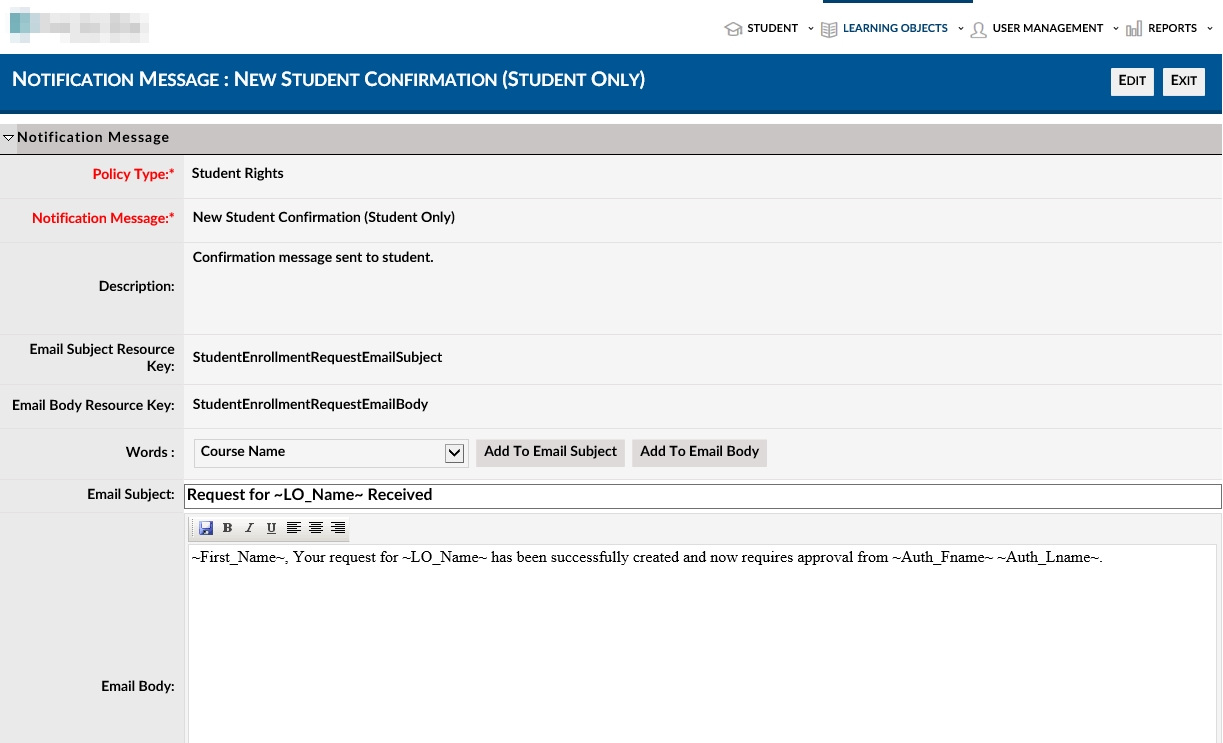
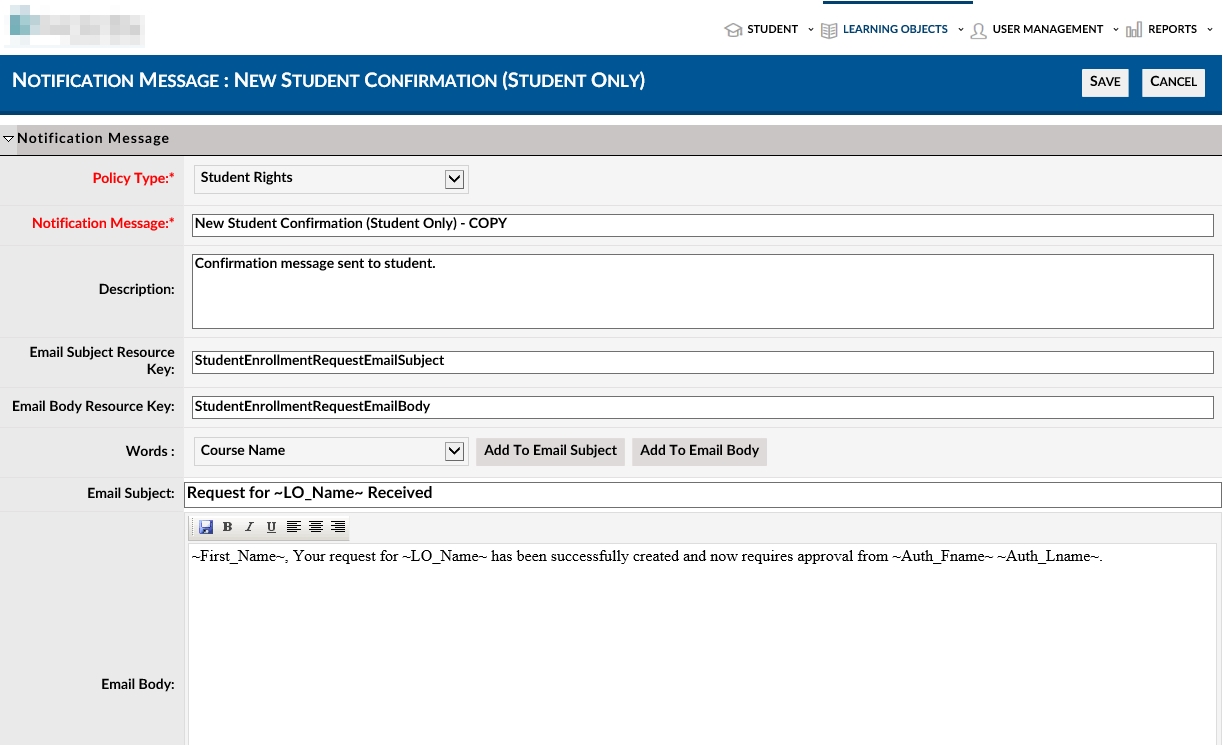
Below are two screenshots. The first one shows a blank Notification Message Details page; the second one shows a completed Notification Message Details page for one of the default messages.
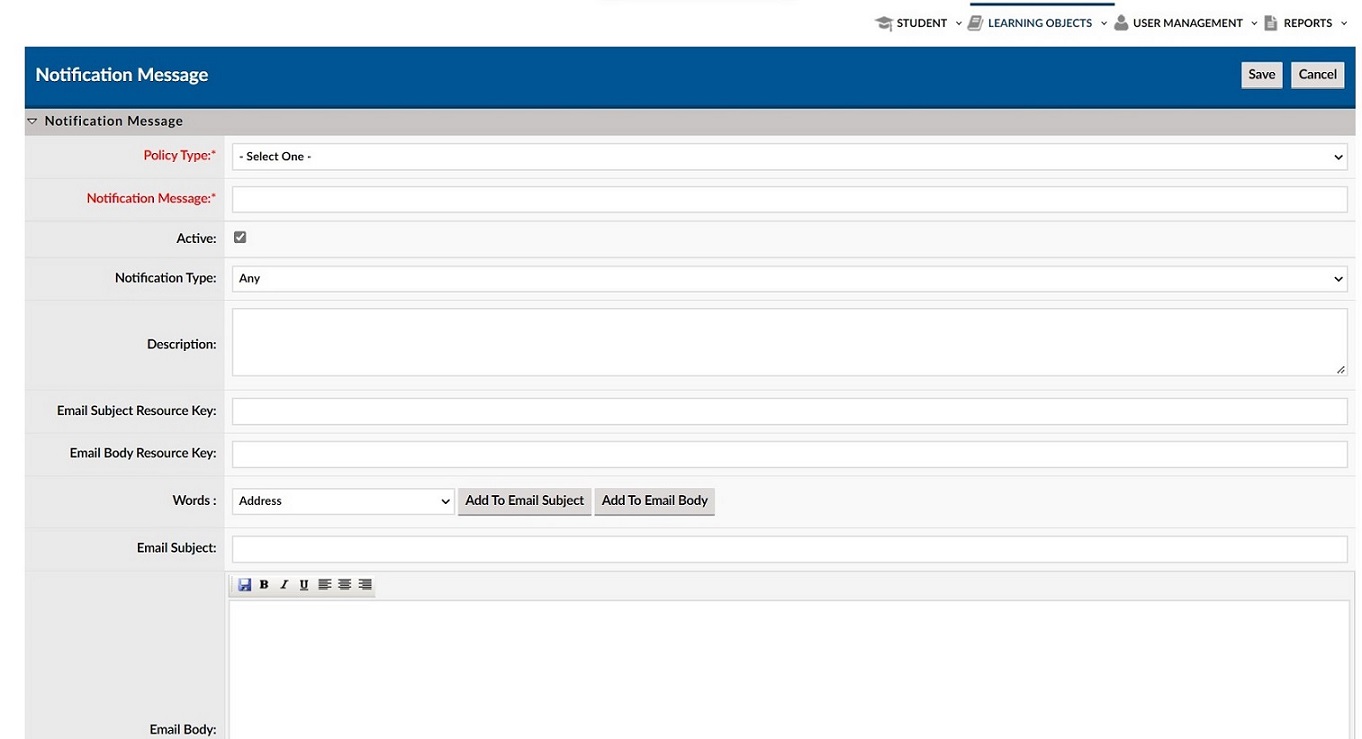

Explanation of Fields: Notification Message Details
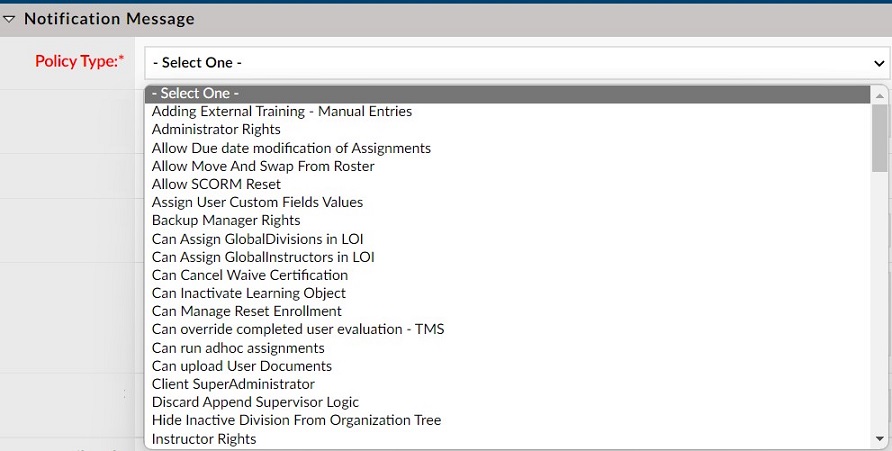
- Policy Type* - Specific System policy to which the message applies, selected from a dropdown selection of prepopulated options.
- Notification Message* - The name of the notification Message. Best Practice, name the message based on the action that will be performed (e.g. New student confirmation)
- Active - A checkbox to indicate if the message is Active (in use) or Inactive.
- Notification Type - Used to indicate if the notification message will be used for a Learning Object (course) or an Assignment.
- Description - More detailed description of the action to be performed by the notification.
- Email Subject Resource Key: - The resource library name for default Email Subject Message.
- Note: If not blank & if no specific message for the event is associated at the course level, then user receives this default, even if the Email Subject & Email Body display a different message. See section 3 – Advanced Concepts for details.
- Email Body Resource Key: - The resource library name for default Email Body Message.
- Note: If not blank & if no specific message for the event is associated at the course level, then user receives this default, even if the Email Subject & Email Body display a different message. See section 3 – Advanced Concepts for details.
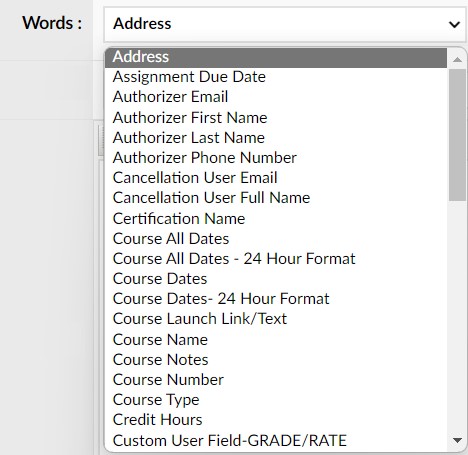
- Words - Allows for selection of variables from a drop-down list that can be inserted into the Email Subject and / or Email body. When the email is generated and sent, these variables will be replaced by actual data. The Words will vary depending on the Notification Type selected.
- NOTE: Only the following variables can be used from the Words dropdown for assignments:
- 1. (~FirstName~)
- 2. (~First_Name~)
- 3. (~LastName~)
- 4. (~Last_Name~)
- 5. (~AssignedLearningObjects~)
- 6. (~AssignedLearningObjectsNoDueDate~)
- 7. (~IntranetLoginPage~)
- 8. (~GLMLoginPage~)
- 9. (~GLM_Website~)
- 10. (~Helpdesk_Number~)
- 11. (~Student_EMail~)
- 12. (~Student_UserName~)
- 13. (~GLM_CompanyName~)
- 14. (~Training_Type~)
- 15. (~Assignment_DueDate~)
- Add to Email Subject button- Will add the variable selected using the Words dropdown box to the Email Subject Line. When sent the variable will be replaced by actual data.
- Add to Email Body button - Will add the variable selected using the Words dropdown box to the Email Body. When sent the variable will be replaced by actual data.
- Email Subject - The subject line of the email to be sent to the recipient (including text and variables that will be replaced by actual data when sent)
- Email Body - The body of the email to be sent to the recipient (including text and variables that will be replaced by actual data when sent)
(*) Required Fields
2.3 How to Override Defaults to Customize System-Wide Notification Messages
The LMS provides a series of system messages that are the default messages for specific system-wide events, for example when enrolling in a course or being enrolled via an assignment. These messages cannot be changed, but they can be overridden in two ways:
- A new feature allows for the replacement of these system-wide messages by customized messages at the individual course level (For further details, see section 2.4).
- The LMS also allows the CSA to remove the connection to the default system messages and create new custom messages that will become the de facto default messages.
For further information on the order (hierarchy) of Notification Messages - see Section 3 - Advanced Concepts.
To override the default system message and substitute a customized default.
- 1 - In the Advanced View, hover over the Learning Object dropdown box and click on the Notification Message feature to bring up the Notification Message List.
- Note: Messages with the ID Numbers 1 – 13 only are the default system-wide messages.
- 2 - Select the specific default system message you wish to override, by clicking in the row of that message. This will bring up the message details for that specific system-wide message .
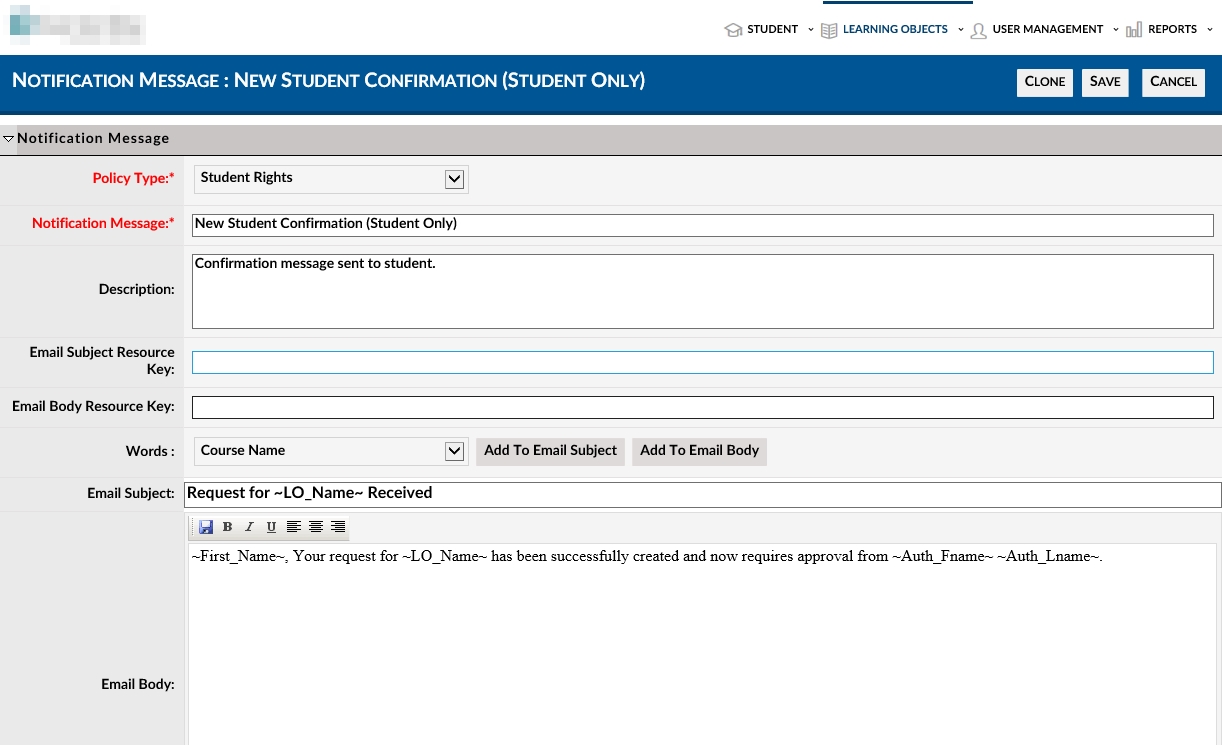
- 3 - Click the Edit button in the upper right hand corner to enter Edit Mode.
- 4 - Remove (clear) the entries in both the Email Subject Resource Key: and Email Body Resource Key: textboxes (if you click within the text, a deletion (X) will appear on the right side of the textbox, click to clear).
- Clearing these fields eliminates the connection to the default system-wide message.
- Note: it will also remove any multilingual support for messaging.
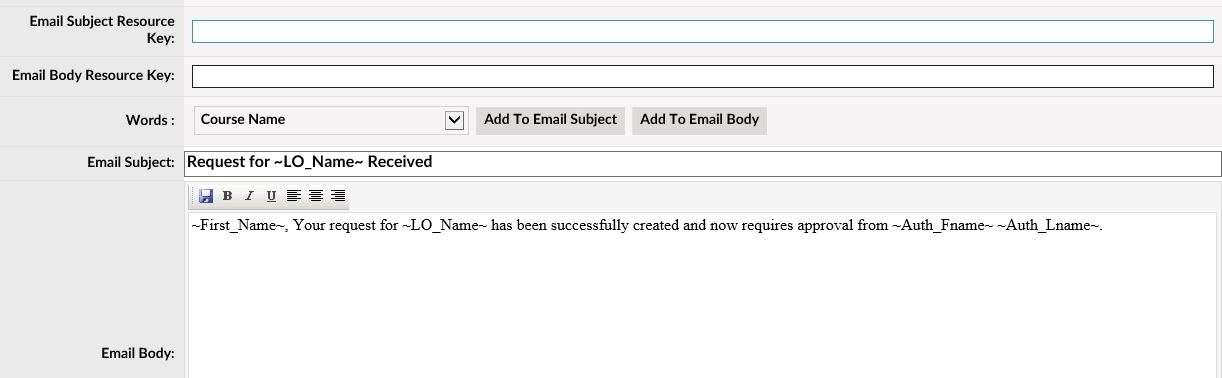
- 5 - Enter text and data into the email subject using a combination of text and selections of variables from the Words dropdown text box (inserted by clicking on Add to Email Subject) as follows:
- For example, if you wish your message to read "Request for [course name] Received"
- Enter the text "Request for " in the Email Subject text box.
- Use the Words dropdown box and select Course Name
- Click the Add to Email Subject button.
- This will insert the text LO_Name~ into the Email Subject text box, just after the "Request for " text you entered in Step i.
- The LO_Name~ is a system variable that is equivalent to the Course Name.
- Enter the text "Received" after the LO_Name~ variable.
- Your message should now read "Request for LO_Name~ Received".
- When this message is sent via email, the variable will be replaced by the actual course name for the course in which the student is enrolling. For example - Email Subject: Request for Excel 101 Received .
- 6 - Enter text and data into the email body using a combination of text and selections of variables from the Words dropdown text box (inserted by clicking on Add to Email Body button).
- 7 - When finished click Save. The Subject and Body you have created will be the new default for that Notification Message.
- NOTE: Only the following variables can be used from the Words dropdown for assignments:
- 1. (~FirstName~)
- 2. (~First_Name~)
- 3. (~LastName~)
- 4. (~Last_Name~)
- 5. (~AssignedLearningObjects~)
- 6. (~AssignedLearningObjectsNoDueDate~)
- 7. (~IntranetLoginPage~)
- 8. (~GLMLoginPage~)
- 9. (~GLM_Website~)
- 10. (~Helpdesk_Number~)
- 11. (~Student_EMail~)
- 12. (~Student_UserName~)
- 13. (~GLM_CompanyName~)
- 14. (~Training_Type~)
- 15. (~Assignment_DueDate~)
2.4 How to Clone Defaults to Create Customized Notification Messages
As noted in prior sections, a new feature in the LMS allows the CSA to create customized messages that can be associated at the individual course level.
While these Notification Messages can be created by using the New Notification Message button when viewing the Notification Message List, it is recommended that creators clone Existing Messages and simply change the underlying email subject and email body sections.
- The reason for this is ensure that the known and correct Policy Types are correctly chosen. By cloning one of the original default system-wide messages (ID numbers 1-13), the correct Policy Type connection will already be established.
To Clone a Default Notification Message and Create a Customized Notification Message:
- 1 - In the Advanced View, hover over the Learning Object dropdown box and click on the Notification Message feature to bring up the Notification Message List.
- 2 - Select the specific default system message you wish to customize for association with specific course, by clicking in the row of that default message (ID Numbers 1-13). This will bring up the message details for that specific system-wide message.

- 3 - Click the Edit button in the upper right hand corner to enter Edit Mode.
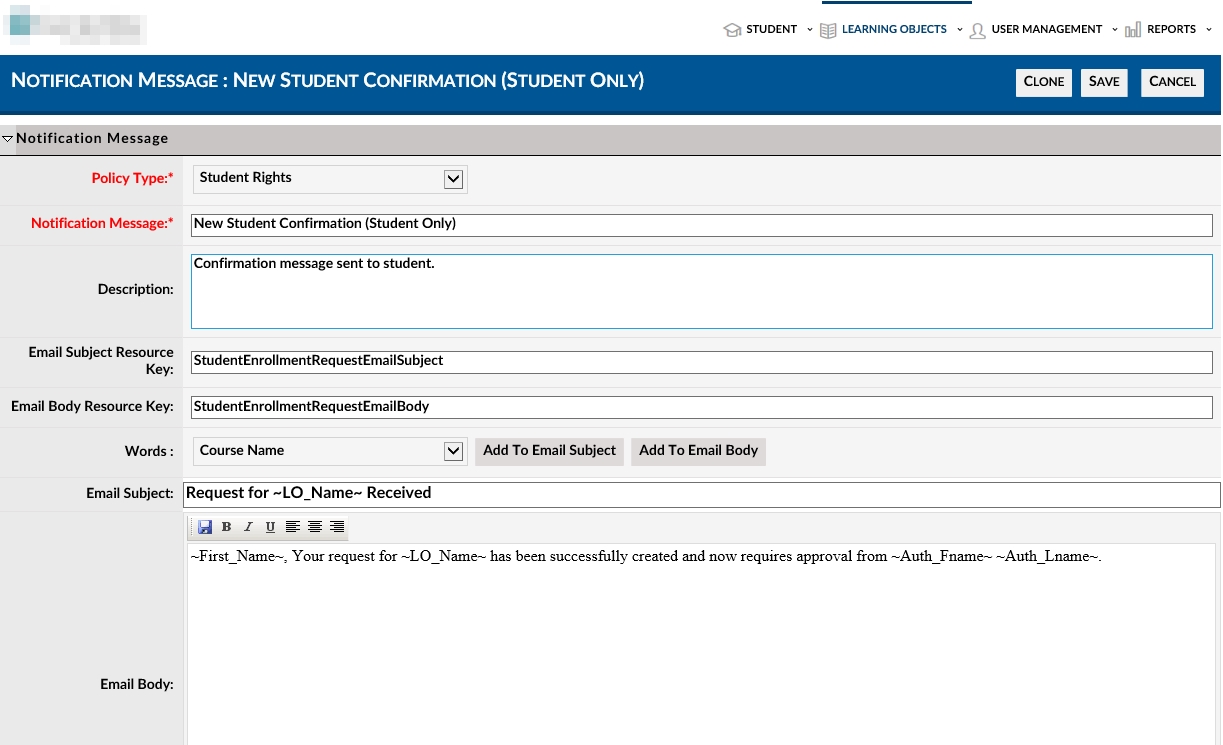
- 4 - Click the CLONE button now available in the upper right hand corner (to the left of the Save and Cancel buttons). This is only available when in Edit mode.
- 5 - A copy of the Notification Message will load also in Edit Mode.
- Note the Term COPY at the end of the Notification Message text box indicating that this is a clone, not the original.
- 6 - Change the Notification Message:** (Name) if desired.
- Best Practice is to use a naming convention which explains the purpose of the message.
- 7 - Remove (clear) the entries in both the Email Subject Resource Key: and Email Body Resource Key: textboxes (if you click within the text, a deletion (X) will appear on the right side of the textbox, click to clear).
- Clearing these fields eliminates the connection to the default system-wide message.
- Note: it will also remove any multilingual support for messaging.


- Enter text and data into the email subject using a combination of text and selections of variables from the Words dropdown text box (inserted by clicking on Add to Email Subject) as follows:
- For example, if you wish your message to read "Request for [course name] Received"
- Enter the text "Request for " in the Email Subject text box.
- Use the Words dropdown box and select Course Name
- Click the Add to Email Subject button.
- This will insert the text LO_Name~ into the Email Subject text box, just after the "equest for " text you entered in Step i.
- The LO_Name~ is a system variable that is equivalent to the Course Name.
- Enter the text "Received" after the LO_Name~ variable.
- Your message should now read "Request for LO_Name~ Received'
- When this message is sent via email, the variable will be replaced by the actual course name for the course in which the student is enrolling. For example - Email Subject: Request for Excel 101 Received .
- Enter text and data into the email body using a combination of text and selections of variables from the Words dropdown text box (inserted by clicking on Add to Email Body button).
- When finished click Save. (To associate this message with a Learning Object / Course, see section 2.5)
- NOTE: Only the following variables can be used from the Words dropdown for assignments:
- 1. (~FirstName~)
- 2. (~First_Name~)
- 3. (~LastName~)
- 4. (~Last_Name~)
- 5. (~AssignedLearningObjects~)
- 6. (~AssignedLearningObjectsNoDueDate~)
- 7. (~IntranetLoginPage~)
- 8. (~GLMLoginPage~)
- 9. (~GLM_Website~)
- 10. (~Helpdesk_Number~)
- 11. (~Student_EMail~)
- 12. (~Student_UserName~)
- 13. (~GLM_CompanyName~)
- 14. (~Training_Type~)
- 15. (~Assignment_DueDate~)
2.5 How to Add Customized Messages to Individual Learning Objects / Courses
As noted in prior sections, a new feature in the LMS allows the CSA to create customized messages that can be associated at the individual course level.
First, create the customized message as detailed in section 2.4.
Next, follow the steps below to associate that customized message to an individual Learning Object / Course.
'This document will assume Administrators already know how to navigate, create and edit Learning Object (Courses) and Course Instances. If not, see separate Courses - How to Guide.
Whether adding a new course or editing an existing course:
- Access the Learning Object (Courses) Details page of the specific course to which you wish to add a Notification Message.
- Navigate to the Available Notification Messages section which is near the bottom of the page (Just above the Internal Information Section)
- Note - If using an existing, saved Learning Object / Course, this section is immediately accessible. If creating a new Learning Object / Course, you must first Save the Learning Object to make this section visible.

- Click the New Notification Message button. This will bring up the Add Notification Message screen in a popup window.

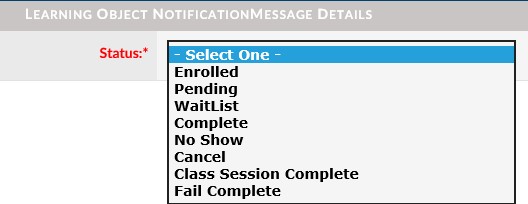
- Use the Status dropdown box to select the even that will trigger the notice.
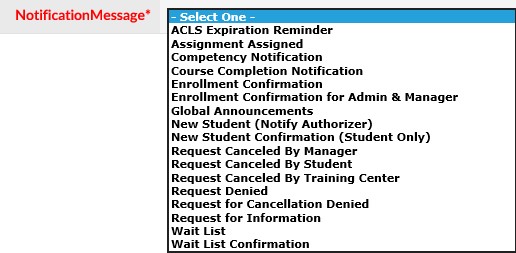
- Use the Notification Message dropdown box to select from all the saved Notification Messages.
6a. If wishing to add more custom Notification Messages to this course, click Save and New (and repeat steps 4-5).
6b. If done adding custom Notification Messages to this course, click Save. This will save the association between the Notification Message, triggering event and the Learning Object / course and return you to the Course Details page where the selected Notification Message will appear in the Available Notification Messages section.

Section 3: Notification Message - Advanced Concepts
3.1 How to Understand the Messaging Hierarchy
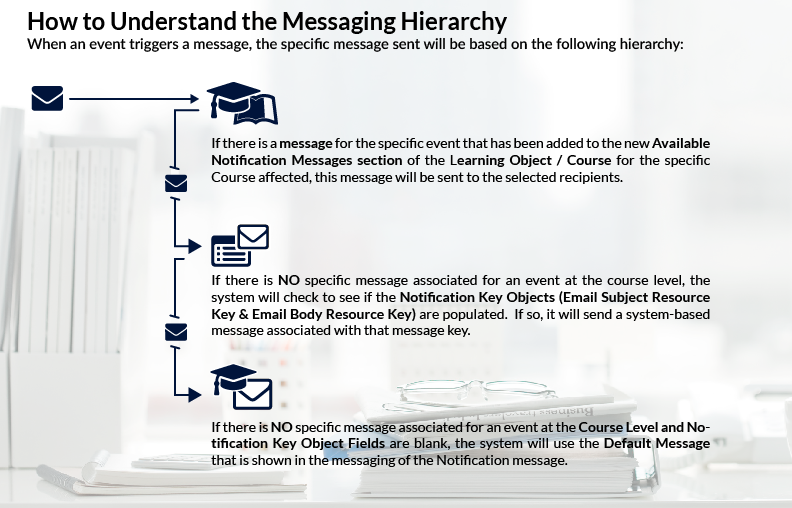
When an event triggers a message, the specific message sent will be based on the following hierarchy:
- If there is a message for the specific event that has been added to the new Available Notification Messages section of the Learning Object / Course for the specific Course affected, this message will be sent to the selected recipients.

- If there is NO specific message associated for an event at the course level, the system will check to see if the Notification Key Objects (Email Subject Resource Key: & Email Body Resource Key:) are populated. If so, it will send a system-based message associated with that message key.

Screenshot 21
Please Note the following:
:# These system messages are NOT accessible or editable by the Admin. :# These may or may not equate with the message shown in the specific Header and Body sections of the chosen message. :# These system messages will adjust to the language setting of the particular user (if that language library is available).
- If there is NO specific message associated for an event at the course level and Notification Key Object Fields are blank, the system will use the default message that is shown in the messaging of the Notification message
''''