DIGITAL DOCUMENTS (ATTACHMENTS) - HOW-TO-GUIDE
Digital Documents (Attachments) - How-to Guide
How to Add Digital Documents to Courses
To Add a Digital Document to a (Learning Object) Course…
1. Navigate to the Learning Object Details page of the Desired Course, Advanced View > Learning Objects > Courses (select a Course from the Course List).
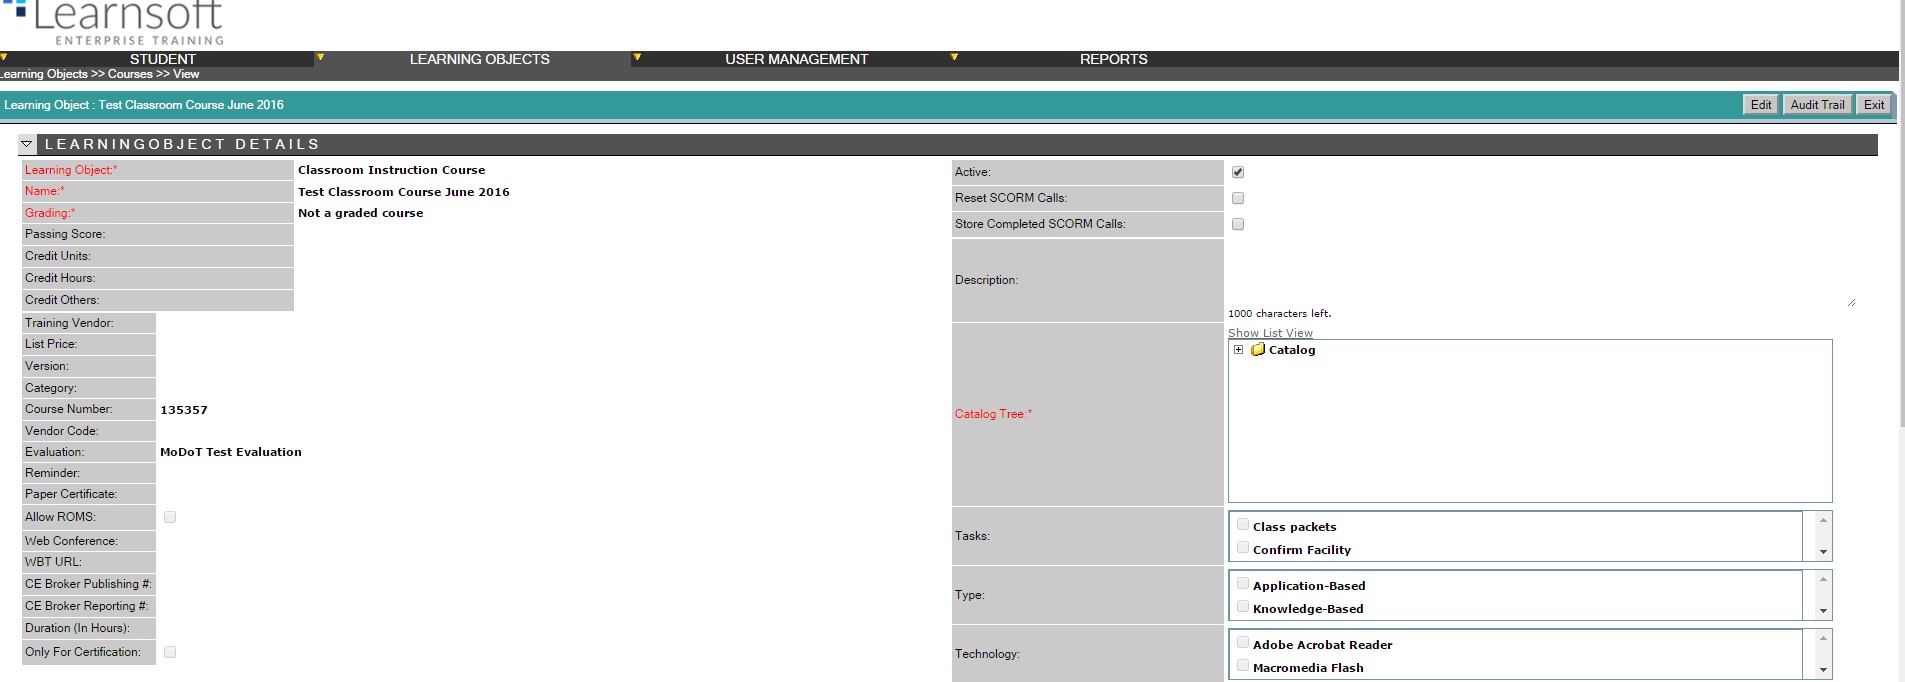
2. Scroll to the lower portion of the screen to access the Attachment Section of the Learning Object Details page.
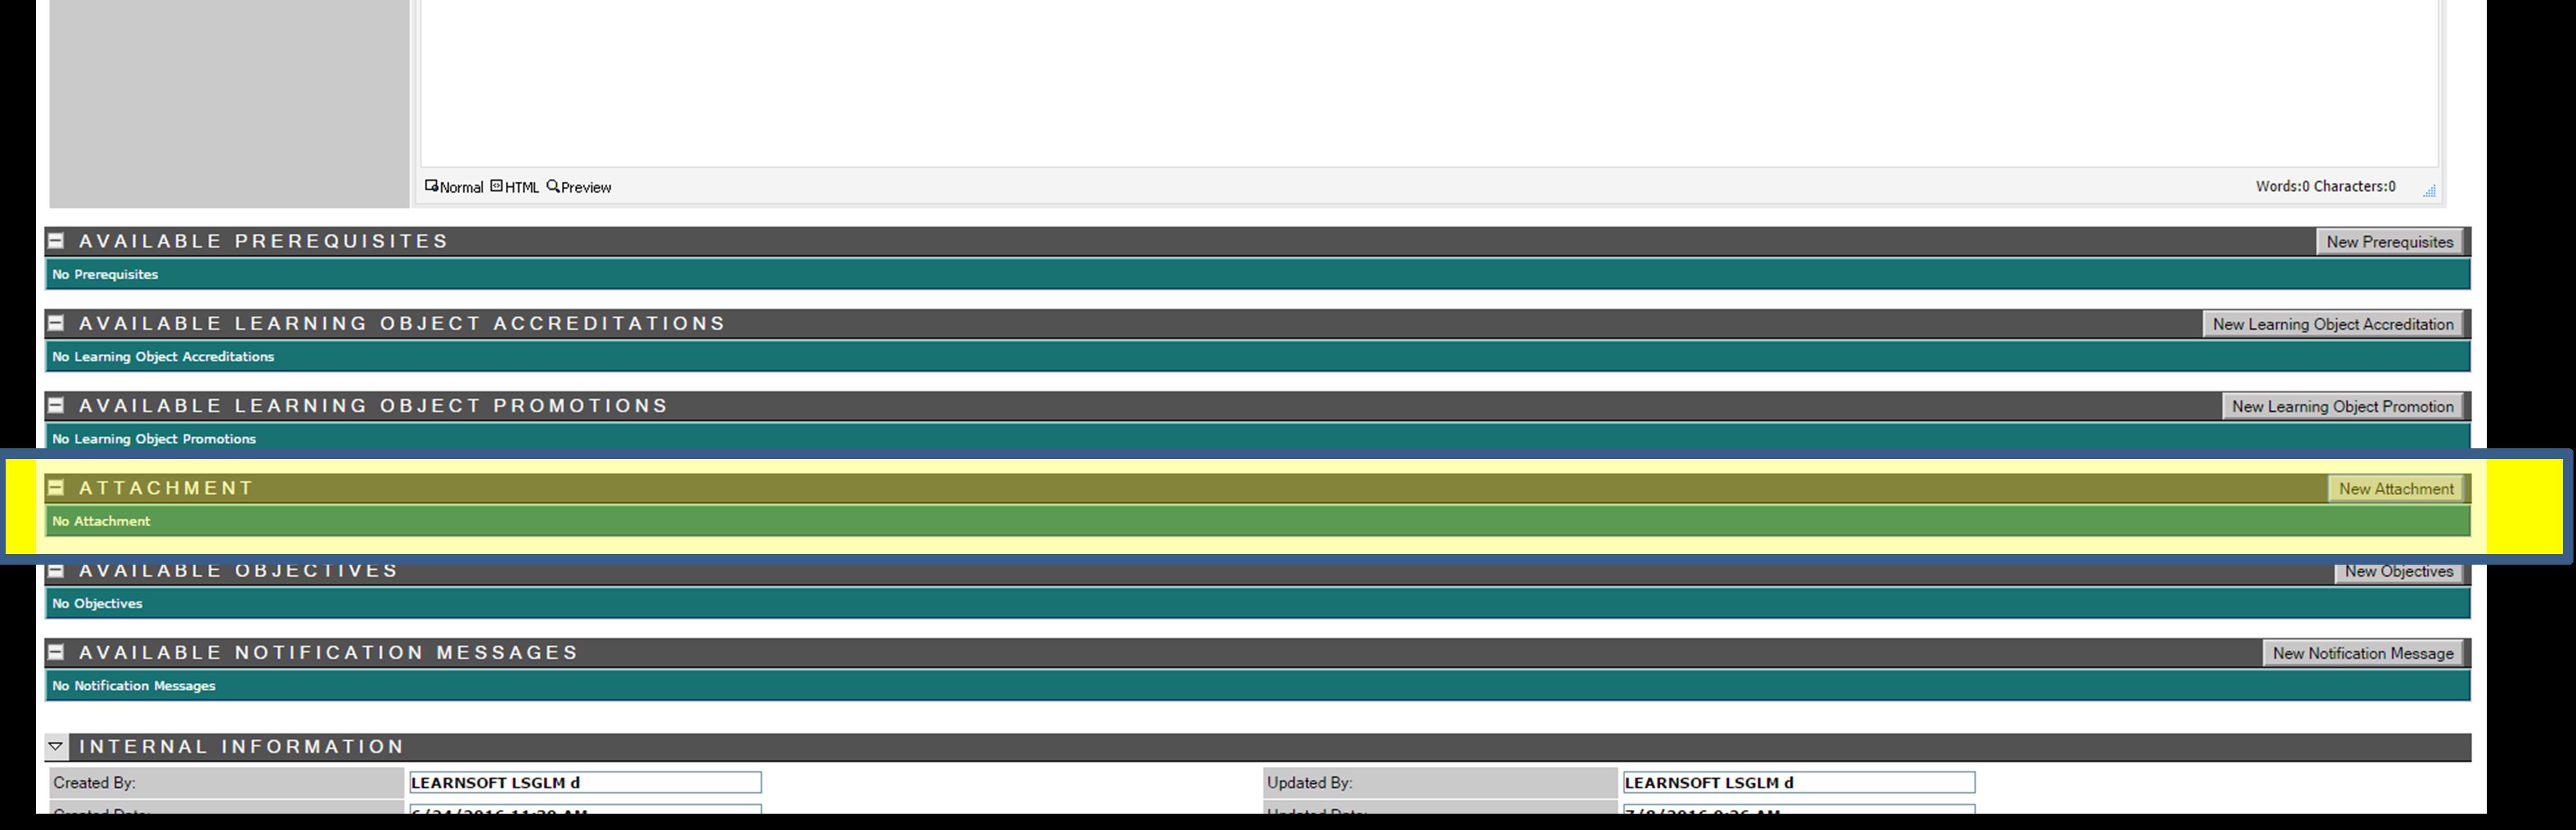
3. Click the New Attachment button. This will bring up the Add Attachment pop-up screen.
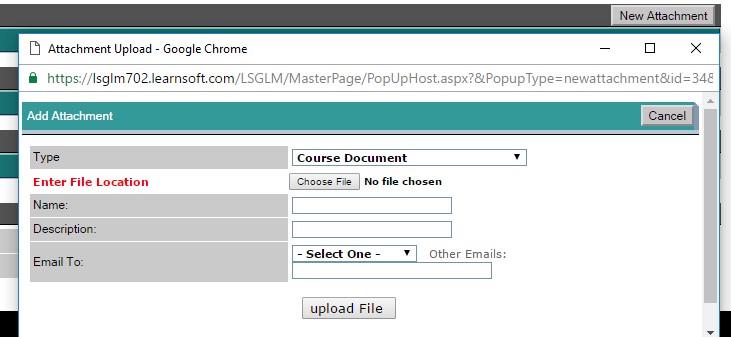
4. Select the attachment Type from the dropdown menu.
a. Course Document, Others, Primary Image or User Document

5. Click the Choose File button to launch the Windows menu system by which to choose the digital document to add.
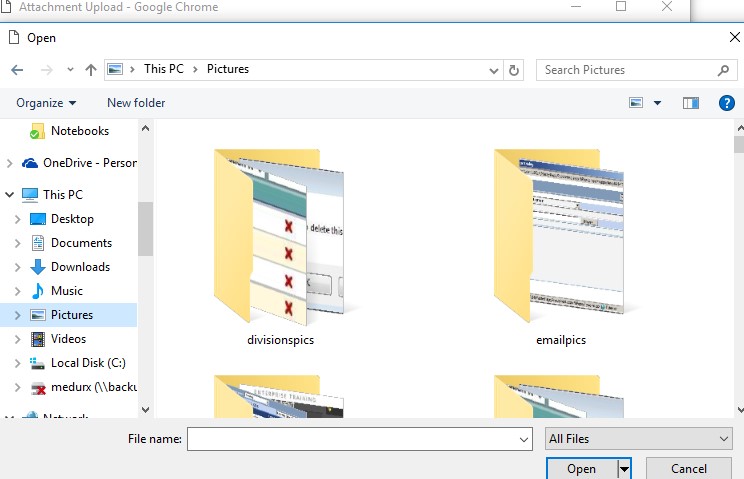
6. Select the desired Digital Document file & click Open to select the file and return to the Add Attachment pop-up screen.
7. Enter Name and Description in the respective fields.
8. Click the Upload File button to add the document to the Course Object.
a. The pop-up screen will close and the object will be added to the Attachment Section.

9. If wishing to edit, click the pencil icon to the right (Note: Name and Description info can be edited. If replacing documents, first click the red X to delete and then add a new document).
How to Access Digital Documents Attached to Courses
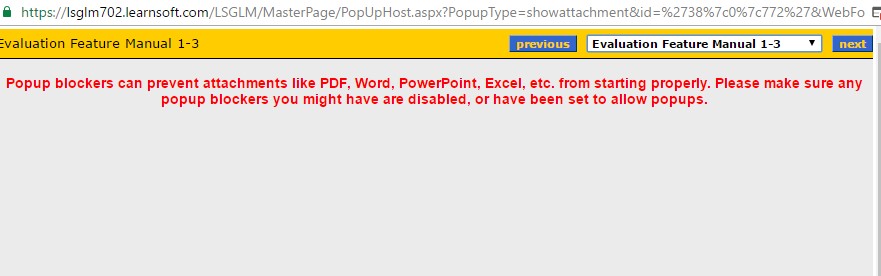
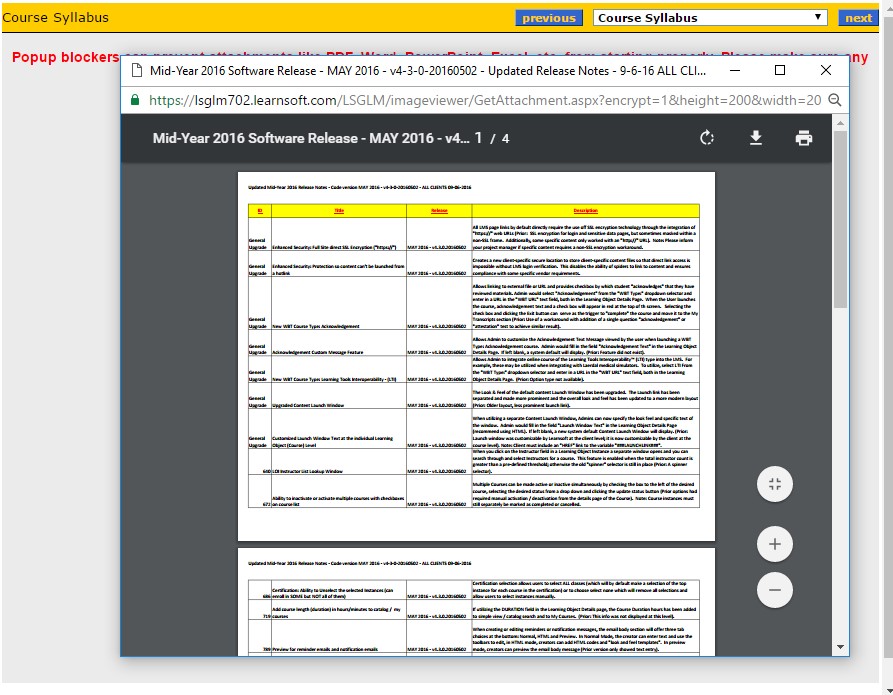
Note: Pop-up blockers must be disabled to access digital documents.To Access a Digital Document attached to a (Learning Object) Course in which you are enrolled…
1. Login to the LMS system, navigate to the MyCourses Tab and find the specific course.
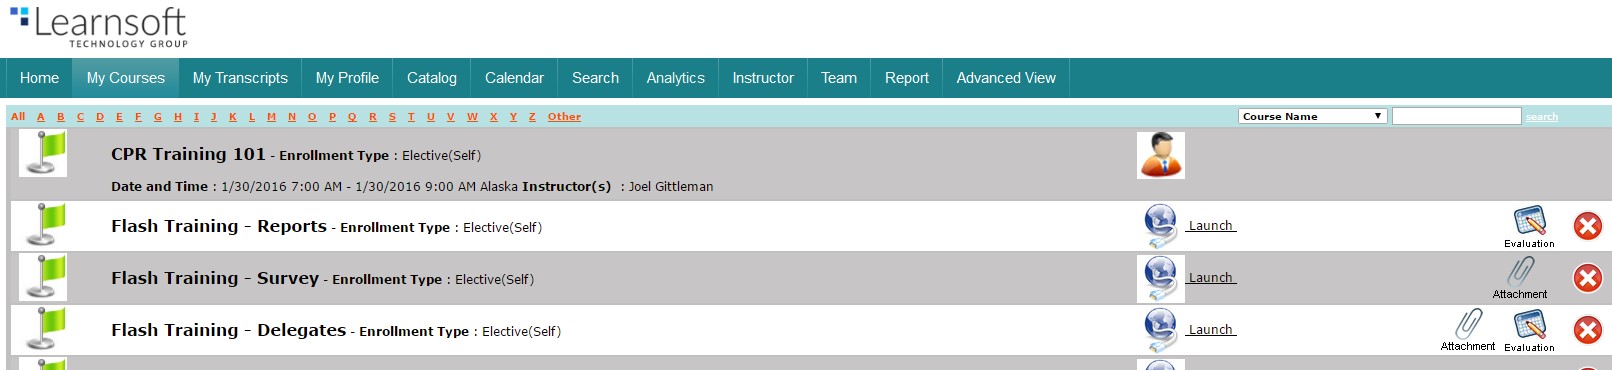
2. Click on the Attachment link (text or paperclip icon) to the right of the course.

3. A new window will pop-up. It will contain a dropdown listing allowing for selection if there are multiple attachments.
4. The initial Digital Document (attachment) should also auto-load in the front-most screen.
a. If not loading, disable pop-up blocker.
5. Use the dropdown menu or navigation buttons to select and load additional documents (if any)